Hole 7 at Hazeltine National Golf Club
- Par
- 5
- Yardage
- 572 yds
- Stroke index
- 0
- Hazards
- 4 bunkers · Water
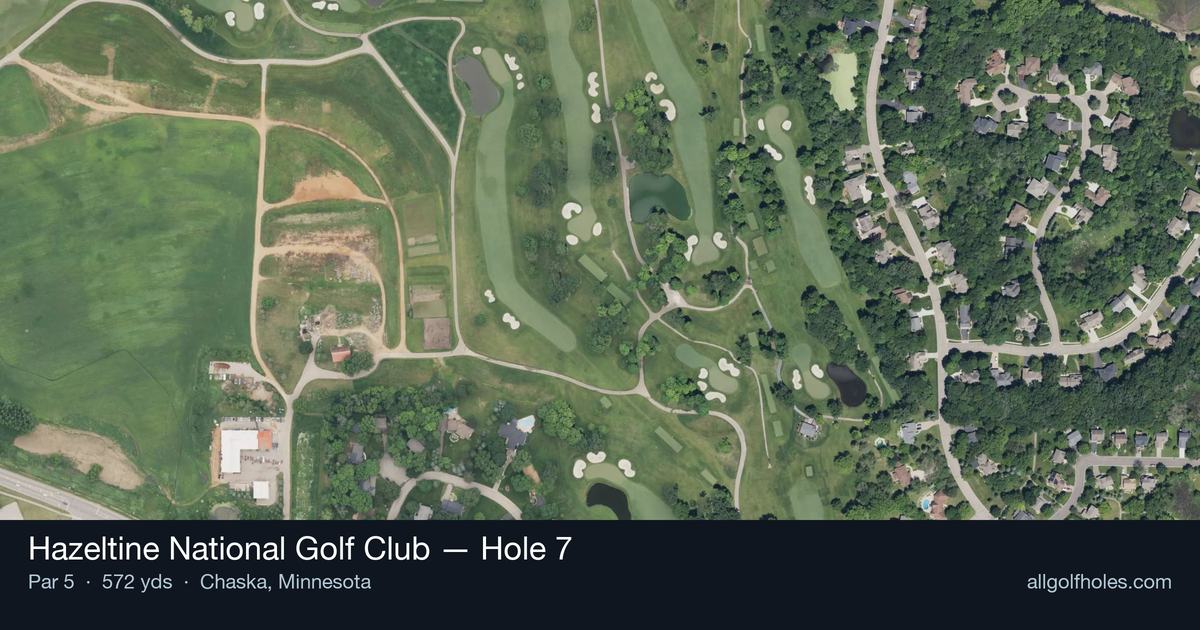
Aerial source not provided
Green size: 42 yds deep × 22 yds wide
Scorecard yardage is for Championship tees. The aerial shows its labeled reference position; distance rings measure to the green.
Championship tees · Par 5 · 572 yards
The plan for No. 7
Known as Hazeltine's signature hole, the 7th is a stunning par 5 that curves along the pristine shoreline of Hazeltine Lake. This picturesque hole gained international recognition during the 2016 Ryder Cup and features the iconic Payne Stewart Bridge, creating one of golf's most memorable and challenging lakeside encounters.
Off the tee
The opening shot sets the tone for the entire hole, requiring a carry over Hazeltine Lake with the optimal target line demanding a slight fade. Position yourself to favor the left side of the tee box to create the best angle for this demanding drive. The key is committing fully to the shot - any hesitation or steering will likely result in finding the water. Club selection should prioritize accuracy over pure distance, as the landing zone offers adequate room for those who execute properly. Focus on your pre-shot routine and trust your swing, as doubt creeps in quickly on this intimidating tee shot. The visual of the lake can be overwhelming, so pick a specific target beyond the water and commit to your normal swing tempo.
Approach & recovery
After successfully navigating the opening water carry, the approach strategy varies significantly based on your tee shot position and pin location. The small green demands precision, and hole locations along the right edge bring the lake back into play, creating constant tension throughout the approach sequence. For your second shot, assess whether going for the green in two is the percentage play. The straight layout provides good visibility, but the small target and potential water hazard make this a critical decision point. If laying up, position yourself for the best angle to the pin, typically favoring the left side of the fairway to open up the green. When the pin is tucked right near the water, even approach shots from ideal positions require careful club selection and precise execution. Aim for the center of the green rather than chasing difficult pin positions, as the small putting surface makes recovery shots extremely challenging.
On the green
The compact green at the 7th demands accurate approach shots, as there's little room for error once you reach the putting surface. Given the hole's lakefront setting and the pressure it creates, many golfers are simply relieved to find the green in regulation. Focus on lag putting to ensure you avoid three-putts, especially when pin positions are near the water's edge. The green's small size means most putts will be relatively short, but the pressure of the setting can affect your normal putting rhythm. Take extra time to read breaks carefully, as the dramatic surroundings can be distracting.
Watch for
- Water along the hole
- Greenside bunker (greenside)
Hole 7 Green Complex
Mapped green boundary
Green size: 6,271 sq ft
How did Hole 7 play?
How did this hole play today?
Frequently asked questions
Yardage reference: Championship tees · 572 yards.
Can this par 5 be reached in two?
↓
At 572 yards, A true three-shot hole for most players. Position your layup to leave a comfortable wedge distance.
How difficult is hole 7?
↓
This hole is one of the tougher holes on the course for most golfers. Key challenges include: long par 5, water in play, heavily bunkered.
What hazards should I watch out for on hole 7?
↓
Key hazards include: 4 greenside bunkers; water at 496.6 yards. Plan your shots to avoid these trouble spots.
How big is the green on hole 7?
↓
The green is fairly large with multiple pin positions. Lag putting becomes important on longer putts.
What's a good score on hole 7?
↓
This hole is a true three-shot hole where birdie requires execution. This longer par 5 demands patience. Two good shots set up the scoring opportunity.