Hole 1 at Hazeltine National Golf Club
- Par
- 4
- Yardage
- 490 yds
- Stroke index
- 0
- Hazards
- 6 bunkers
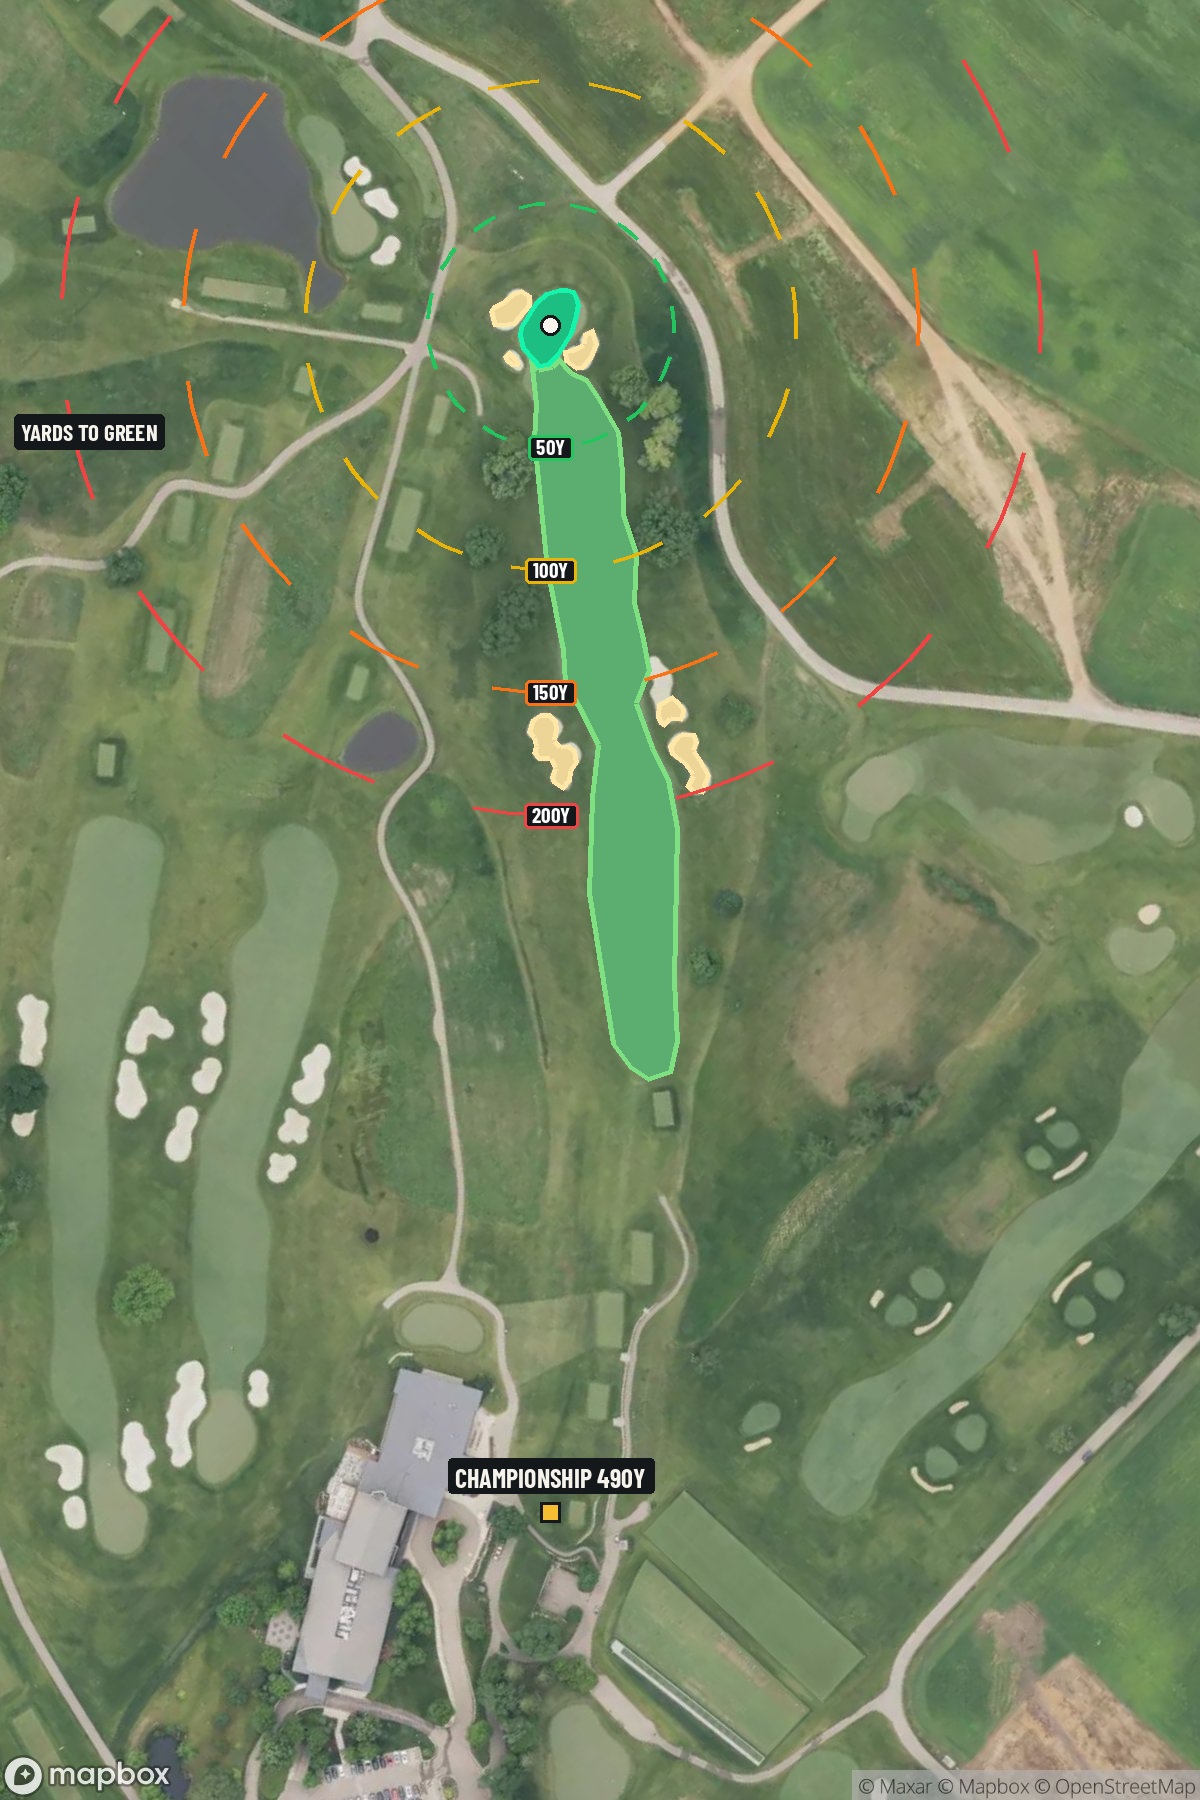 Hole 1 map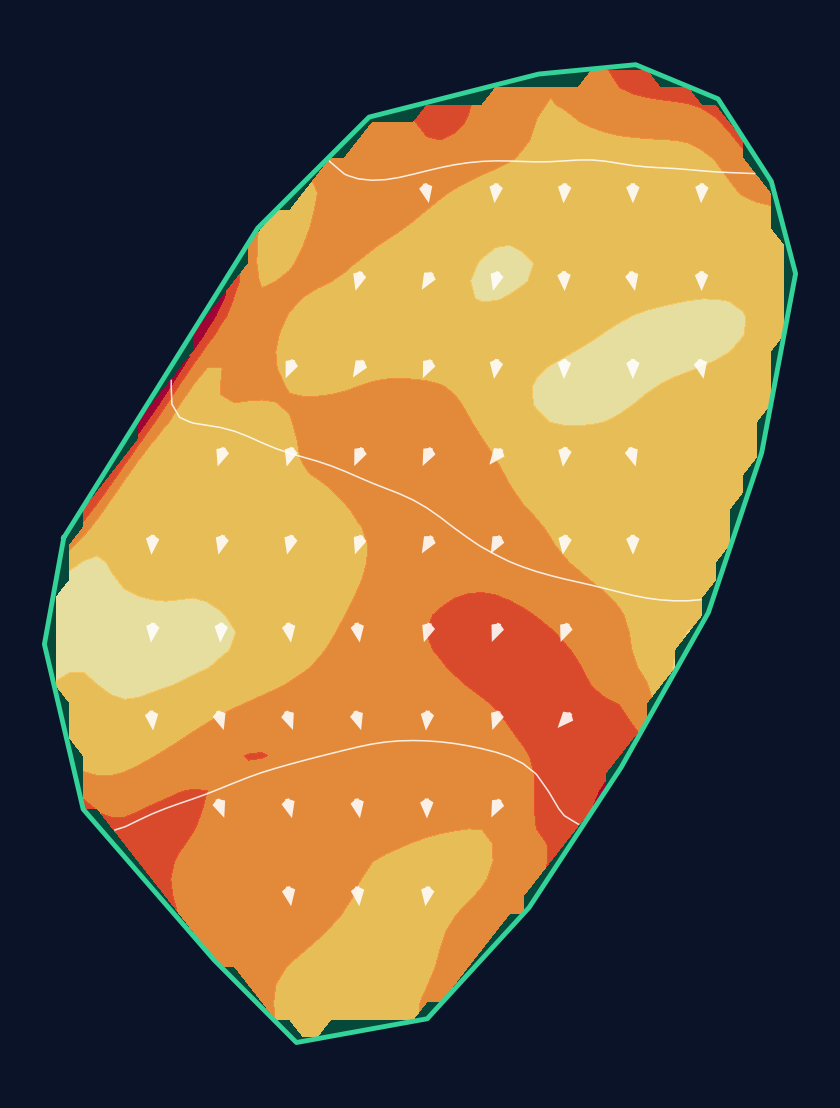
25 yd wide × 33 yd deep · 3.4 ft total elevation range
Light = gentler slope · Red = steeper slope
White lines: 1 foot of elevation. Arrows: downhill. General terrain, not a pin read.
Approach from bottom
Contour source
USGS 1 Meter 15 x45y497 MN_CentralMissRiver_B22 · collection 2022–2023
Map source & reference
Mapbox Satellite composite · capture date not provided. Green at the top; the labeled map reference is below.
Scorecard yardage is for Championship tees. The aerial shows its labeled reference position; distance rings measure to the green.
Championship tees · Par 4 · 490 yards
The plan for No. 1
Hazeltine's opening hole sets an immediate championship tone, featuring the iconic Payne Stewart Bridge that adds both beauty and strategic complexity to this signature par-4. With water lurking along the right edge and multiple bunkers guarding the approach, this demanding starter has tested the world's best players during major championships like the 2016 Ryder Cup.
Off the tee
Your tee shot strategy should prioritize finding the fairway over maximum distance. The three fairway bunkers are strategically positioned to catch aggressive drives, so focus on a smooth, controlled swing with your driver or 3-wood. Aim for the left-center of the fairway to avoid the water hazard that runs along the right side - this conservative target line still leaves you in excellent position for your approach. The slight downhill nature of the hole will add roll to your drive, so don't feel pressured to swing out of your shoes. A well-struck drive of about 260-280 yards will set up an ideal approach angle.
Approach & recovery
Your approach shot is where this hole can make or break your round. The green complex slopes dramatically from back right to front left, with a narrow opening in the front left providing the best entry point. Avoid pin positions along the right edge at all costs - these bring the water directly into play and create extremely challenging recovery shots. When the pin is right, aim for the center or left side of the green and take your two-putt par. A mid-iron to long-iron will typically be required, depending on your tee shot and conditions. The three greenside bunkers guard different quadrants, so club selection should account for carrying these hazards while still controlling distance on the small target.
On the green
The green's slope from back right to front left dominates all putting decisions. Putts from above the hole require extreme caution, as the slope can quickly turn a makeable birdie putt into a three-putt bogey. When putting uphill, be aggressive - these putts will hold their line better and won't run past as severely. Pay special attention to pin positions on the right side, which create the most challenging putting angles due to the slope and proximity to the water hazard.
Watch for
- Fairway bunker crossing the landing zone
- Greenside bunker (greenside)
Hole 1 Green Complex & Slope
USGS 3DEP terrain analysis
Green size: 4,787 sq ft
How did Hole 1 play?
How did this hole play today?
Frequently asked questions
Yardage reference: Championship tees · 490 yards.
What's the best strategy off the tee?
↓
For this 490-yard par 4, most players will hit driver to set up a comfortable approach.
How difficult is hole 1?
↓
This hole is a moderate challenge for most golfers. Key challenges include: long par 4, heavily bunkered.
How big is the green on hole 1?
↓
The green is medium-sized with moderate targets. Pay attention to pin placement when selecting your approach club.
What's a good score on hole 1?
↓
This hole is one of the tougher holes where par feels like birdie. A challenging par 4. Accept that bogey happens and avoid big numbers.