Hole 4 at Hazeltine National Golf Club
- Par
- 3
- Yardage
- 210 yds
- Stroke index
- 0
- Hazards
- 4 bunkers
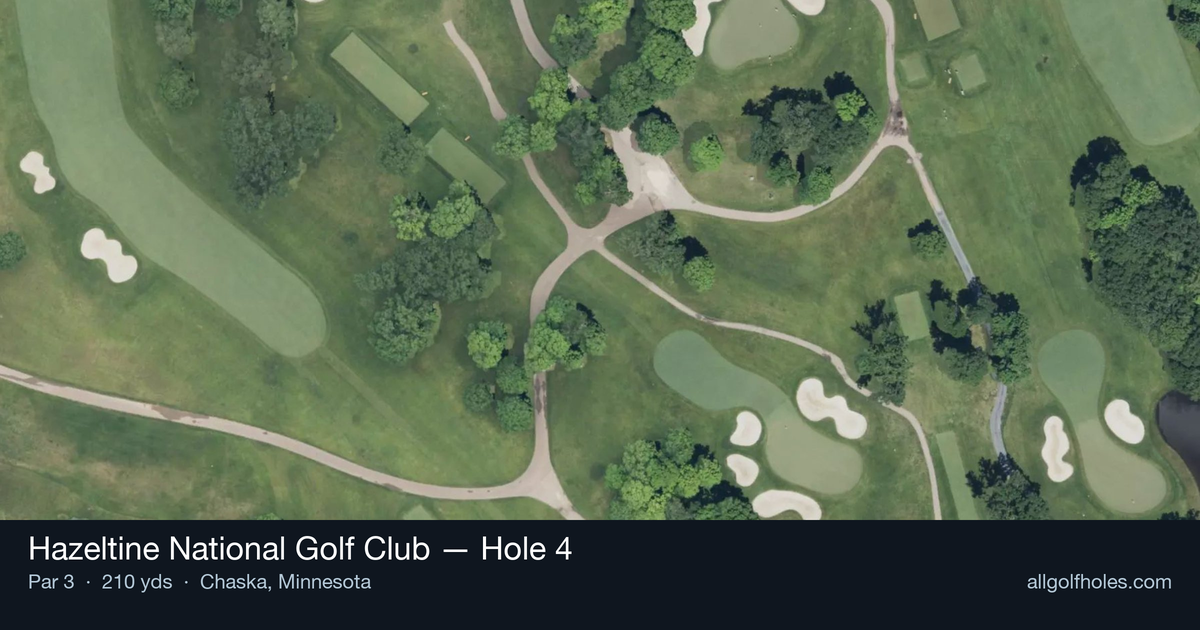
Aerial source not provided
Green size: 35 yds deep × 26 yds wide
Scorecard yardage is for Championship tees. The aerial shows its labeled reference position; distance rings measure to the green.
Championship tees · Par 3 · 210 yards
The plan for No. 4
This demanding par 3 at Hazeltine National showcases the course's championship pedigree with a challenging carry over water to a well-guarded green. The hole exemplifies the strategic design philosophy that has made Hazeltine a favorite venue for major championships and international competitions.
Off the tee
Club selection is absolutely critical here - take one more club than you think you need and swing with controlled aggression. Most golfers will be looking at a long iron or hybrid, depending on conditions and personal carry distances. Aim for the center of the green regardless of pin position, as the small target leaves little margin for error. Focus on a smooth, balanced swing rather than trying to muscle the shot. The straight layout eliminates any strategic angles, making this purely about execution. Take your time on the tee, visualize the ball flight, and commit fully to your chosen club and target line.
Approach & recovery
Since this is a par 3, your tee shot IS your approach shot. The key is accepting that center-green is always the correct play here. Even if the pin is tucked in a corner, the small green size means any shot on the putting surface gives you a reasonable birdie chance. Pay attention to wind conditions, as they can significantly affect club selection on this longer par 3. A headwind might require moving up to a fairway wood or driver, while a helping breeze could bring a mid-iron into play.
On the green
With a small green, most putts will be makeable once you find the surface. Focus on speed control rather than trying to be overly aggressive with line. The putting surface likely has subtle breaks that become more pronounced on longer putts, so take time to read the green carefully. Two-putting should always be the goal here - making par on this challenging hole is a victory that keeps momentum on your side for the remaining holes.
Watch for
- Greenside bunker (greenside)
Hole 4 Green Complex
Mapped green boundary
Green size: 5,517 sq ft
How did Hole 4 play?
How did this hole play today?
Frequently asked questions
Yardage reference: Championship tees · 210 yards.
What club should I use on this par 3?
↓
At 210 yards, most golfers will need a fairway wood or hybrid to reach this green. Adjust for elevation, wind, and pin position.
How difficult is hole 4?
↓
This hole is a moderate challenge for most golfers. Key challenges include: long par 3, heavily bunkered.
What hazards should I watch out for on hole 4?
↓
Key hazards include: 4 greenside bunkers. Plan your shots to avoid these trouble spots.
How big is the green on hole 4?
↓
The green is medium-sized with moderate targets. The green is wider than it is deep, rewarding shots that find the correct tier. Pay attention to pin placement when selecting your approach club.
What's a good score on hole 4?
↓
This hole is a challenging par where bogey is acceptable. This longer par 3 will test your long iron or hybrid game. Par is a good score.