Hole 3 at Hazeltine National Golf Club
- Par
- 5
- Yardage
- 633 yds
- Stroke index
- 0
- Hazards
- 7 bunkers
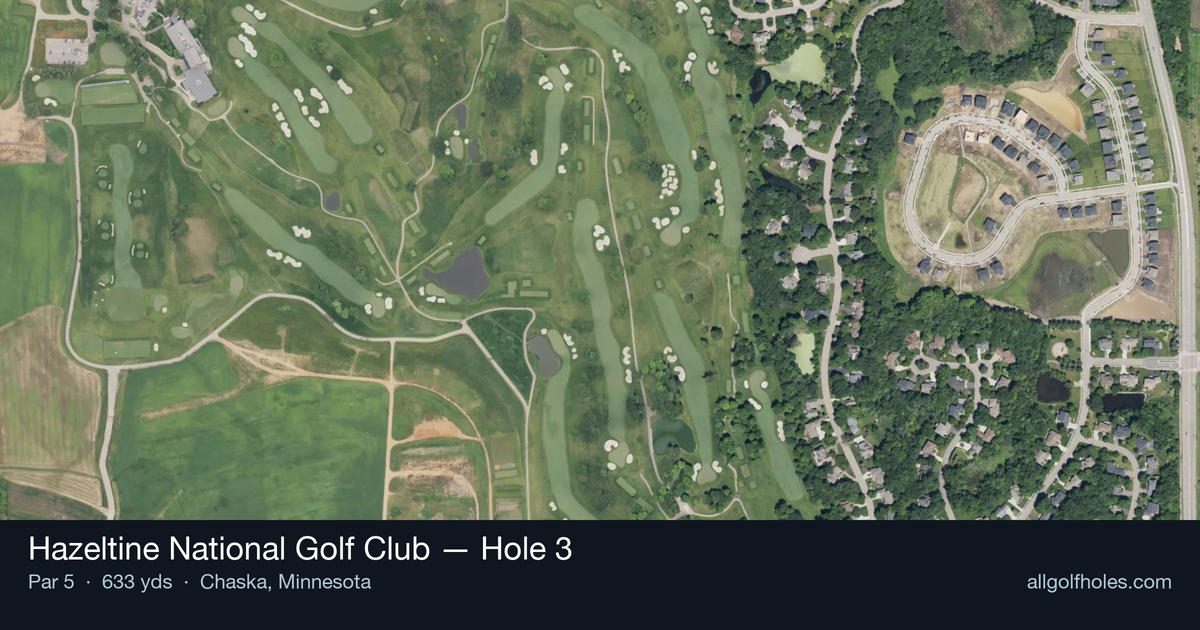
Aerial source not provided
Green size: 36 yds deep × 34 yds wide
Scorecard yardage is for Championship tees. The aerial shows its labeled reference position; distance rings measure to the green.
Championship tees · Par 5 · 633 yards
The plan for No. 3
Hazeltine's 3rd hole stands as one of the most demanding tests on this championship layout, embodying the course's reputation for requiring precise approach shots and strategic thinking. This lengthy par 5 challenges players with its unforgiving design that has tested the world's best golfers in major championships.
Off the tee
The tee shot sets up everything on this hole. With no significant hazards threatening, focus on maximizing distance while maintaining control. Driver is the obvious choice for most players, as every yard gained here makes the subsequent shots more manageable. Aim for the center of the fairway to ensure the best possible lie for your second shot. The straight layout means you can be aggressive off the tee, but don't sacrifice accuracy for an extra 10-15 yards – position is crucial for tackling the remaining distance effectively.
Approach & recovery
Your strategy for the approach depends entirely on your tee shot success. Longer hitters may have a chance to reach in two, but the small green makes this a high-risk proposition that requires perfect execution. Most players should focus on positioning their second shot in the ideal wedge range – typically leaving 100-120 yards for the third shot. This conservative approach allows for a controlled, high-trajectory shot into the small green with maximum spin and stopping power. When hitting your approach into the green, favor the center of the putting surface and avoid getting too aggressive with pin hunting on this compact target.
On the green
The small green demands respect and precision. Hazeltine's putting surfaces are known for their subtle breaks and challenging slopes, so take extra time reading your putts. With limited real estate, distance control becomes paramount – a putt that's slightly too firm can easily roll off the back edge. Focus on getting your first putt close rather than being overly aggressive, as two-putting from anywhere on this green should be considered a success.
Watch for
- Fairway bunker crossing the landing zone
- Greenside bunker (greenside)
Hole 3 Green Complex
Mapped green boundary
Green size: 6,459 sq ft
How did Hole 3 play?
How did this hole play today?
Frequently asked questions
Yardage reference: Championship tees · 633 yards.
Can this par 5 be reached in two?
↓
At 633 yards, A true three-shot hole for most players. Position your layup to leave a comfortable wedge distance.
How difficult is hole 3?
↓
This hole is a moderate challenge for most golfers. Key challenges include: long par 5, heavily bunkered.
How big is the green on hole 3?
↓
The green is fairly large with multiple pin positions. Lag putting becomes important on longer putts.
What's a good score on hole 3?
↓
This hole is a true three-shot hole where birdie requires execution. This longer par 5 demands patience. Two good shots set up the scoring opportunity.