Hole 2 at Forest Dunes Golf Club
- Par
- 4
- Yardage
- 451 yds
- Stroke index
- 5
- Hazards
- 4 bunkers
Aerial source not provided
Green size: 40 yds deep × 39 yds wide
Scorecard yardage is for Championship tees. The aerial shows its labeled reference position; distance rings measure to the green.
Championship tees · Par 4 · 451 yards
The plan for No. 2
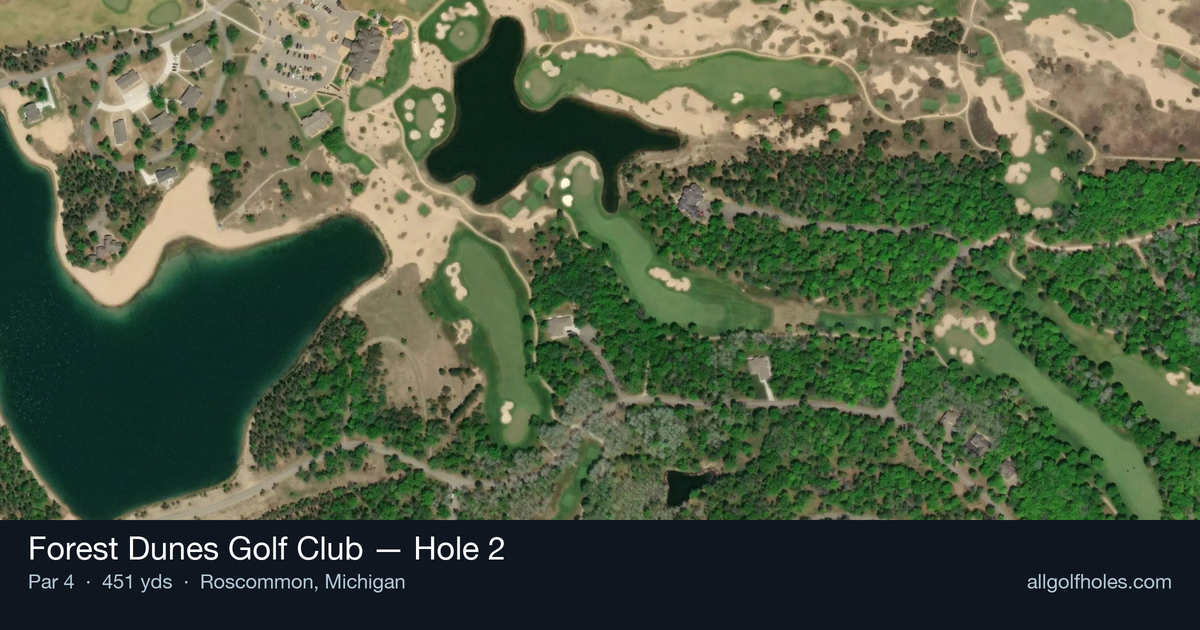
Forest Dunes Golf Club hole 2 presents a deceptively straightforward challenge that embodies Tom Doak's masterful design philosophy at The Loop. This 451-yard par 4 demands precision over power, with its straight layout offering no hiding places for wayward shots. The tee shot must find the generous fairway corridor, but the real test awaits at the approach to the small, subtly contoured green complex. Without significant hazards to distract, golfers must focus purely on execution and club selection, making accurate distance control paramount. The green's compact dimensions reward those who commit fully to their approach shot, while tentative swings often find trouble around the putting surface. This hole perfectly captures The Loop's reversible concept - what appears simple becomes strategically complex when every shot matters.
Off the tee
Your tee shot strategy should focus on finding the optimal position for your approach shot. With no significant hazards to navigate, driver is often the right choice for longer hitters who can control their ball flight. However, consider the wind conditions and your comfort level - a well-struck 3-wood or hybrid that finds the center of the fairway trumps a wayward driver every time. The straight layout means your target line is relatively straightforward, but pay attention to subtle elevation changes and fairway contours that might influence your ball's final position. Position yourself in the fairway's center to give yourself the best angle into the small green.
Approach & recovery
The approach shot is where this hole's true challenge reveals itself. That small green demands precision with your iron selection and execution. From the typical landing zone, you'll likely face a mid-iron to long-iron depending on conditions and your driving distance. Focus on the center of the green rather than attacking pins, especially if they're tucked near edges. The small target means there's little room for error, so club up if you're between selections and prioritize a smooth, controlled swing. Take note of wind direction and green firmness, as both will significantly impact how your ball reacts on this compact putting surface.
On the green
With a small green, putting becomes a premium skill on this hole. Expect subtle breaks and potentially challenging pin positions that can make even short putts tricky. Study the green's contours carefully during your approach - what looks flat from 150 yards often reveals meaningful slopes up close. Focus on lag putting to avoid three-putts, as the small surface can create deceptive distances. If you're above the hole, be especially cautious with your speed control. ## RISK VS REWARD This hole offers a classic risk/reward scenario in club selection rather than routing. The reward for aggressive play is minimal - there are no shortcuts or dramatic advantages to taking on extra risk. Instead, the smart play rewards conservative, precise golf with legitimate birdie opportunities. The biggest risk comes from being overly aggressive with pin hunting on approach shots. The small green punishes misses severely, making the center of the green your best target regardless of pin position. ## DIFFERENT SKILL LEVELS **High Handicappers:** Focus on two solid, conservative shots. Use whatever club gives you confidence off the tee, even if it's a 5-iron. For your approach, aim for the center of the green and don't worry about pin positions. A bogey here isn't a disaster - it's a challenging hole. **Low Handicappers:** This hole rewards your precision skills. Consider the pin position and green conditions when selecting your approach club, but resist the urge to get too aggressive. Your short game skills give you more margin for error, so you can be slightly more attacking while still respecting the small target. The beauty of The Loop's design philosophy shines through on this hole - it may play completely differently when you experience it in reverse, adding another layer of strategic complexity to your Forest Dunes experience.
Watch for
- Course conditioning and mapped hazards may affect line selection; confirm from the aerial.
Hole 2 Green Complex
Mapped green boundary
Green size: 4,253 sq ft
How did Hole 2 play?
How did this hole play today?
Frequently asked questions
Yardage reference: Championship tees · 451 yards.
What's the best strategy off the tee?
↓
For this 451-yard par 4, most players will hit driver to set up a comfortable approach.
How difficult is hole 2?
↓
This hole is one of the tougher holes on the course for most golfers. Key challenges include: long par 4, heavily bunkered, small green.
How big is the green on hole 2?
↓
The green is small and requires precision. The green is deeper than wide, so club selection is crucial. Expect challenging pin positions with limited room for error.
What's a good score on hole 2?
↓
This hole is one of the tougher holes where par feels like birdie. A challenging par 4. Accept that bogey happens and avoid big numbers.