Hole 3 at Forest Dunes Golf Club
- Par
- 3
- Yardage
- 203 yds
- Stroke index
- 15
- Hazards
- 6 bunkers
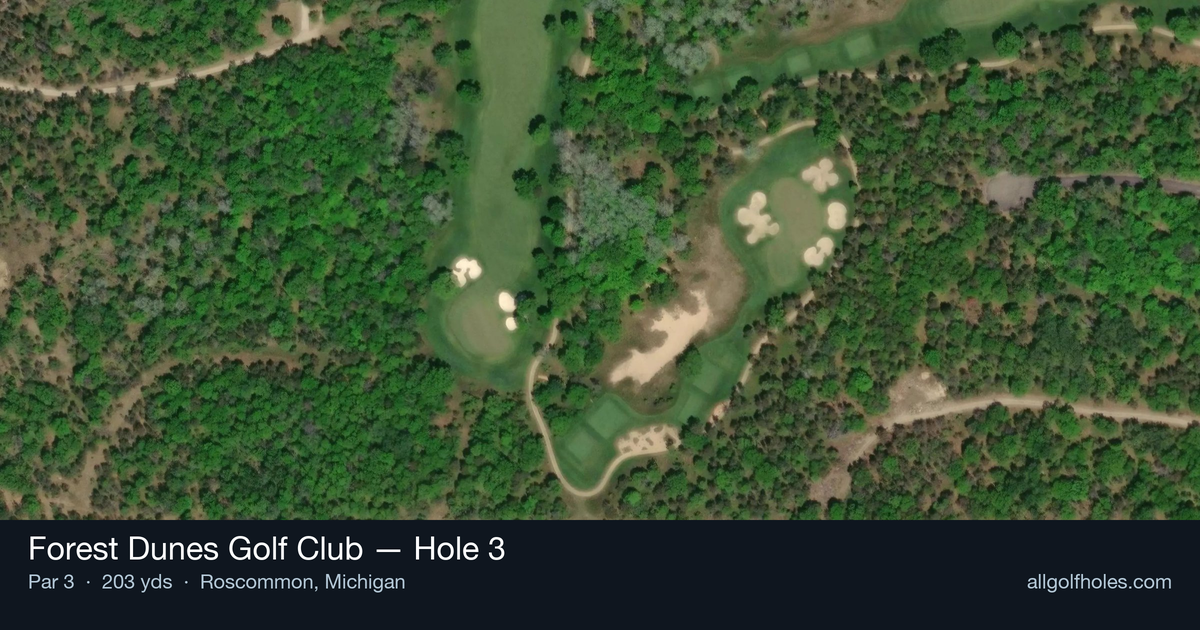
Aerial source not provided
Green size: 36 yds deep × 44 yds wide
Scorecard yardage is for Championship tees. The aerial shows its labeled reference position; distance rings measure to the green.
Championship tees · Par 3 · 203 yards
The plan for No. 3
Forest Dunes Golf Club hole 3 presents an elegant early test among the towering conifers of Michigan's Huron National Forest. This 203-yard par 3 demands precision over power, with the tee shot threading through the cathedral-like pines to a small, subtly contoured green. The straightforward layout belies the challenge - club selection becomes critical as the compact target offers little margin for error, particularly with approach shots that come up short or long. Without significant hazards to intimidate, the hole's difficulty lies in its demand for accuracy and the psychological pressure of hitting to such a tight target. The serene forest setting creates a deceptively peaceful atmosphere that can lull golfers into complacency before this early examination of their iron play.
Off the tee
Club selection is paramount on this tee shot, with most players requiring anything from a long iron to a hybrid depending on conditions and pin position. Take one extra club and swing smoothly rather than forcing a shot - the small green rewards controlled aggression over raw power. Aim for the center of the green regardless of pin position, as the compact target makes chasing flags a risky proposition. Pay close attention to wind conditions, which can significantly impact club selection on this exposed shot. A controlled fade or draw is acceptable, but avoid any shot shape that might take you away from the green's center.
Approach & recovery
Since this is a par 3, your tee shot serves as your approach. Focus on landing the ball on the putting surface rather than short, as the small green size makes recovery shots from the surrounds challenging. The straight hole layout means you can be aggressive with your target line - there's no strategic advantage to playing to one side or another. Commit to your yardage and club selection, then execute with confidence. A shot that finishes pin-high anywhere on the green gives you an excellent chance at birdie.
On the green
The small green size means most putts will be relatively short, but don't underestimate the subtle breaks that can exist on these compact surfaces. Focus on speed control, as putts that roll off this small green can leave you with difficult up-and-downs. Take time to read the green carefully from multiple angles - what appears straight may have more break than expected. The center of the green typically offers the most forgiving putts, so even if you're not close to the pin, you should have a reasonable birdie opportunity. ## RISK VS REWARD This hole offers a clear risk/reward scenario: the reward of a potential birdie or easy par versus the risk of missing the small green entirely. The lack of significant hazards means that aggressive play won't result in big numbers, but missing the green can still lead to bogey if your short game isn't sharp. The smart play is controlled aggression - take enough club to ensure you reach the green, but focus on accuracy over distance. A two-putt par from anywhere on the green is a solid result that keeps momentum positive early in the round. ## DIFFERENT SKILL LEVELS **High Handicappers:** Take one extra club and aim for the middle of the green regardless of pin position. Focus on making solid contact and getting the ball airborne rather than trying to work the ball or attack specific pin locations. A bogey here isn't devastating given the hole's difficulty, so don't feel pressured to be overly aggressive. **Low Handicappers:** This represents a genuine scoring opportunity where you should expect to make par or better. You can be more aggressive with pin hunting, especially when the flag is in the center portions of the green. Use your distance control skills to dial in the exact yardage, and don't be afraid to take dead aim at accessible pins. The key is converting the birdie opportunities this hole provides to separate yourself from the field.
Watch for
- Course conditioning and mapped hazards may affect line selection; confirm from the aerial.
Hole 3 Green Complex
Mapped green boundary
Green size: 2,546 sq ft
How did Hole 3 play?
How did this hole play today?
Frequently asked questions
Yardage reference: Championship tees · 203 yards.
What club should I use on this par 3?
↓
At 203 yards, most golfers will need a long iron or hybrid (5-iron to 6-iron) to reach this green. Adjust for elevation, wind, and pin position.
How big is the green on hole 3?
↓
The green is small and requires precision. Expect challenging pin positions with limited room for error.