Hole 12 at Forest Dunes Golf Club
- Par
- 4
- Yardage
- 397 yds
- Stroke index
- 10
- Hazards
- 2 bunkers · Water
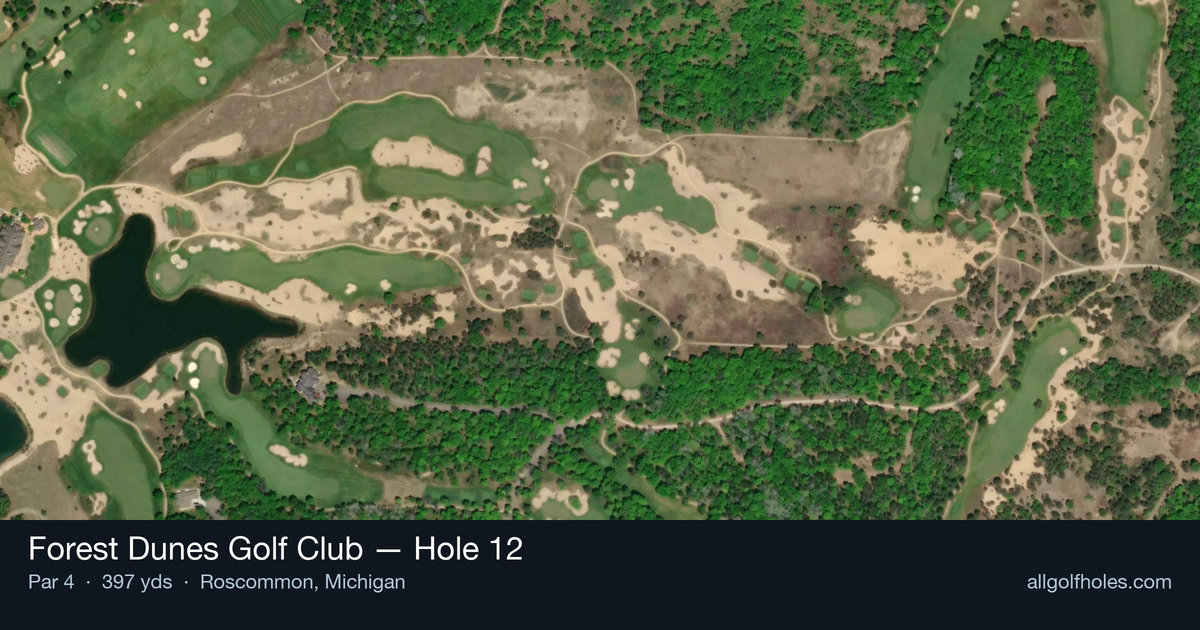
Aerial source not provided
Green size: 41 yds deep × 32 yds wide
Scorecard yardage is for Championship tees. The aerial shows its labeled reference position; distance rings measure to the green.
Championship tees · Par 4 · 397 yards
The plan for No. 12
The signature hole of Forest Dunes Golf Club's challenging Black routing, this 397-yard par 4 showcases Tom Doak's brilliant reversible design philosophy. The right dogleg demands precision from the tee, as golfers must navigate the bend while positioning for an optimal approach angle. What makes this hole truly special is its dual personality - playing as a completely different challenge when The Loop runs in reverse direction. The small green requires accurate iron play, rewarding those who find the proper side of the fairway off the tee. Strategic bunkering and natural contours frame both the landing area and green complex, creating risk-reward decisions that epitomize championship golf architecture. This hole perfectly captures why The Loop has earned acclaim as one of golf's most innovative experiences.
Off the tee
The key to conquering this dogleg right is finding the perfect balance between distance and position. Aim for the left-center of the fairway to open up the best angle to the green, avoiding the temptation to cut too much of the corner. A well-struck driver or strong 3-wood should position you ideally for the approach, typically leaving a mid-iron to the green. Conservative players might consider laying back with a hybrid or long iron to ensure they stay in the fairway's optimal zone, especially if the pin is tucked behind any subtle green contours.
Approach & recovery
With the small green as your target, precision trumps power on the approach shot. The preferred angle comes from the left side of the fairway, where your tee shot positioning pays dividends. Club selection becomes critical here - take one more club than you think you need to ensure you reach the putting surface. The compact green size means missing short or long can leave challenging recovery shots. Focus on smooth tempo and solid contact rather than trying to attack specific pin positions aggressively.
On the green
The small green demands respect with your putter in hand. While specific break patterns aren't detailed, Tom Doak's design philosophy suggests subtle undulations that reward careful green reading. Pay attention to the overall slope and drainage patterns around the green complex. Lag putting becomes essential on longer putts, as the compact surface leaves little margin for error on aggressive attempts. Conservative putting strategy often yields better results than bold charges at the hole. ## RISK VS REWARD This hole offers multiple risk/reward scenarios depending on your skill level and confidence. The primary decision point comes off the tee - how much of the dogleg to challenge versus playing safely to the fairway's wide section. Longer hitters might attempt to drive closer to the green, but the small target on approach makes this a questionable strategy for most players. The safer play of positioning for a comfortable mid-iron approach typically yields better scoring opportunities. ## DIFFERENT SKILL LEVELS **High Handicappers:** Focus on keeping the ball in play off the tee with a club you can control confidently. Aim for the left-center fairway and don't worry about maximum distance. On approach, take plenty of club and aim for the center of the green, accepting any resulting putt length. **Low Handicappers:** This hole rewards precision and course management over raw power. Consider the pin position when selecting your tee shot target line, and don't be afraid to be aggressive with your approach when you've positioned yourself properly. The small green demands commitment to your chosen line and club selection. The beauty of playing The Loop means you'll experience this hole from a completely different perspective on the Red routing, where strategic considerations shift dramatically. This dual nature makes Forest Dunes' 12th hole a true masterpiece of strategic golf course design.
Watch for
- Course conditioning and mapped hazards may affect line selection; confirm from the aerial.
Hole 12 Green Complex
Mapped green boundary
Green size: 4,101 sq ft
How did Hole 12 play?
How did this hole play today?
Frequently asked questions
Yardage reference: Championship tees · 397 yards.
What's the best strategy off the tee?
↓
For this 397-yard par 4, most players will hit driver to set up a comfortable approach.
How difficult is hole 12?
↓
This hole is a moderate challenge for most golfers. Key challenges include: water in play, small green.
What hazards should I watch out for on hole 12?
↓
Key hazards include: fairway bunkers at 2318934.3-2318941.3 yards; water at 2318864.4 yards. Plan your shots to avoid these trouble spots.
How big is the green on hole 12?
↓
The green is small and requires precision. Expect challenging pin positions with limited room for error.
Which side of the fairway is safer on hole 12?
↓
Aim for the left side of the fairway when possible. Missing right (water) brings more trouble into play.
What's a good score on hole 12?
↓
This hole is a medium-length test where par is a solid result. A straightforward par 4 where course management pays off.