Hole 9 at Cog Hill Golf & CC (Dubsdread)
- Par
- 5
- Yardage
- 613 yds
- Stroke index
- 1
- Hazards
- 4 bunkers
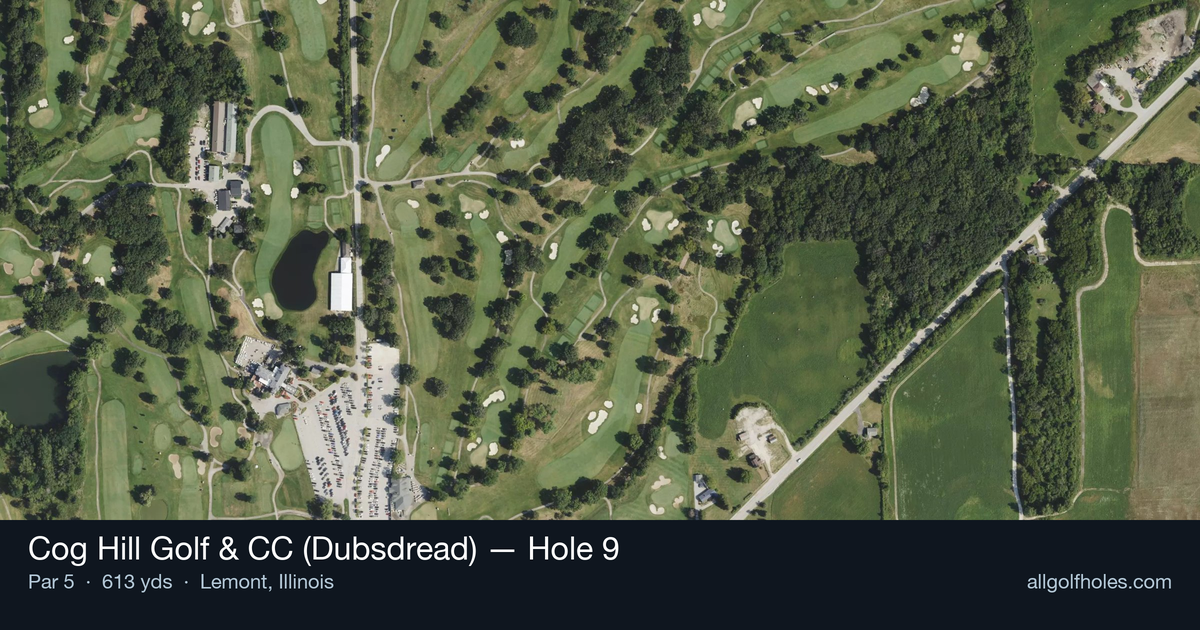
Aerial source not provided
Green size: 31 yds deep × 21 yds wide
Scorecard yardage is for Championship tees. The aerial shows its labeled reference position; distance rings measure to the green.
Championship tees · Par 5 · 613 yards
The plan for No. 9
The 9th hole at Cog Hill Golf & CC (Dubsdread) stands as the course's signature par 5, stretching an imposing 613 yards and earning its reputation as the number one handicap hole. This monster demands three precise shots to reach the small, well-guarded green complex. The straight layout may appear forgiving from the tee, but the sheer length tests every aspect of your game. Multiple tee boxes offer options for all skill levels, though even from the forward tees, this hole commands respect. The approach shot to the compact green requires pinpoint accuracy, as missing the target leaves challenging recovery shots. As the closing hole of the front nine, it epitomizes why Dubsdread has earned its fearsome nickname among Chicago-area golfers.
Off the tee
Your tee shot strategy should prioritize finding the fairway over maximum distance. With multiple tee boxes available, select the appropriate tees for your skill level and focus on a smooth, controlled swing. Aim for the center of the fairway with your most reliable driver or 3-wood. The straight layout provides a generous target line, but accuracy is paramount as any wayward drive will leave you scrambling from trouble. Consider the wind conditions carefully, as this lengthy hole will expose any directional issues with your tee shot.
Approach & recovery
Most golfers will face a lengthy second shot that should focus on advancing the ball as far as possible while staying in play. Target the widest part of the fairway and avoid the temptation to overswing. A well-struck fairway wood or hybrid that finds the short grass is far superior to a longer shot that finds trouble. Your third shot approach to the small green demands precision - consider the pin position and aim for the center of the green rather than attacking difficult pin placements.
On the green
The small green requires accurate distance control on your approach shot. With limited real estate to work with, focus on getting your ball onto the putting surface rather than trying to get close to challenging pin positions. Once on the green, read putts carefully as the smaller surface can create subtle breaks that aren't immediately apparent. Two-putting from anywhere on this green should be considered a victory. ## RISK VS REWARD This hole offers limited risk/reward opportunities for most players due to its length. Long hitters might consider going for the green in two under ideal conditions, but the small target makes this an extremely risky play. The smarter approach is to view this as a three-shot hole and focus on making a solid par. Bogey is not a disaster here - many good players struggle to break par on this demanding test. ## DIFFERENT SKILL LEVELS **High-Handicap Players:** Play this hole conservatively as a three-shot par 5. Use your most reliable clubs off the tee and for your second shot, prioritizing accuracy over distance. Don't be afraid to lay up to your favorite wedge distance for the third shot, and aim for the center of the green regardless of pin position. **Low-Handicap Players:** While still primarily a three-shot hole, skilled players can be more aggressive with club selection on the first two shots. Consider the pin position when planning your approach angle, but respect the small green size. Only attempt to reach in two under perfect conditions with a significant tailwind. The 9th hole at Dubsdread lives up to the course's intimidating reputation, demanding respect and strategic thinking from first tee shot to final putt. Success here comes from playing within your abilities and avoiding the big numbers that can derail an otherwise good round.
Watch for
- 4 mapped bunkers guard landing zones and/or the green.
- Tree-lined areas (12 mapped woodland zones) punish offline tee shots.
Hole 9 Green Complex
Mapped green boundary
Green size: 3,727 sq ft
How did Hole 9 play?
How did this hole play today?
Frequently asked questions
Yardage reference: Championship tees · 613 yards.
Can this par 5 be reached in two?
↓
At 613 yards, A true three-shot hole for most players. Position your layup to leave a comfortable wedge distance.
How difficult is hole 9?
↓
This hole is a moderate challenge for most golfers. Key challenges include: long par 5, heavily bunkered, small green.
How big is the green on hole 9?
↓
The green is small and requires precision. Expect challenging pin positions with limited room for error.
What's a good score on hole 9?
↓
This hole is a true three-shot hole where birdie requires execution. This longer par 5 demands patience. Two good shots set up the scoring opportunity.