Hole 2 at Cog Hill Golf & CC (Dubsdread)
- Par
- 3
- Yardage
- 224 yds
- Stroke index
- 17
- Hazards
- 1 bunker
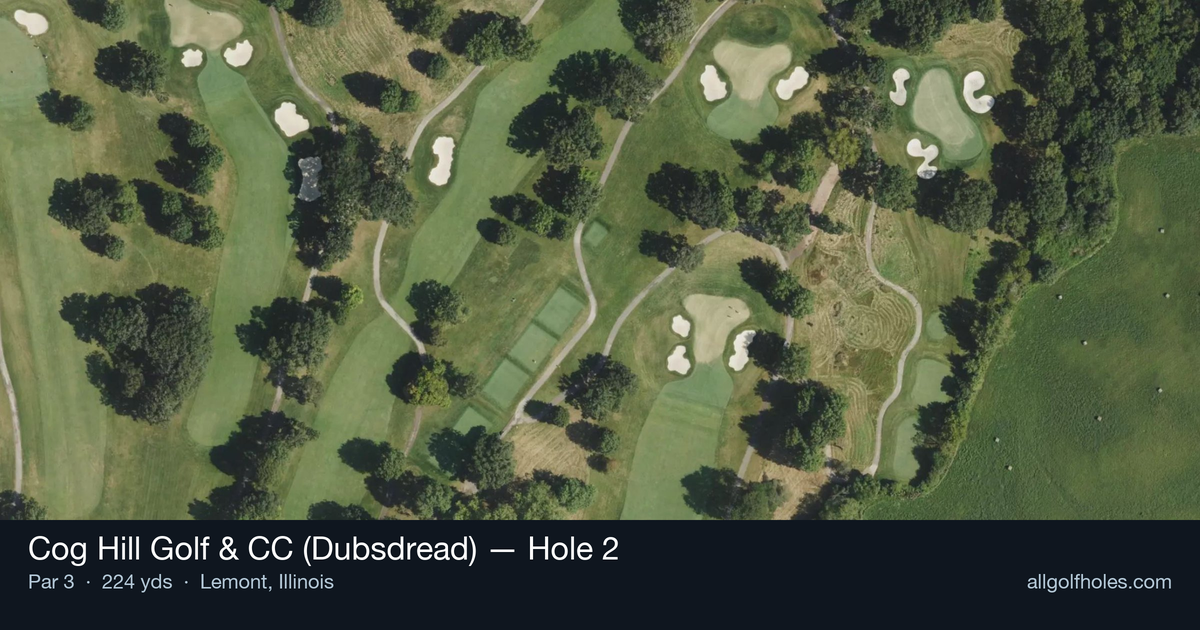
Aerial source not provided
Green size: 31 yds deep × 32 yds wide
Scorecard yardage is for Championship tees. The aerial shows its labeled reference position; distance rings measure to the green.
Championship tees · Par 3 · 224 yards
The plan for No. 2
The second hole at Cog Hill Golf & CC (Dubsdread) stands as a beloved test among the club's regulars, embodying the classic par 3 challenge that has made this Illinois layout a favorite for decades. This 224-yard one-shotter demands precision from the tee, requiring golfers to navigate the wooded, rolling terrain that defines the Ravines course. The tee shot must carry confidently to reach the small green complex, with the surrounding natural landscape framing this picturesque hole. Club selection proves critical on this straightforward but unforgiving par 3, where the margin for error is minimal. What makes this hole memorable is its honest, no-nonsense design that rewards accurate iron play while punishing wayward shots in the dense Illinois woodlands that guard the putting surface.
Off the tee
Club selection is paramount on this lengthy one-shotter. Most golfers will need anywhere from a long iron to hybrid or even fairway wood depending on conditions and pin position. The key is committing to a club that gets you to the green with authority rather than trying to force a shorter iron. Take one extra club and make a smooth, controlled swing - the small green demands precision over power. Focus on the center of the green regardless of pin position. The straight layout means your target line is relatively straightforward, but the rolling terrain can create uneven lies if you miss the putting surface. Pay attention to wind conditions, as they can significantly affect club selection on a hole of this length.
Approach & recovery
Since this is a par 3, your tee shot IS your approach shot. The small green size means there's little room for error, making this hole all about hitting your target. The green's compact dimensions reward golfers who can control their distance - being long or short can leave difficult recovery shots from the surrounding terrain. Without significant hazards listed, the primary challenge comes from the green itself and the natural contours of the land. Missing the green in the wrong spots can leave you with awkward lies on the rolling terrain, making up-and-down attempts more challenging than they might initially appear.
On the green
The small green puts a premium on lag putting and distance control. With limited real estate to work with, aggressive putting can quickly lead to three-putts if you're not careful. Focus on getting your first putt close rather than trying to make everything. Read the green carefully, as the rolling terrain likely influences the putting surface as well. The compact size means that even subtle breaks can have a significant impact on your putt. Take your time to study the line and commit to your read. ## RISK VS REWARD This hole offers a classic risk/reward scenario in club selection. The conservative play is taking plenty of club and aiming for the center of the green, accepting a longer putt for birdie in exchange for virtually guaranteeing you'll find the putting surface. The aggressive play involves trying to get closer to the pin with a shorter iron, but this increases the risk of coming up short or missing the small target entirely. Given the hole's reputation as a favorite among regulars, it likely rewards those who play it conservatively and consistently rather than those who try to attack it. ## DIFFERENT SKILL LEVELS **High-Handicap Players:** Focus entirely on finding the green with your tee shot. Take an extra club and aim for the center of the green regardless of pin position. A two-putt par on this hole is an excellent score that keeps momentum going into the rest of the round. **Mid-Handicap Players:** You can be slightly more aggressive with pin hunting, but still prioritize the putting surface. Consider the pin position in your club selection, but don't short-side yourself on this small green. **Low-Handicap Players:** This is where course management becomes crucial. You have the skills to attack pins, but the small green size means even good swings can find trouble if you're too aggressive. Play to your strengths - if you're confident with your long irons, you can be more aggressive; if not, take the conservative approach and rely on your putting to make birdie. The key for all skill levels is respecting what this hole demands: precision, proper club selection, and the patience to take what the hole gives you rather than forcing a score that isn't there.
Watch for
- 1 mapped bunker guard landing zones and/or the green.
- Tree-lined areas (7 mapped woodland zones) punish offline tee shots.
Hole 2 Green Complex
Mapped green boundary
Green size: 4,573 sq ft
How did Hole 2 play?
How did this hole play today?
Frequently asked questions
Yardage reference: Championship tees · 224 yards.
What club should I use on this par 3?
↓
At 224 yards, most golfers will need a fairway wood or hybrid to reach this green. Adjust for elevation, wind, and pin position.
How difficult is hole 2?
↓
This hole is a moderate challenge for most golfers. Key challenges include: long par 3.
What hazards should I watch out for on hole 2?
↓
Key hazards include: 1 greenside bunker. Plan your shots to avoid these trouble spots.
How big is the green on hole 2?
↓
The green is medium-sized with moderate targets. The green is wider than it is deep, rewarding shots that find the correct tier. Pay attention to pin placement when selecting your approach club.
What's a good score on hole 2?
↓
This hole is a challenging par where bogey is acceptable. This longer par 3 will test your long iron or hybrid game. Par is a good score.