Hole 17 at Cog Hill Golf & CC (Dubsdread)
- Par
- 4
- Yardage
- 423 yds
- Stroke index
- 12
- Hazards
- 5 bunkers
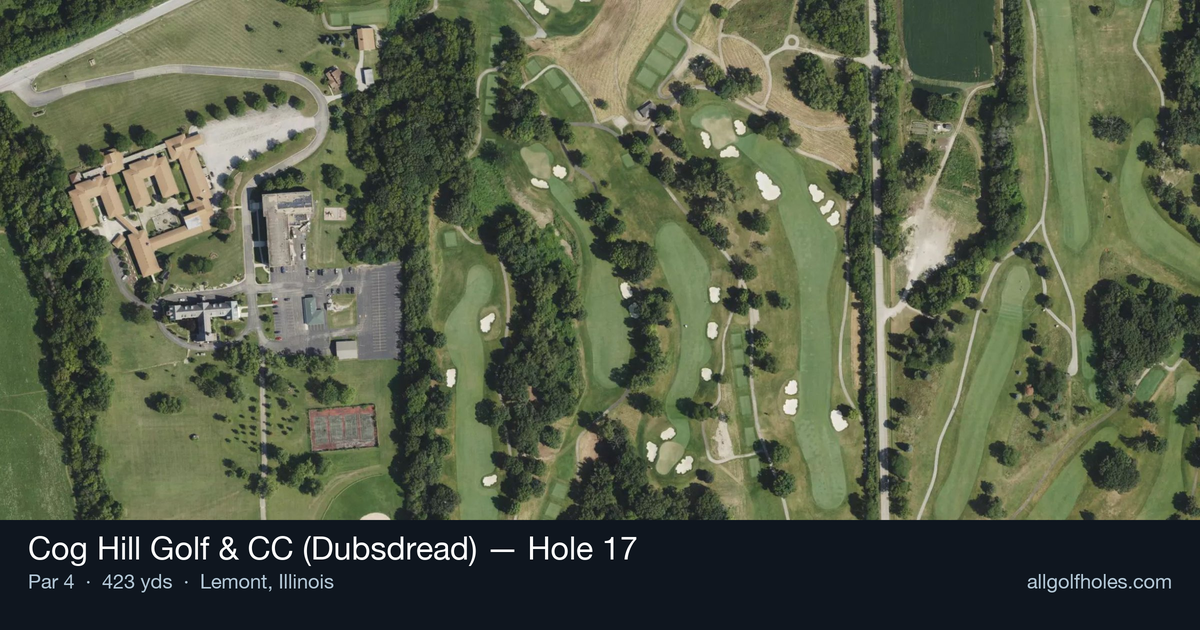
Aerial source not provided
Green size: 28 yds deep × 31 yds wide
Scorecard yardage is for Championship tees. The aerial shows its labeled reference position; distance rings measure to the green.
Championship tees · Par 4 · 423 yards
The plan for No. 17
The penultimate hole at Cog Hill Golf & CC (Dubsdread) hole 17 presents a deceptively straightforward par 4 that has tested PGA Tour professionals during multiple Western Opens and BMW Championships. This 423-yard challenge demands precision over power, with a generous fairway that invites aggressive tee shots but rewards strategic positioning for the crucial approach shot. The small green complex becomes the focal point, requiring pinpoint accuracy to avoid costly short-sided situations. Without significant hazards to navigate, this hole relies on subtle design elements and green contours to separate good scores from great ones. As golfers prepare for the demanding finishing hole, the 17th serves as a final opportunity to gain momentum, making course management and execution paramount on this classic championship layout.
Off the tee
Your tee shot strategy should prioritize finding the optimal position for your approach rather than maximum distance. A well-struck drive of about 250-270 yards will leave you with a manageable mid-iron into the green. The straight fairway provides a generous target line, but resist the urge to swing out of your shoes. Focus on a smooth, controlled swing that finds the center of the fairway. Driver is the obvious choice for most players, though stronger golfers might consider a 3-wood if accuracy has been an issue during the round.
Approach & recovery
The approach shot is where this hole reveals its teeth. The small green demands precise club selection and committed execution. Depending on your tee shot position, you'll likely face a mid-iron to long-iron into the green. Study the pin position carefully - with limited green space, being on the correct level or section becomes critical. Favor the center of the green when in doubt, as short-siding yourself on a small target can lead to difficult up-and-downs. Factor in wind conditions, which can be particularly challenging in the Chicago area.
On the green
The small green at the 17th requires excellent distance control on your putts. While specific break patterns aren't documented, expect subtle undulations that can catch the unwary. Take time to read your putts carefully, as three-putts on a small surface are particularly costly. Focus on getting your first putt close rather than being overly aggressive with birdie attempts. The putting surface quality at this PGA Tour venue should provide true roll, so trust your read and commit to your line. ## RISK VS REWARD This hole offers limited risk/reward opportunities, which is precisely its challenge. The straightforward design means there are no shortcuts or gambling options - just solid, fundamental golf. The reward comes from executing two quality shots and avoiding the mental lapses that can derail a round on a championship course. Consider this hole an opportunity to build confidence and momentum heading into the demanding 18th. ## DIFFERENT SKILL LEVELS **High Handicappers:** Focus on keeping the ball in play off the tee, even if it means using a 3-wood or hybrid for accuracy. Don't be afraid to aim for the largest part of the green on your approach, accepting a longer putt rather than risking a miss. Two-putt pars are excellent scores here. **Low Handicappers:** Use this hole to your advantage by committing to precise targets. Your superior ball-striking should allow you to attack specific sections of the green based on pin position. This is a birdie opportunity if you execute properly, but respect the small green and don't force difficult shots. The 17th at Dubsdread exemplifies why this course has challenged the world's best players for decades. Success here comes from embracing the strategic demands and executing fundamental shots with precision - the same qualities that separate good rounds from great ones on any championship layout.
Watch for
- 5 mapped bunkers guard landing zones and/or the green.
- Tree-lined areas (9 mapped woodland zones) punish offline tee shots.
Hole 17 Green Complex
Mapped green boundary
Green size: 4,524 sq ft
How did Hole 17 play?
How did this hole play today?
Frequently asked questions
Yardage reference: Championship tees · 423 yards.
What's the best strategy off the tee?
↓
For this 423-yard par 4, most players will hit driver to set up a comfortable approach.
How difficult is hole 17?
↓
This hole is a moderate challenge for most golfers. Key challenges include: heavily bunkered.
How big is the green on hole 17?
↓
The green is medium-sized with moderate targets. Pay attention to pin placement when selecting your approach club.