Hole 16 at Cog Hill Golf & CC (Dubsdread)
- Par
- 4
- Yardage
- 418 yds
- Stroke index
- 1
- Hazards
- 5 bunkers
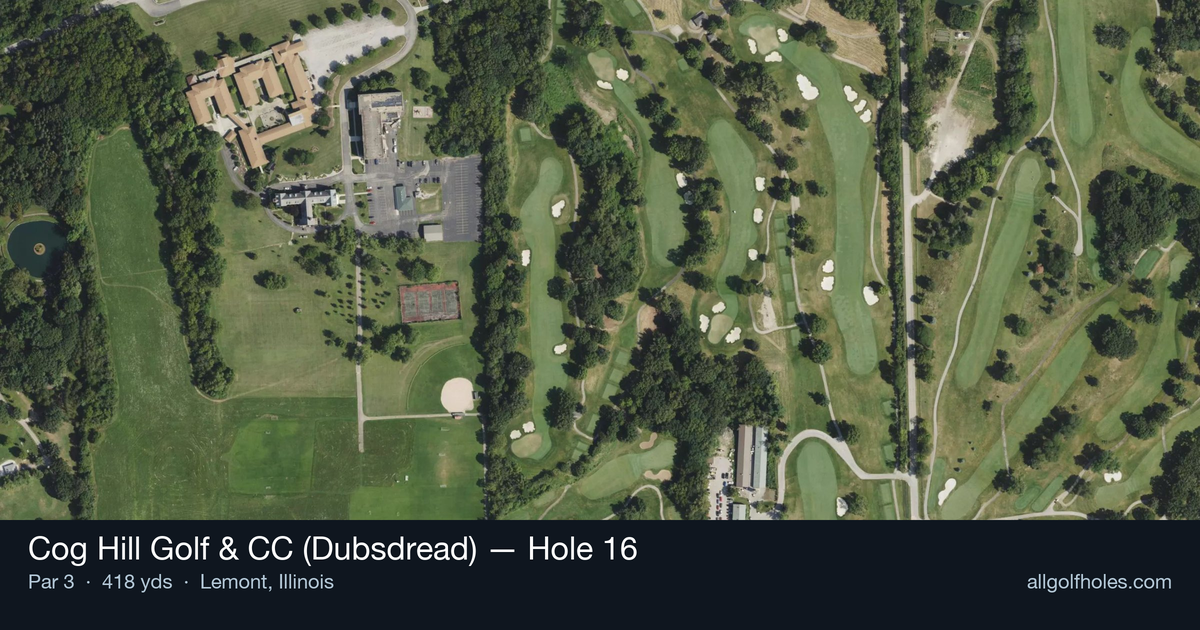
Aerial source not provided
Green size: 30 yds deep × 30 yds wide
Scorecard yardage is for Championship tees. The aerial shows its labeled reference position; distance rings measure to the green.
Championship tees · Par 4 · 418 yards
The plan for No. 16
The 16th hole at Cog Hill Golf & CC (Dubsdread) stands as the course's most demanding par 3, earning its status as the number one handicap hole at 418 yards. This brutally long one-shotter epitomizes Dick Wilson's unforgiving design philosophy that made Dubsdread legendary among Chicago-area golfers. The tee shot demands precision and power, requiring players to carry their approach over potential trouble to reach the elevated, multi-tiered green complex. True to Dubsdread's reputation for punishing rough, any miss from the tee leaves golfers battling thick grass that can destroy scoring opportunities. The small, undulating putting surface sits perched above the fairway, creating an intimidating target that tests even accomplished players. This hole perfectly captures why Dubsdread has earned its fearsome nickname and remains one of Illinois' premier public golf challenges.
Off the tee
Given the 418-yard distance, most golfers will need driver or 3-wood to reach this green, fundamentally changing the typical par 3 strategy. Your target line should favor the center of the green, as the small putting surface leaves little margin for error. Focus on a smooth, controlled swing rather than trying to overpower the shot - the length is already built into the hole. The key is accepting that this plays more like a long par 4 approach shot than a traditional par 3. Take one extra club and swing within yourself, as Dubsdread's thick rough will penalize any miss that finds the longer grass. The straight layout helps with alignment, but don't let the apparent simplicity fool you into being careless with your target selection.
Approach & recovery
Since this is a par 3, your tee shot IS your approach shot, making club selection absolutely critical. The elevated green requires additional carry, so factor in at least one extra club beyond what the yardage might normally suggest. The small green size means precision is paramount - aim for the center of the putting surface regardless of pin position. Wind conditions play a major role on a shot this long, so assess conditions carefully before committing to your club choice. The elevated nature of the green can create swirling winds that aren't apparent from the tee, making a conservative center-green strategy even more important.
On the green
Dick Wilson's elevated green design at Dubsdread features the multi-tiered, undulating surfaces that are fast and challenging to read. Given the length of the approach shot, most players will be putting from considerable distances, making lag putting skills essential. Focus on getting your first putt close rather than being aggressive with the hole. The green's elevation and multiple tiers mean that being above the hole can leave you with lightning-fast downhill putts. When possible, favor approaches that leave you putting uphill, even if it means aiming away from certain pin positions. ## RISK VS REWARD The primary risk/reward decision on this hole is club selection and swing aggression. The reward for reaching the green in regulation on this monster par 3 is significant - it's a genuine birdie opportunity despite the difficulty. However, the risk of trying to overpower the shot and finding Dubsdread's thick rough can easily lead to bogey or worse. The smart play is often accepting that par is an excellent score and playing conservatively to the center of the green. Chasing pins on a hole this demanding rarely pays off for most golfers. ## DIFFERENT SKILL LEVELS **High-handicap players** should treat this hole like a short par 4. Consider laying up to a comfortable wedge distance rather than trying to reach the green with your longest club. A controlled 200-yard shot followed by a wedge approach often produces better results than an all-out effort that finds trouble. **Low-handicap players** have the distance to attack this hole but must resist the temptation to be overly aggressive with pin hunting. Focus on solid contact and center-green targets. Your superior short game skills give you better opportunities to save par from around the green if needed. **Mid-handicap players** face the toughest decision - you might have just enough distance to reach the green but lack the consistency for such a demanding shot. Consider your recent ball-striking form and course conditions when deciding whether to go for the green or play more conservatively. The 16th hole at Dubsdread embodies the course's reputation as a championship-caliber test. Success here comes from respecting the hole's difficulty, making smart strategic decisions, and executing with the precision that Dick Wilson's design demands.
Watch for
- 5 mapped bunkers guard landing zones and/or the green.
- Tree-lined areas (6 mapped woodland zones) punish offline tee shots.
Hole 16 Green Complex
Mapped green boundary
Green size: 4,415 sq ft
How did Hole 16 play?
How did this hole play today?
Frequently asked questions
Yardage reference: Championship tees · 418 yards.
How big is the green on hole 16?
↓
The green is small and requires precision. Expect challenging pin positions with limited room for error.