Hole 4 at Grayhawk Golf Club (Raptor course)
- Par
- 5
- Yardage
- 562 yds
- Stroke index
- 2
- Hazards
- 7 bunkers
Aerial source not provided
Green size: 34 yds deep × 26 yds wide
Scorecard yardage is for Championship tees. The aerial shows its labeled reference position; distance rings measure to the green.
Championship tees · Par 5 · 562 yards
The plan for No. 4
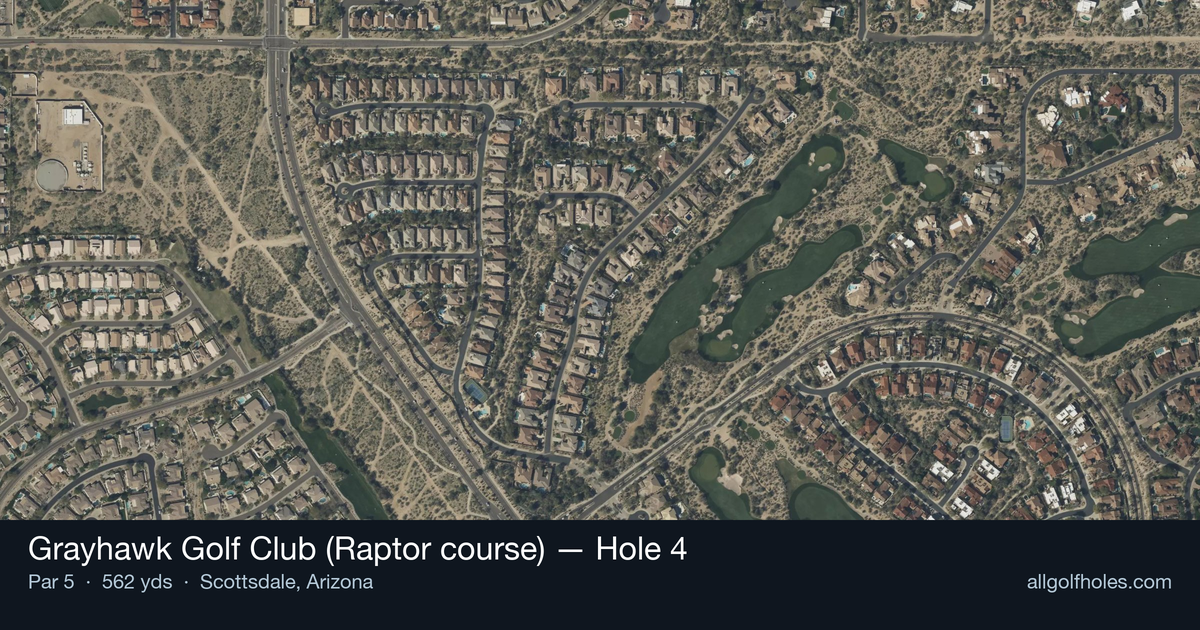
The fourth hole at Grayhawk Golf Club's Raptor course exemplifies Tom Fazio's masterful risk-reward design philosophy on this challenging 562-yard par 5. From the tee, players face an immediate strategic decision as a gaping fairway bunker lurks menacingly on the right side, demanding precise placement off the tee. Conservative players wisely choose a long iron or fairway wood to position safely short of the hazard, while aggressive golfers can challenge the bunker for optimal positioning. The approach shot reveals Fazio's architectural brilliance with an elevated green that slopes dramatically from back to front, featuring a lower left tier protected by a deep bunker. This tiered green complex transforms what appears to be a straightforward par 5 into a chess match, where club selection and pin position dictate success on this memorable desert test.
Off the tee
The tee shot strategy centers entirely around avoiding the prominent fairway bunker on the right side. The conservative and often wisest play is a long iron or fairway wood that stays comfortably left of center, ensuring you remain in the fairway while setting up the best angle for your second shot. Longer hitters may be tempted to challenge the bunker with driver, but the risk rarely justifies the reward given the hole's length and green complexity. Target the left-center portion of the fairway, which provides the safest landing zone and optimal positioning for your approach. The key is finding the right balance between distance and accuracy – you want to advance the ball as far as possible while maintaining complete control over your ball flight.
Approach & recovery
Your second shot strategy depends heavily on your tee shot execution and personal capabilities. Most players will face a long approach to an elevated green, making club selection critical. The green slopes from back to front with a distinct lower tier on the left side, creating different target zones based on pin position. When the pin is on the lower left tier, be aware of the deep bunker guarding this section – a miss here creates a difficult up-and-down opportunity. For pins on the main level, favor the center-right portion of the green to avoid both the left bunker and the severe front-to-back slope that can send balls rolling off the putting surface.
On the green
The elevated green's back-to-front slope dominates putting strategy. Approach putts from below the hole are relatively manageable, but anything above the hole becomes treacherous on this sloped surface. The two-tiered nature means you must be precise with speed control when putting between levels. Focus on leaving yourself below the hole whenever possible, even if it means taking a more conservative line on your approach shot. The small green size amplifies the importance of accurate distance control on both approach shots and putting. ## RISK VS REWARD This hole presents a fascinating risk-reward equation that changes based on your position and skill level. The primary decision point comes on the tee shot – do you play conservatively short of the right bunker or challenge it for better positioning? The elevated green and its protective bunkers create a second risk-reward scenario on the approach. Generally, the percentages favor the conservative approach given the hole's difficulty rating and the severe penalties for missing in the wrong spots. However, stronger players may find opportunities to be more aggressive when conditions are favorable. ## DIFFERENT SKILL LEVELS **High-handicap players** should embrace the conservative strategy throughout. Use a long iron or hybrid off the tee to ensure fairway positioning, then focus on advancing the ball as close to the green as possible with your second shot, even if it means laying up. A well-executed wedge to the center of the green often yields better results than a risky long approach. **Low-handicap players** can consider more aggressive lines, particularly off the tee where superior ball control allows them to challenge the right bunker more safely. These players should also be more willing to attack specific pin positions, though respect for the green's slopes and bunkers remains essential. The key for all skill levels is recognizing that this hole rewards patience and precision over power – a philosophy that defines Tom Fazio's design approach and makes the Raptor course such a respected test of golf.
Watch for
- Course conditioning and mapped hazards may affect line selection; confirm from the aerial.
Hole 4 Green Complex
Mapped green boundary
Green size: 4,504 sq ft
How did Hole 4 play?
How did this hole play today?
Frequently asked questions
Yardage reference: Championship tees · 562 yards.
Can this par 5 be reached in two?
↓
At 562 yards, A true three-shot hole for most players. Position your layup to leave a comfortable wedge distance.
How difficult is hole 4?
↓
This hole is a moderate challenge for most golfers. Key challenges include: long par 5, heavily bunkered.
How big is the green on hole 4?
↓
The green is medium-sized with moderate targets. Pay attention to pin placement when selecting your approach club.
What's a good score on hole 4?
↓
This hole is a true three-shot hole where birdie requires execution. This longer par 5 demands patience. Two good shots set up the scoring opportunity.