Hole 3 at Grayhawk Golf Club (Raptor course)
- Par
- 4
- Yardage
- 460 yds
- Stroke index
- 4
- Hazards
- 4 bunkers
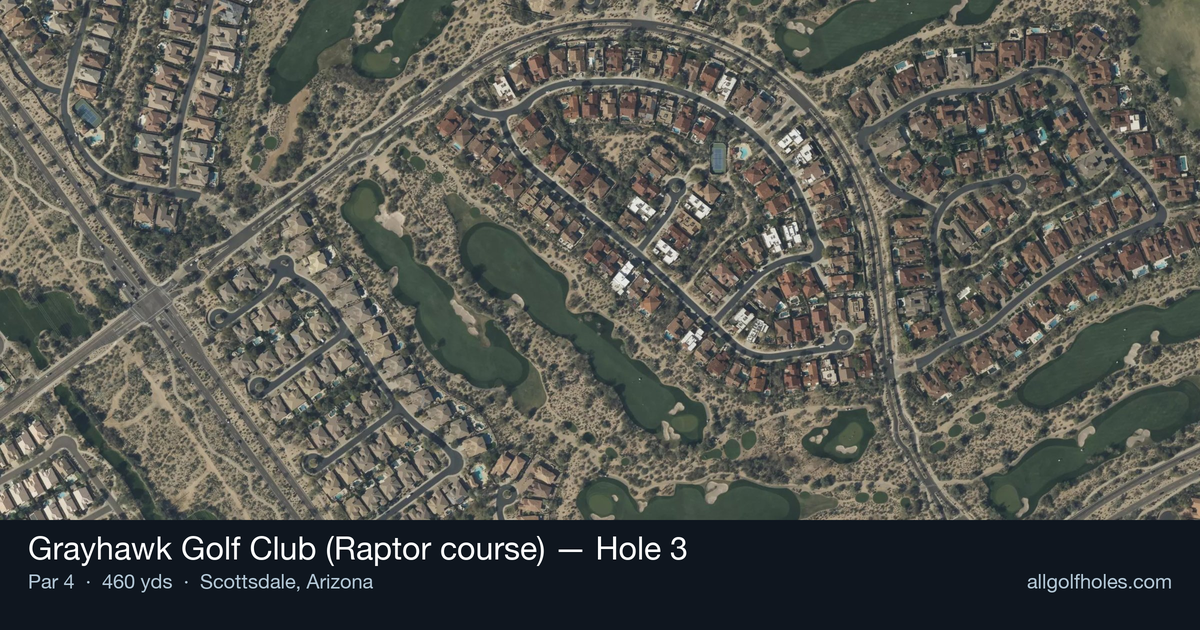
Aerial source not provided
Green size: 35 yds deep × 36 yds wide
Scorecard yardage is for Championship tees. The aerial shows its labeled reference position; distance rings measure to the green.
Championship tees · Par 4 · 460 yards
The plan for No. 3
The third hole at Grayhawk Golf Club's Raptor course stands as one of Tom Fazio's most demanding tests, earning its reputation as the most challenging hole on the layout. This 460-yard par 4 presents a classic risk-reward scenario where aggressive players must navigate a menacing fairway bunker that runs along the entire right side of the landing area. The smart play favors the left side of the fairway, offering a safer but longer approach to the massive green complex. What makes this hole particularly treacherous is the deceptive nature of its challenge - while the fairway appears generous, the strategic bunker placement forces golfers to choose between distance and safety. The enormous green provides multiple pin positions, ensuring this hole plays differently throughout the season and demanding precise approach shots regardless of tee shot strategy.
Off the tee
The tee shot presents a clear strategic fork in the road. The aggressive target line down the right side offers the shortest route to the green and the best approach angle, but this direct path crosses a substantial fairway bunker complex that runs along most of the right-side landing area. For longer hitters, this means flirting with trouble at the optimal driving distance. The conservative play favors the left side of the fairway, providing a safer landing area but leaving a longer, more challenging approach shot. Club selection becomes crucial here – many players will benefit from taking less than driver to ensure they can hold the left side of the fairway while avoiding the right-side bunker system entirely. Target the left-center of the fairway with your tee shot, prioritizing accuracy over maximum distance. The penalty for finding the right-side bunker complex far outweighs any advantage gained from a few extra yards.
Approach & recovery
From the left side of the fairway, expect to face a mid-to-long iron approach shot to the expansive green. The generous green size works in your favor, offering multiple target areas depending on pin placement. However, Tom Fazio's design typically features crowned greens protected by deep greenside bunkers, so precision remains important despite the large target. Study the pin position carefully before selecting your approach club. With such a large green, club selection can vary significantly – what might be a 6-iron to a back pin could be an 8-iron to a front flag. The key is committing to your yardage and swinging with confidence, as the green size provides room for slight misses.
On the green
The "gigantic" green presents both opportunities and challenges. While you have a large target for your approach shot, two-putting becomes the priority once you're on the putting surface. With numerous pin placement options available, expect significant variations in green speed and break depending on your position relative to the flag. Focus on lag putting to the correct level of the green rather than being overly aggressive with longer putts. The generous green size means three-putts are entirely avoidable with smart speed control and proper read of the slopes. ## RISK VS REWARD The primary risk-reward decision occurs on the tee shot. Challenging the right side bunker system can shorten your approach by 20-30 yards and provide a better angle, but the penalty for failure is severe. The reward rarely justifies the risk for most players, especially given the hole's reputation as one of the course's most difficult. The safer left-side strategy may result in a longer approach shot, but it virtually guarantees avoiding the fairway bunkers and keeps you in position to make par or better. On a hole ranked as the #4 handicap, making par represents a victory against the course. ## DIFFERENT SKILL LEVELS **High Handicappers:** Embrace the conservative strategy completely. Use a 3-wood or hybrid off the tee to ensure you can reach the left side of the fairway safely. Accept that you'll have a longer approach shot, and focus on getting your ball somewhere on the large green rather than attacking specific pin positions. **Low Handicappers:** While the aggressive line down the right side may be tempting, the percentages favor the left-side strategy even for skilled players. The difference in approach distance isn't significant enough to justify the bunker risk. Focus on executing a solid drive to the left-center of the fairway, then use the large green to your advantage with precise approach shots based on pin position. The third hole at Grayhawk's Raptor course rewards patience and strategic thinking over raw power and aggression. Master the art of playing away from trouble, and you'll find yourself walking to the fourth tee with a satisfying par on one of Arizona's most challenging holes.
Watch for
- Course conditioning and mapped hazards may affect line selection; confirm from the aerial.
Hole 3 Green Complex
Mapped green boundary
Green size: 6,170 sq ft
How did Hole 3 play?
How did this hole play today?
Frequently asked questions
Yardage reference: Championship tees · 460 yards.
What's the best strategy off the tee?
↓
For this 460-yard par 4, most players will hit driver to set up a comfortable approach.
How difficult is hole 3?
↓
This hole is a moderate challenge for most golfers. Key challenges include: long par 4, heavily bunkered.
How big is the green on hole 3?
↓
The green is fairly large with multiple pin positions. The green is deeper than wide, so club selection is crucial. Lag putting becomes important on longer putts.
What's a good score on hole 3?
↓
This hole is one of the tougher holes where par feels like birdie. A challenging par 4. Accept that bogey happens and avoid big numbers.