Hole 13 at TPC Southwind
- Par
- 4
- Yardage
- 472 yds
- Stroke index
- 16
- Hazards
- 9 bunkers · Water
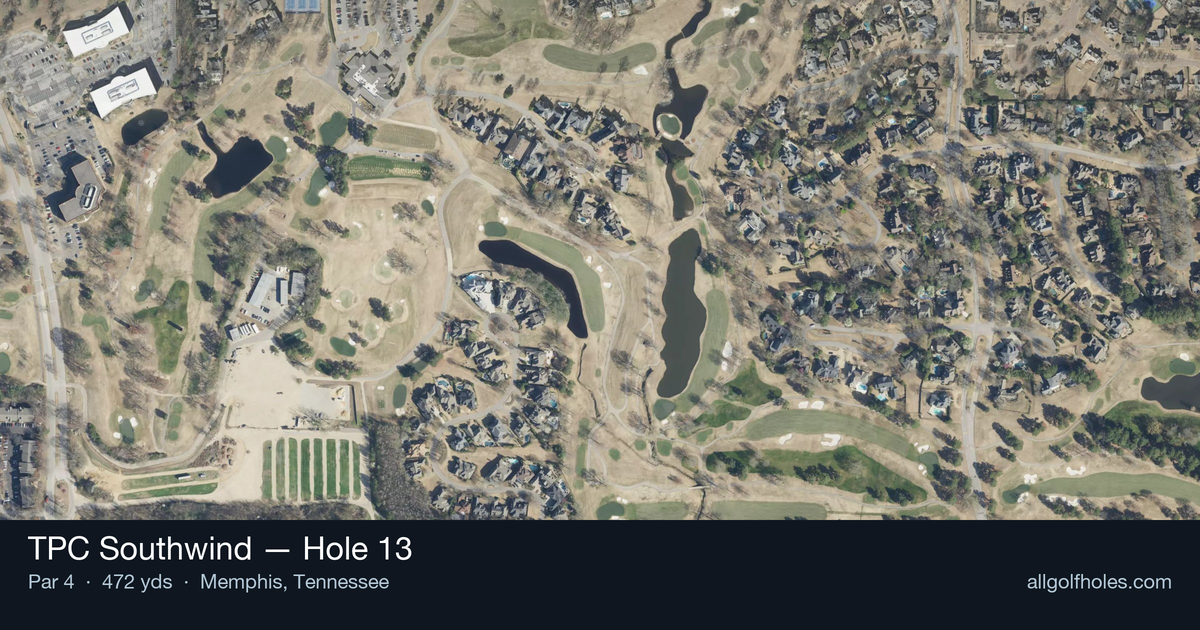
Aerial source not provided
Green size: 29 yds deep × 34 yds wide
Scorecard yardage is for Championship tees. The aerial shows its labeled reference position; distance rings measure to the green.
Championship tees · Par 4 · 472 yards
The plan for No. 13
The 13th hole at TPC Southwind presents a deceptively challenging straight par 4 that demands precision over power. At 472 yards, this hole requires a strategic tee shot to position for an optimal approach to the small, well-protected green. The fairway offers a generous landing area, but the real test comes with the second shot, where accuracy becomes paramount. The compact green complex punishes wayward approaches, making club selection and distance control crucial for scoring opportunities. As the back nine builds momentum toward TPC Southwind's famous finishing stretch, this hole serves as a critical scoring opportunity that can either propel rounds forward or derail them with careless execution.
Off the tee
Your tee shot strategy should focus on positioning rather than distance. A well-struck driver or 3-wood to the center-right portion of the fairway typically provides the ideal approach angle. The key is avoiding the temptation to overpower this hole - a controlled tee shot that finds the short grass around the 250-yard mark leaves you in prime position. Consider club selection based on wind conditions and pin position, as leaving yourself a comfortable approach distance is more valuable than maximum distance here.
Approach & recovery
The approach shot is where this hole shows its teeth. With a small green as your target, precision trumps power every time. Depending on your tee shot placement, you'll likely face a mid-iron to short-iron approach. Focus on the center of the green regardless of pin position - the compact target makes aggressive pin-hunting a risky proposition. Take one extra club if you're between distances, as coming up short or flying the green both present difficult recovery situations.
On the green
The small putting surface demands respect and careful speed control. Approach putts with conservative pace, as running putts past the hole on this tight green can leave challenging comeback attempts. Focus on lag putting to the center of the green when facing longer putts, and trust your line on shorter attempts. The compact nature means most putts will be relatively straight, but don't underestimate subtle breaks. ## RISK VS REWARD This hole offers a classic risk/reward scenario disguised as a straightforward par 4. The reward comes from aggressive approach shots that attack pin positions, potentially setting up short birdie putts. However, the risk of missing the small green entirely can lead to difficult up-and-downs and potential bogeys. The smart play is conservative - aim for the center of the green and take your pars, with the occasional birdie when you execute perfectly. ## DIFFERENT SKILL LEVELS **High Handicappers:** Play this hole conservatively from tee to green. Use a fairway wood or hybrid off the tee if driver accuracy is inconsistent. On approach shots, always aim for the center of the green regardless of pin position, and take enough club to ensure you reach the putting surface. **Low Handicappers:** This becomes a birdie opportunity with precise execution. You can be more aggressive with driver placement to optimize approach angles, and consider attacking certain pin positions when conditions favor accuracy. However, even scratch players should respect the small green and avoid forcing difficult shots. The 13th hole exemplifies how strategic golf course design can create challenge without relying on obvious hazards - sometimes the most demanding test comes from precision requirements rather than penalty areas.
Hole 13 Green Complex
Mapped green boundary
Green size: 4,937 sq ft
Course coverage
Tournament and creator videos about TPC Southwind — shared course coverage, not hole-specific clips.
Tournament coverage
FedEx St. Jude Championship highlights
FedEx St. Jude Championship | Final Round Highlights
2025
How did Hole 13 play?
How did this hole play today?
Frequently asked questions
Yardage reference: Championship tees · 472 yards.
What's the best strategy off the tee?
↓
For this 472-yard par 4, most players will hit driver to set up a comfortable approach.
How difficult is hole 13?
↓
This hole is one of the tougher holes on the course for most golfers. Key challenges include: long par 4, water in play, heavily bunkered.
How big is the green on hole 13?
↓
The green is medium-sized with moderate targets. Pay attention to pin placement when selecting your approach club.
Which side of the fairway is safer on hole 13?
↓
Aim for the right side of the fairway when possible. Missing left (water) brings more trouble into play.
What's a good score on hole 13?
↓
This hole is one of the tougher holes where par feels like birdie. A challenging par 4. Accept that bogey happens and avoid big numbers.