Hole 1 at TPC Southwind
- Par
- 4
- Yardage
- 434 yds
- Stroke index
- 5
- Hazards
- 6 bunkers · Water
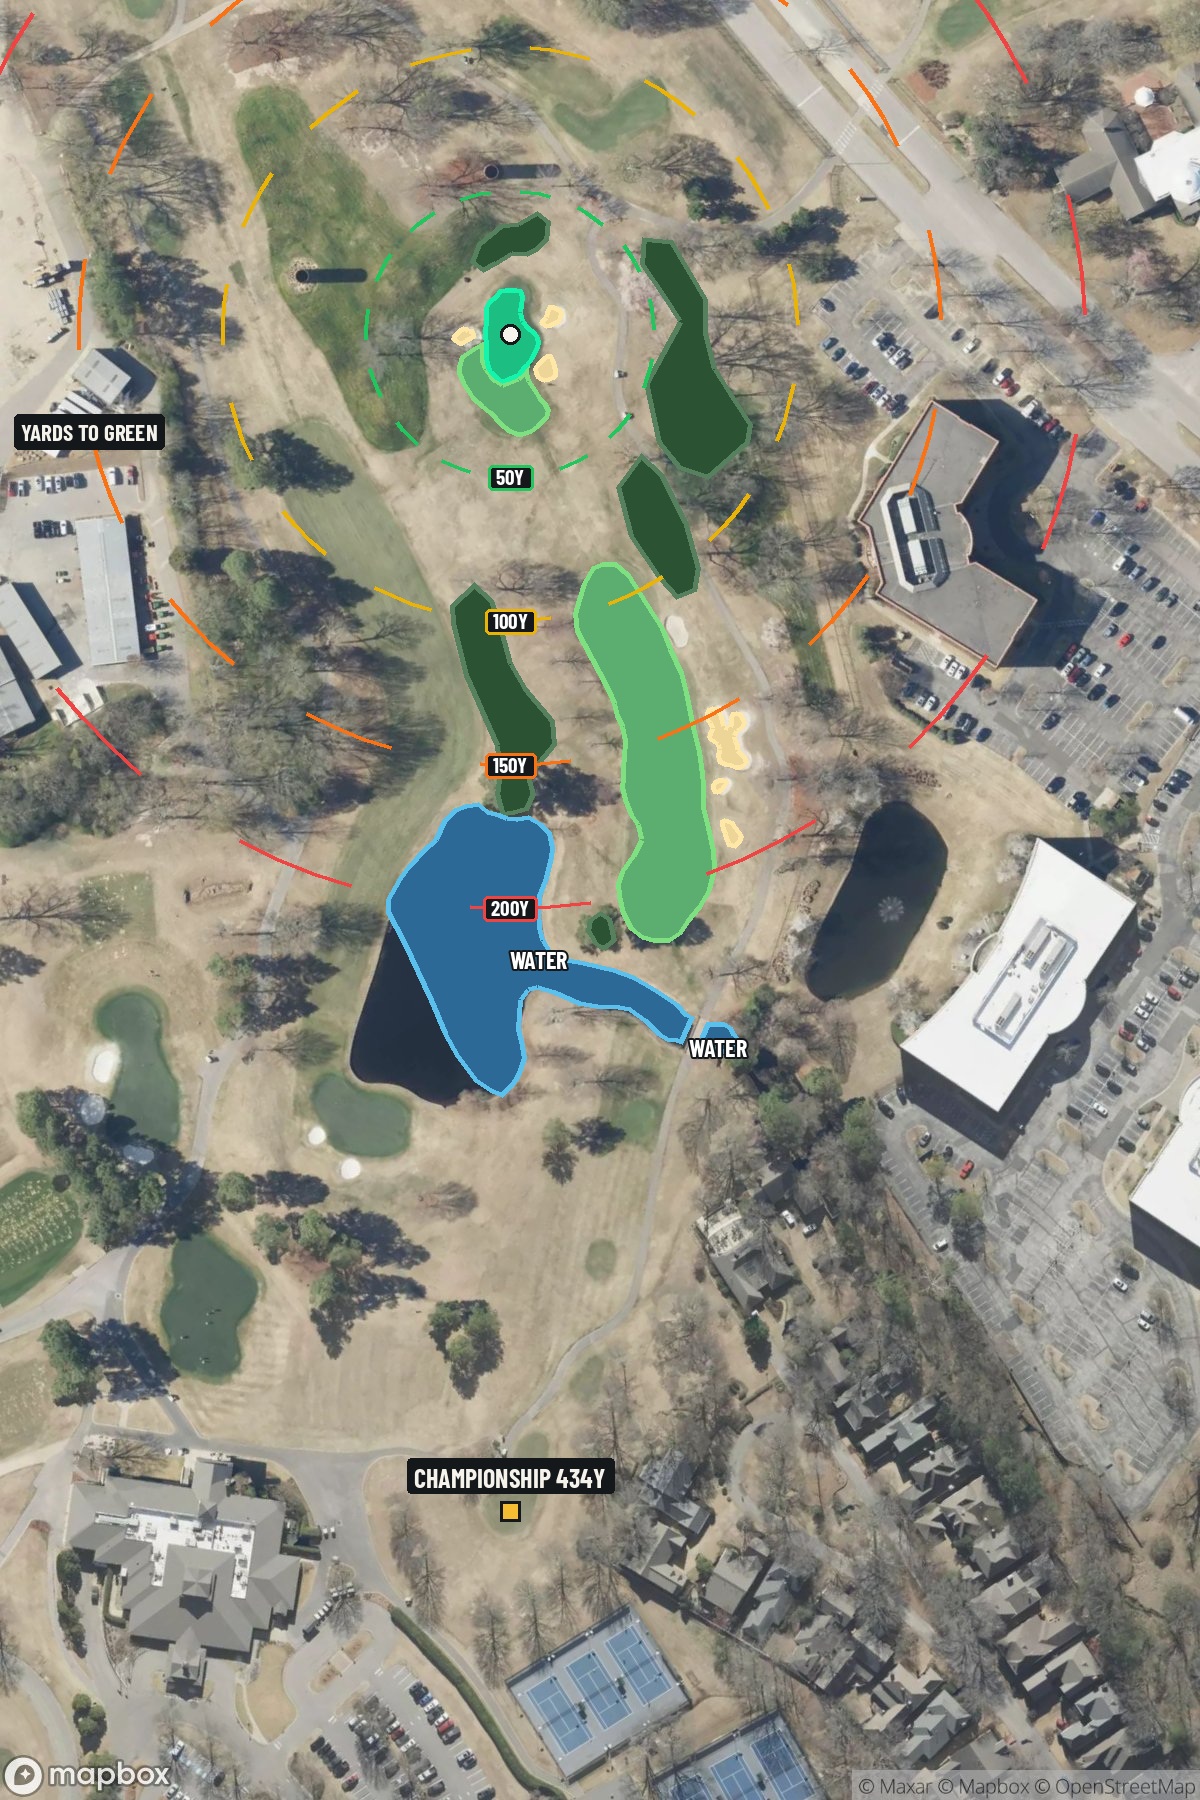 Hole 1 map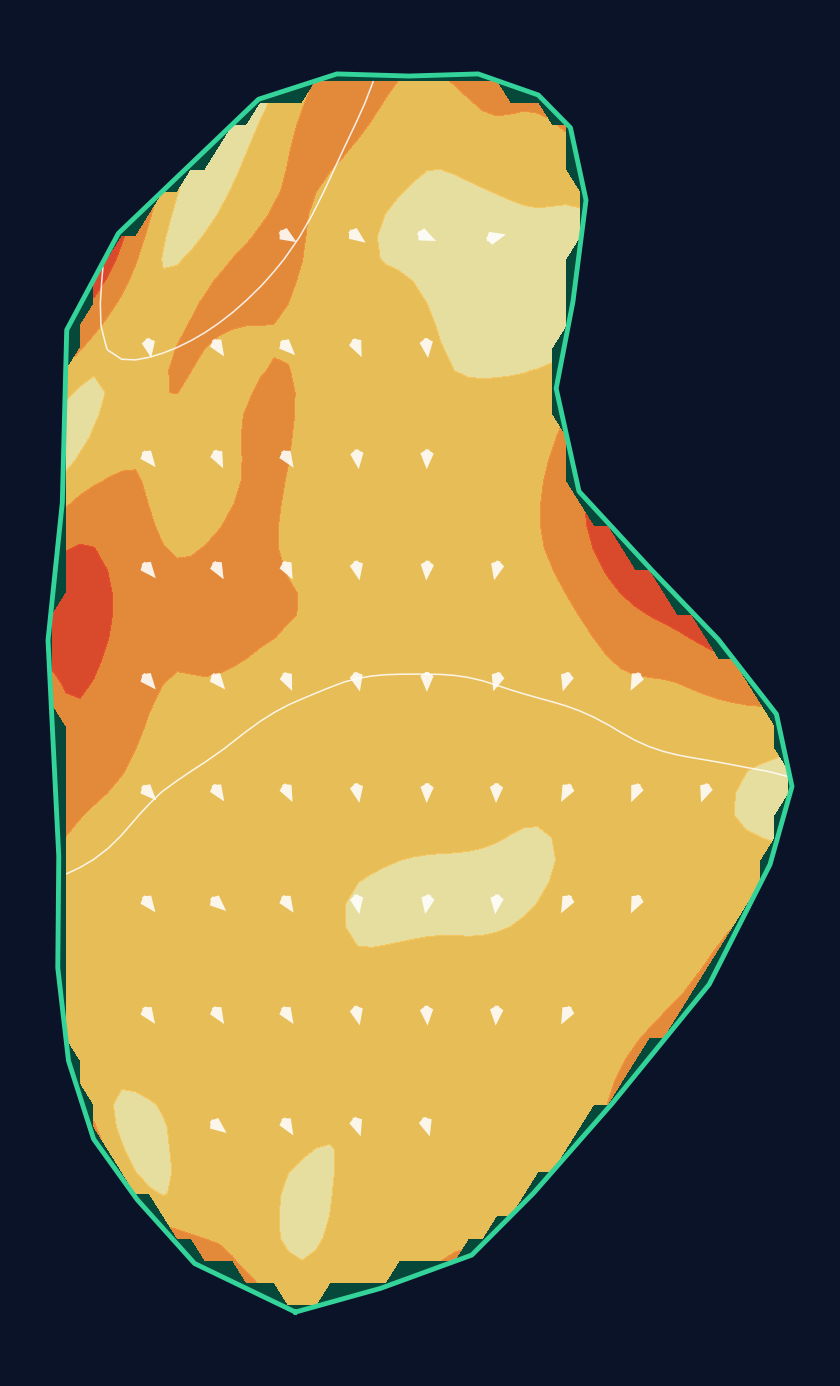
20 yd wide × 33 yd deep · 2.2 ft total elevation range
Light = gentler slope · Red = steeper slope
White lines: 1 foot of elevation. Arrows: downhill. General terrain, not a pin read.
Approach from bottom
Contour source
USGS one meter x24y389 TN ShelbyCo 2017 · collection 2017
Map source & reference
Mapbox Satellite composite · capture date not provided. Green at the top; the labeled map reference is below.
Scorecard yardage is for Championship tees. The aerial shows its labeled reference position; distance rings measure to the green.
Championship tees · Par 4 · 434 yards
The plan for No. 1
TPC Southwind hole 1 sets an immediate tone for this championship Memphis venue, demanding precision from the opening tee shot. This straight par 4 stretches 434 yards through what was once rolling dairy farmland, establishing the strategic mindset required for a course that has tested PGA Tour professionals for decades. The tee shot must navigate past strategically positioned trees that frame the landing area, requiring golfers to commit to their line early in the round. With no water hazards threatening this opener, players can focus on finding the optimal position for their approach shot to the compact green complex. The small green demands accuracy with mid-irons, setting up the mental challenge that defines TPC Southwind's reputation as a thinking player's course that rewards strategic golf over pure power.
Off the tee
Your tee shot strategy should focus on finding the optimal landing zone in the fairway, typically around the 250-yard mark for longer hitters. Driver is the preferred club for most golfers, as the extra distance will leave a more manageable approach shot to the small green. Target the center-right portion of the fairway to set up the best angle for your approach. While there are no major hazards off the tee, accuracy remains crucial as missing the fairway will complicate your approach shot significantly.
Approach & recovery
The approach shot is where this hole can make or break your score. With a small green as your target, club selection becomes critical - expect to hit anything from a mid-iron to a long-iron depending on your tee shot distance and pin position. The key is taking enough club to ensure you reach the putting surface, as coming up short leaves a difficult up-and-down. Aim for the center of the green unless the pin is accessible, and don't be afraid to take an extra club to ensure you clear any front-edge trouble.
On the green
The small green demands precise putting and careful speed control. Read putts conservatively, as the compact surface means even slight misjudgments in pace can leave challenging comeback putts. Focus on getting your first putt close to the hole rather than being overly aggressive, especially on longer putts. The green's size works in your favor for shorter putts, so lag putting becomes essential for longer attempts. ## RISK VS REWARD This opening hole offers a moderate risk/reward proposition. The reward comes from aggressive tee shots that set up shorter approach shots, potentially creating birdie opportunities. However, the risk lies in the precision required for both shots - missed fairways lead to difficult approaches, and missed greens make par a challenge. The smart play is controlled aggression: commit to your tee shot but prioritize accuracy on the approach. ## DIFFERENT SKILL LEVELS **Higher Handicap Players**: Focus on keeping the ball in play off the tee, even if it means using a 3-wood or hybrid for better accuracy. Accept that you may need two shots to reach the green and plan accordingly. Prioritize hitting the green over attacking pins, and take your par when possible. **Lower Handicap Players**: This hole presents a legitimate birdie opportunity with two quality shots. Be aggressive with your driver to maximize distance, but maintain your commitment to accuracy on the approach shot. The small green rewards precise iron play, so trust your yardages and don't hesitate to attack accessible pins. The first hole at TPC Southwind serves as an excellent barometer for how your ball-striking will perform throughout the round, making it essential to start with confidence and smart course management.
Hole 1 Green Complex & Slope
USGS 3DEP terrain analysis
Green size: 3,511 sq ft
Course coverage
Tournament and creator videos about TPC Southwind — shared course coverage, not hole-specific clips.
Tournament coverage
FedEx St. Jude Championship highlights
FedEx St. Jude Championship | Final Round Highlights
2025
How did Hole 1 play?
How did this hole play today?
Frequently asked questions
Yardage reference: Championship tees · 434 yards.
What's the best strategy off the tee?
↓
For this 434-yard par 4, most players will hit driver to set up a comfortable approach.
How difficult is hole 1?
↓
This hole is one of the tougher holes on the course for most golfers. Key challenges include: water in play, heavily bunkered, small green.
How big is the green on hole 1?
↓
The green is small and requires precision. Expect challenging pin positions with limited room for error.
What's a good score on hole 1?
↓
This hole is a demanding hole where bogey is not unusual. This longer par 4 will test most golfers. Focus on position over distance.