Hole 9 at TPC Southwind
- Par
- 4
- Yardage
- 457 yds
- Stroke index
- 1
- Hazards
- 2 bunkers · Water
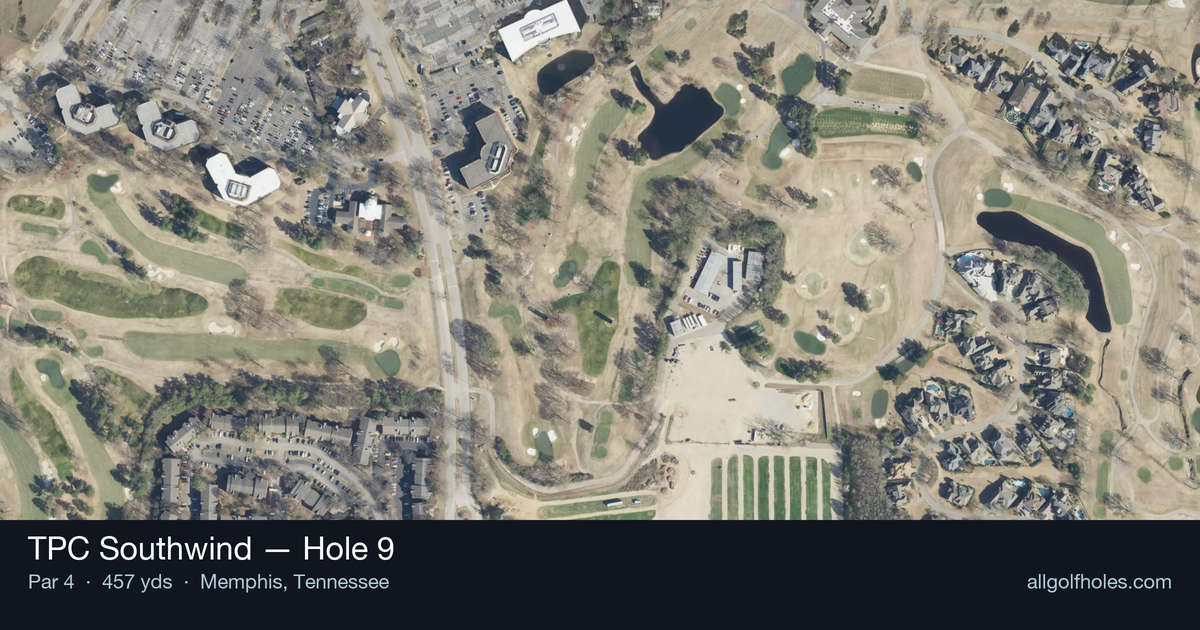
Aerial source not provided
Green size: 32 yds deep × 30 yds wide
Scorecard yardage is for Championship tees. The aerial shows its labeled reference position; distance rings measure to the green.
Championship tees · Par 4 · 457 yards
The plan for No. 9
TPC Southwind hole 9 stands as the course's most demanding test, earning its reputation as the hardest hole on the championship layout. This 457-yard par 4 presents a strategic puzzle from the tee, where a creek bisects the fairway and demands precise positioning. The tee shot must navigate past a prominent tree while finding the optimal angle for the approach. What awaits is a thrilling short iron over water to a small island green, reminiscent of TPC Sawgrass's famous 17th but with its own unique character. A pot bunker guards the front edge, adding another layer of precision required. This closing hole of the front nine combines risk and reward perfectly, where bold play is rewarded but mistakes are severely punished in true TPC fashion.
Off the tee
The tee shot strategy revolves around navigating the creek that bisects the fairway while positioning for the best approach angle. The key is finding the optimal landing zone that provides a clear shot to the green while avoiding the water hazard. Most players should focus on accuracy over distance, selecting a club that ensures they can carry the creek comfortably while staying in the fairway. The large tree mentioned in course descriptions adds another layer of complexity to club selection and target line. Position is more valuable than distance here - a shorter drive in the fairway beats a longer drive in trouble every time.
Approach & recovery
The approach shot requires a short iron over water to a small, challenging green. The small pot bunker guarding the front edge demands precise distance control and club selection. With the green's compact size, there's little margin for error in both distance and direction. The key is committing to your club selection and making an aggressive swing - tentative shots often find the water or bunker. Pay careful attention to pin position, as the small green means different quadrants can play significantly different. When the pin is tucked behind the front bunker, consider taking extra club and playing to the back of the green.
On the green
The small green size means putting becomes a premium skill on this hole. With limited real estate, approach shots that miss their target often leave challenging recovery putts. Focus on getting your approach shot to the correct level of the green relative to the pin position. The compact nature means even seemingly makeable putts can have significant break. Take extra time to read the green, as three-putts can quickly turn a good score into a disappointing one. ## RISK VS REWARD This hole offers limited risk/reward opportunities, instead demanding solid execution throughout. The primary decision point comes on the tee shot - how aggressive to be in challenging the creek for better position. Conservative players should focus on finding the fairway and accepting a longer approach shot. More confident ball-strikers might challenge the creek carry for a shorter iron into the green. However, the penalty for missing is severe, making the conservative approach the percentage play for most golfers. ## DIFFERENT SKILL LEVELS **High Handicappers:** Focus entirely on keeping the ball in play. Use whatever club ensures you can comfortably carry the creek on your tee shot, even if it means hitting 5-iron or hybrid off the tee. On the approach, take one extra club and aim for the center of the green regardless of pin position. The small target and water hazard make accuracy more important than getting close to every pin. **Low Handicappers:** Can be more aggressive with driver off the tee if they're confident in their accuracy. The shorter approach shot from an optimal drive position is worth the risk for skilled players. On approach shots, low handicappers can attack pins more aggressively, but should still respect the front bunker and water hazard. Consider the risk of short-siding yourself on this small green when pins are tucked. This hole rewards patient, strategic golf over aggressive play. With its reputation as the course's toughest test, making par here is always a victory and sets up a strong finish to the front nine.
Hole 9 Green Complex
Mapped green boundary
Green size: 4,505 sq ft
Course coverage
Tournament and creator videos about TPC Southwind — shared course coverage, not hole-specific clips.
Tournament coverage
FedEx St. Jude Championship highlights
FedEx St. Jude Championship | Final Round Highlights
2025
How did Hole 9 play?
How did this hole play today?
Frequently asked questions
Yardage reference: Championship tees · 457 yards.
What's the best strategy off the tee?
↓
For this 457-yard par 4, most players will hit driver to set up a comfortable approach.
How difficult is hole 9?
↓
This hole is one of the tougher holes on the course for most golfers. Key challenges include: long par 4, water in play.
What hazards should I watch out for on hole 9?
↓
Key hazards include: 2 greenside bunkers; water at 402.8 yards. Plan your shots to avoid these trouble spots.
How big is the green on hole 9?
↓
The green is medium-sized with moderate targets. Pay attention to pin placement when selecting your approach club.
What's a good score on hole 9?
↓
This hole is one of the tougher holes where par feels like birdie. A challenging par 4. Accept that bogey happens and avoid big numbers.