Hole 12 at TPC Southwind
- Par
- 4
- Yardage
- 406 yds
- Stroke index
- 14
- Hazards
- 4 bunkers · Water
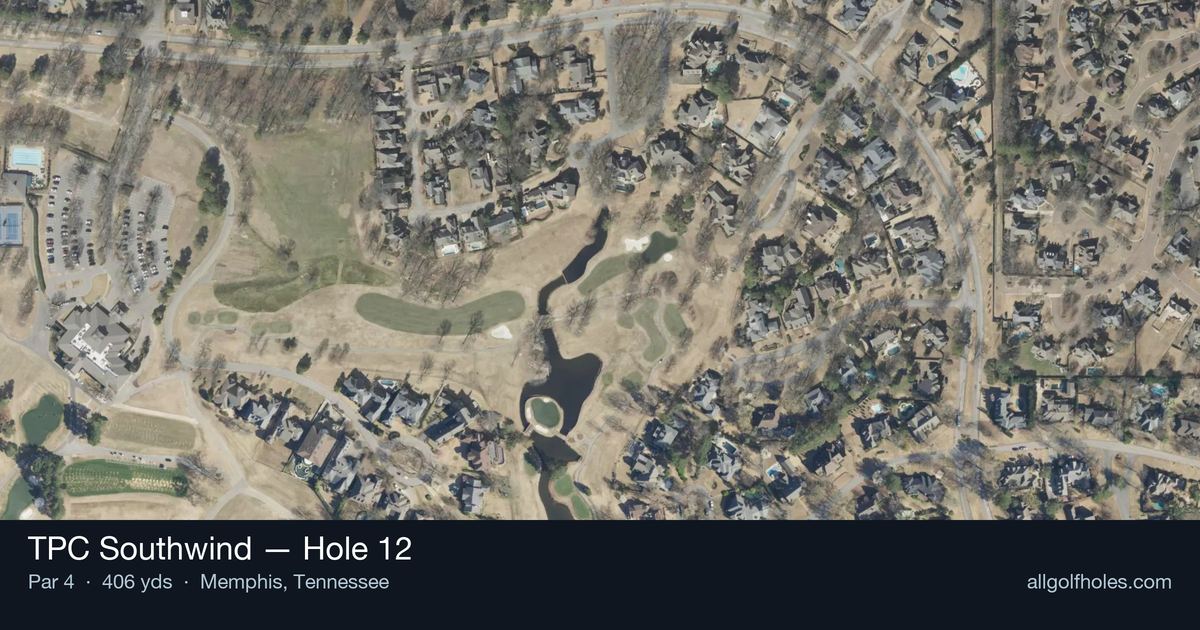
Aerial source not provided
Green size: 27 yds deep × 30 yds wide
Scorecard yardage is for Championship tees. The aerial shows its labeled reference position; distance rings measure to the green.
Championship tees · Par 4 · 406 yards
The plan for No. 12
TPC Southwind's 12th hole presents a strategic mid-length par 4 that rewards precision over power. Bending right at 406 yards, this dogleg right demands golfers shape their tee shot to find optimal positioning, avoiding the water hazard lurking along the right side. The fairway funnels players toward a green complex well-defended by bunkers on both flanks, with mature woods framing the left edge for added visual intimidation. Success here hinges on smart course management—favor the inside of the dogleg to open the short-iron approach angle. The well-guarded putting surface punishes careless shots, making this understated par 4 a genuine test of golf strategy rather than raw distance, embodying the tactical challenges that make TPC Southwind hole 12 a memorable stop during tournament week.
Off the tee
Off the tee, prioritize accuracy over raw distance. Hole 12 rewards a ball positioned in the fairway that sets up a clean look at the green, so club down if needed—a well-struck 3-wood or long iron that finds the short grass will serve you far better than a driver leaked into trouble. Think of this tee shot as setting the table for a short-iron approach rather than trying to overpower the hole. Once you're in position, the approach is all about precision into a green that's well-protected. With a short iron in hand, focus on controlling your distance and taking dead aim at the flag, but respect any trouble around the putting surface—this isn't a hole where you can bail out and still expect an easy up-and-down. Favor the correct portion of the green based on your pin position, and don't be afraid to play to the fat side if you're unsure of the exact number. Around the green, expect a stern short-game test. If you miss, choose a landing spot that allows the ball to release toward the hole rather than a low-percentage flop over trouble. Putt or chip conservatively from tricky spots rather than getting greedy. What to avoid: don't overclub off the tee trying to shorten the approach, and don't attack pins aggressively when position play would serve you better. Patience and precision, not power, are what make Hole 12 a scoring opportunity.
Approach & recovery
With the tee shot placed correctly, most players will have a short-iron to mid-iron approach remaining. The green is defended by two bunkers around the putting surface and a wooded area tight to one side, so precise club selection is essential — take enough club to reach the target line but avoid overcooking it into trouble long or short. The preferred angle of attack is from the left side of the fairway, opening up the green and reducing the risk of catching the greenside sand. Approaches from the right side of the fairway (if a player strays there) bring the bunkers and woods much more into play.
On the green
While specific green contours remain unknown, players should expect a well-protected putting surface that punishes short-sided misses given the tight bunkering and nearby woods. Take extra care to two-putt from testing distances, especially if the pin is tucked near any of the greenside hazards. Conservative lag putting from long range is the smart play — this is a green where avoiding three-putts matters more than attacking every flag. 5. Risk vs. Reward The main risk/reward decision comes at the tee. Players tempted to challenge the dogleg by cutting the corner closer to the water can shorten the approach and set up a scoring opportunity with a wedge in hand. However, the reward is modest compared to the risk — a mistimed shot right brings the water hazard directly into play. For most golfers, the smarter risk/reward line is playing safely left, accepting a slightly longer approach in exchange for eliminating any chance of a penalty stroke. 6. Strategy by Skill Level High-handicap players: Prioritize staying dry and finding the fairway. Club down off the tee if needed to guarantee a good angle, and don't be afraid to lay up short of the greenside bunkers on the approach rather than challenging tucked pins. Low-handicap players: This is a hole where a confident, well-struck tee shot down the left-center line sets up a scoring chance. Skilled players can be more aggressive with their approach club selection, attacking pins when the angle allows, but should still respect the bunkers and woods framing the green — this is not a hole to force circumstances. Ultimately, Hole 12 is a straightforward but demanding par 4 that rewards golfers who commit to smart target lines and disciplined club selection rather than trying to overpower it. Playing away from the water and setting up a comfortable approach angle is the surest path to a solid score.
Hole 12 Green Complex
Mapped green boundary
Green size: 4,217 sq ft
Course coverage
Tournament and creator videos about TPC Southwind — shared course coverage, not hole-specific clips.
Tournament coverage
FedEx St. Jude Championship highlights
FedEx St. Jude Championship | Final Round Highlights
2025
How did Hole 12 play?
How did this hole play today?
Frequently asked questions
Yardage reference: Championship tees · 406 yards.
What's the best strategy off the tee?
↓
For this 406-yard par 4, most players will hit driver to set up a comfortable approach.
How difficult is hole 12?
↓
This hole is one of the tougher holes on the course for most golfers. Key challenges include: water in play, heavily bunkered, small green.
How big is the green on hole 12?
↓
The green is small and requires precision. Expect challenging pin positions with limited room for error.
Which side of the fairway is safer on hole 12?
↓
Aim for the left side of the fairway when possible. Missing right (water) brings more trouble into play.