Hole 5 at TPC Southwind
- Par
- 5
- Yardage
- 485 yds
- Stroke index
- 11
- Hazards
- 4 bunkers
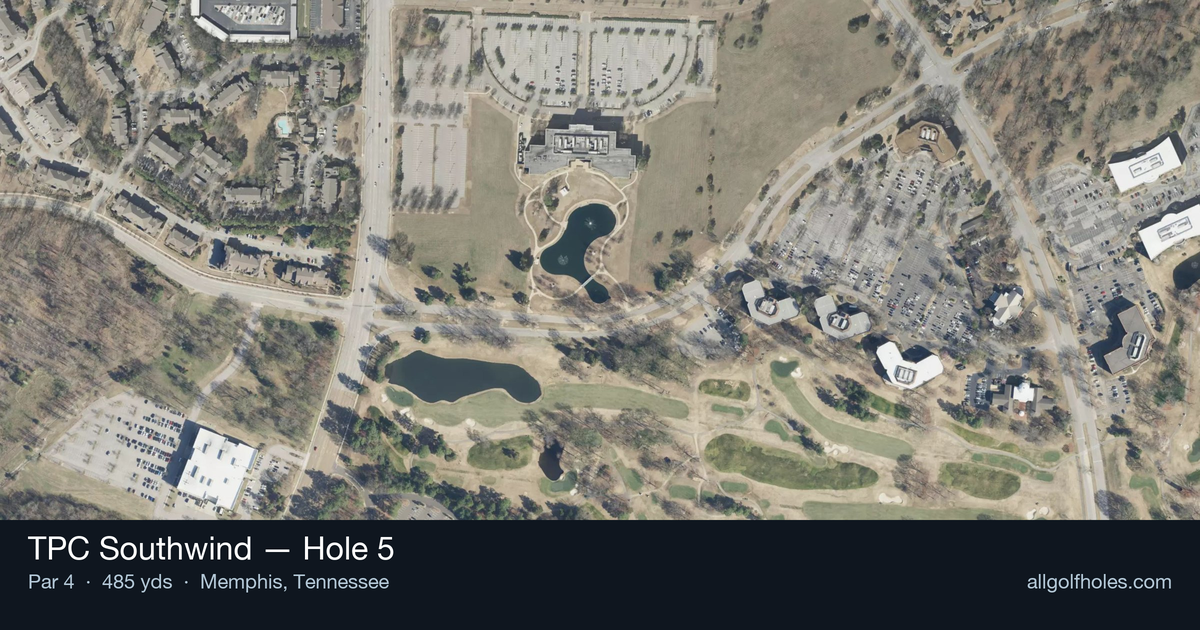
Aerial source not provided
Green size: 28 yds deep × 30 yds wide
Scorecard yardage is for Championship tees. The aerial shows its labeled reference position; distance rings measure to the green.
Championship tees · Par 5 · 485 yards
The plan for No. 5
TPC Southwind's 5th hole plays a dual identity that defines its character. At 485 yards on a straight path to the green, members tackle it as a three-shot par 5, plotting a strategic route around the trio of greenside bunkers guarding the putting surface. Come FedEx St. Jude Championship week, the scorecard transforms this into a beastly long par 4, demanding a crushing tee shot followed by a mid-to-long iron approach into a well-defended green complex. The sand bunkers positioned around the green punish any miss, requiring precision on the approach regardless of how the hole is being played. This adaptability—generous par 5 for weekend rounds, unforgiving par 4 for Tour professionals—makes hole 5 one of Southwind's most fascinating tests, rewarding accuracy over aggression.
Off the tee
On the 5th at TPC Southwind, the strategy shifts depending on how you're playing it. For members playing it as a par 5 at roughly 485 yards, driver off the tee is the right call, favoring the fairway width to set up a comfortable layup rather than pressing for the green in two — this hole rewards positioning over heroics. During St. Jude Championship week, however, remember the pros face this as a long par 4 at that same ~485 yards, meaning it's a true two-shot grind: driver followed by a mid-iron approach, not a three-shot birdie opportunity. Whichever way you're playing it, club selection off the tee should prioritize accuracy — a driver that finds the fairway beats one that's ten yards longer but in trouble. For your approach or layup shot, take enough club to avoid coming up short; misjudging distance here is a common mistake that leaves a tricky pitch or leaves the mid-iron approach short of a well-guarded green. Around the green, be conservative with any short-game shots — spinny, aggressive plays increase your risk of compounding a tough approach into a bogey or worse. Above all, avoid the temptation to force a low-percentage aggressive line off the tee or into the green; this hole punishes overreach, and a smart, patient plan — driver in play, sensible second shot, careful green-side touch — is your best route to a solid score.
Approach & recovery
The approach shot is where this hole reveals its teeth, with sand hazards positioned at multiple points around the green complex. Club selection depends heavily on which "version" of the hole you're playing: Member/par-5 play: After a smart lay-up, look for a short iron or wedge approach, allowing for a controlled trajectory that can hold the green and avoid the surrounding bunkers. Tournament/par-4 play: Professionals face a much longer approach—likely a mid-iron to long-iron depending on driving distance and conditions—demanding both distance control and precision to navigate the sand hazards guarding the green on multiple sides. In either scenario, favor an approach angle that keeps you away from the greenside bunkers; playing to the fat part of the green rather than pin-hunting is the smarter play when the flag tucks near any of the sand hazards.
On the green
With green size and shape data unavailable, golfers should rely on standard putting fundamentals here: read the break based on overall course topography and lag putts to challenging pin positions rather than attacking flags. Given the bunker placement around the green, expect that many approach shots—especially from the rough or from longer tournament-distance irons—will finish below the hole, requiring uphill putts that are generally more manageable for scoring opportunities. 5. Risk vs Reward The risk/reward calculus on this hole shifts dramatically based on context. For members playing it as a par 5, the risk/reward decision comes on the second shot: attempting to reach the green in two offers eagle or easy birdie potential but brings the sand hazards squarely into play if the shot is off-line or comes up short. The safer three-shot strategy virtually eliminates bunker risk and sets up a straightforward wedge for birdie. For Tour professionals facing this as a long par 4, the risk/reward is more subtle—it's less about a dramatic go-for-it decision and more about accepting the inherent difficulty of hitting a long-iron approach into a well-bunkered green. Any miss into the sand from that distance makes par a struggle, so precise course management on both tee shot and approach becomes the real "risk mitigation" strategy rather than any heroic play. 6. Different Skill Levels High-handicap players: Play this strictly as a three-shot par 5. Prioritize fairway position off the tee, take a comfortable layup distance that sets up a full-swing approach with a favorite wedge or short iron, and focus on avoiding the greenside bunkers above all else. Two-putting from a safe position on the green should be viewed as a successful hole. Mid-handicap players: Assess your tee shot outcome before deciding whether to attempt reaching the green in two. If the drive finds the fairway with a clear line, a long-iron or hybrid approach to the front of the green can set up a two-putt birdie chance—but bailing out to a layup remains the percentage play if sand hazards block the direct route. Low-handicap players and Tour professionals: Understand the hole's dual identity and adjust expectations accordingly. In casual or member rounds, attacking this par 5 with two well-struck shots offers legitimate scoring opportunity. During championship week, however, treat it with the respect due any long, demanding par 4—driver and a committed long-iron approach, prioritizing green-in-regulation over any thoughts of an easy par 5 birdie.
Hole 5 Green Complex
Mapped green boundary
Green size: 3,928 sq ft
Course coverage
Tournament and creator videos about TPC Southwind — shared course coverage, not hole-specific clips.
Tournament coverage
FedEx St. Jude Championship highlights
FedEx St. Jude Championship | Final Round Highlights
2025
How did Hole 5 play?
How did this hole play today?
Frequently asked questions
Yardage reference: Championship tees · 485 yards.
Can this par 5 be reached in two?
↓
At 485 yards, Reachable in two for longer hitters. Consider laying up short of hazards if going for it is risky.
How difficult is hole 5?
↓
This hole is a moderate challenge for most golfers. Key challenges include: heavily bunkered, small green.
How big is the green on hole 5?
↓
The green is small and requires precision. Expect challenging pin positions with limited room for error.
What's a good score on hole 5?
↓
This hole is a reachable par 5 with eagle chances for longer hitters. Birdie is very much in play here if you can set up a good approach.