Hole 10 at Hazeltine National Golf Club
- Par
- 4
- Yardage
- 452 yds
- Stroke index
- 0
- Hazards
- 7 bunkers · Water
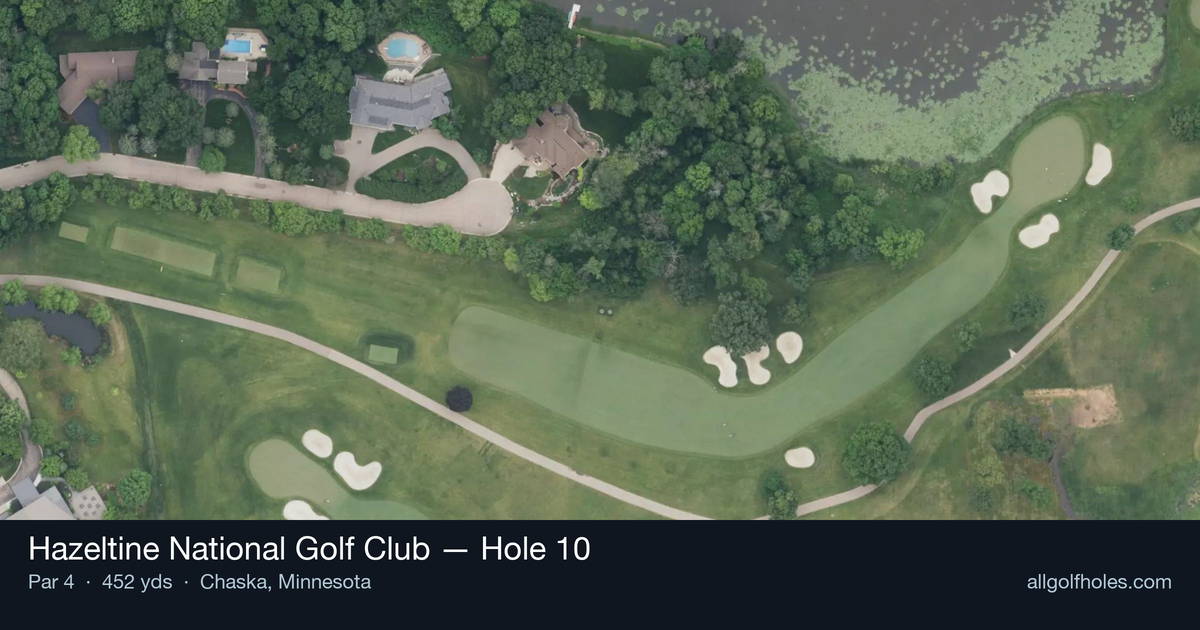
Aerial source not provided
Green size: 32 yds deep × 37 yds wide
Scorecard yardage is for Championship tees. The aerial shows its labeled reference position; distance rings measure to the green.
Championship tees · Par 4 · 452 yards
The plan for No. 10
The 10th hole at Hazeltine National offers one of golf's most spectacular settings, with the fairway providing incredible views that pair the green with the famous 16th green along the shores of Hazeltine Lake. This picturesque par 4 demands both precision and course management as players navigate toward a green that slopes treacherously from front right to back left.
Off the tee
Your tee shot strategy should prioritize accuracy over distance on this hole. The fairway offers a reasonable target, but positioning is crucial for the approach. Aim for the center-left portion of the fairway to give yourself the best angle into the green. Most players will benefit from a controlled driver or strong 3-wood, focusing on a smooth tempo rather than maximum distance. The target line should favor avoiding any trouble on the right side, as this can complicate your approach angle to the small green.
Approach & recovery
The approach shot is where this hole truly shows its teeth. With the green sloping from front right to back left toward Hazeltine Lake, club selection becomes critical. Take one extra club and focus on a controlled swing that ensures you reach the putting surface with adequate spin. Aim for the front portion of the green when possible, as balls that don't carry enough spin or come up short of their intended target can roll off the back toward the water. A mid-iron to long-iron will typically be required, depending on conditions and your tee shot position.
On the green
The green's slope from front right to back left creates several challenging scenarios for putting. Putts from above the hole require extreme caution, as the slope can quickly take balls past the cup and potentially off the green. When putting from below the hole, be aggressive enough to reach the cup but understand that pace control is paramount. Pin positions on the back portion of the green are particularly treacherous, as they bring the lake into play for any ball that rolls off the putting surface.
Watch for
- Water along the hole
- Greenside bunker (greenside)
- Fairway bunker crossing the landing zone
Hole 10 Green Complex
Mapped green boundary
Green size: 7,350 sq ft
How did Hole 10 play?
How did this hole play today?
Frequently asked questions
Yardage reference: Championship tees · 452 yards.
What's the best strategy off the tee?
↓
For this 452-yard par 4, most players will hit driver to set up a comfortable approach.
How difficult is hole 10?
↓
This hole is one of the tougher holes on the course for most golfers. Key challenges include: long par 4, water in play, heavily bunkered, large green requiring good lag putting.
How big is the green on hole 10?
↓
The green is fairly large with multiple pin positions. Lag putting becomes important on longer putts.
What's a good score on hole 10?
↓
This hole is one of the tougher holes where par feels like birdie. A challenging par 4. Accept that bogey happens and avoid big numbers.