Hole 1 at Grayhawk Golf Club (Raptor course)
- Par
- 4
- Yardage
- 413 yds
- Stroke index
- 10
- Hazards
- 4 bunkers
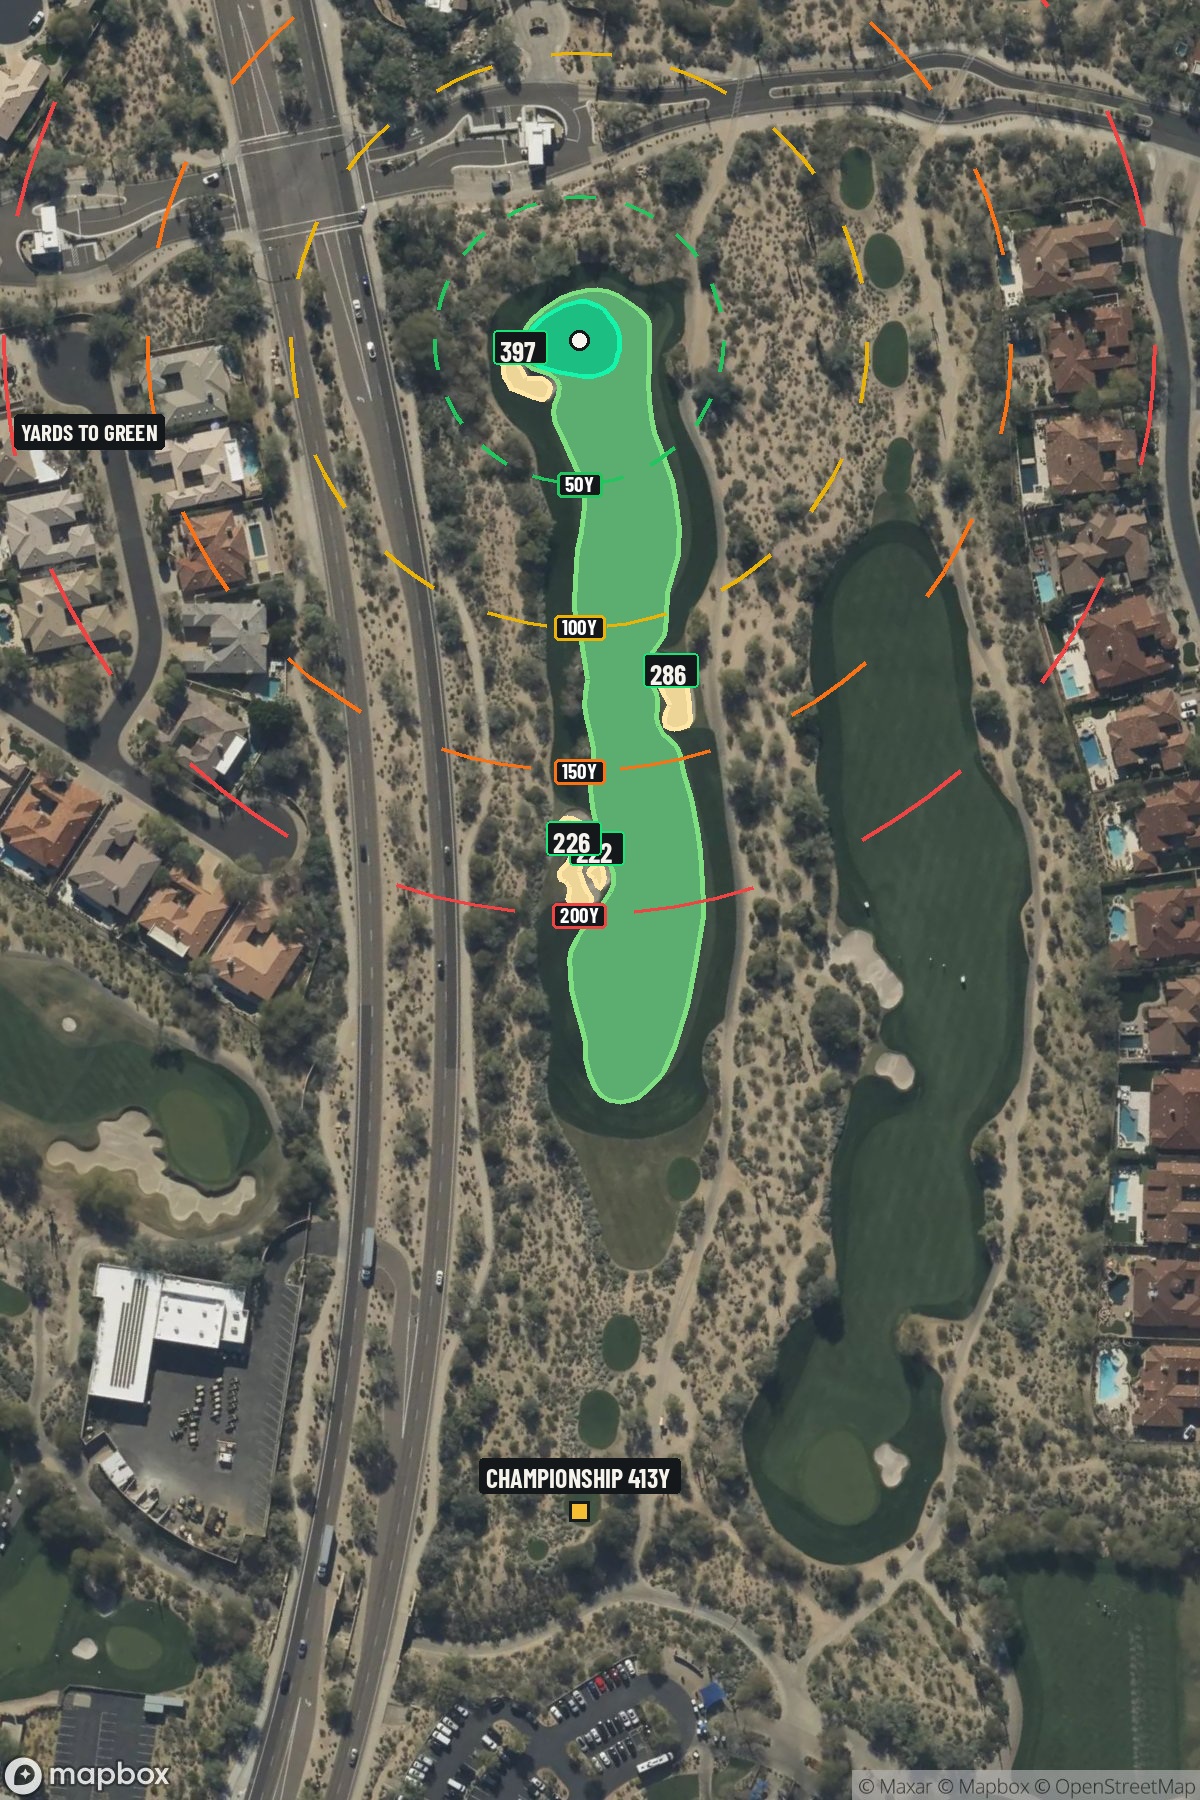 Hole 1 map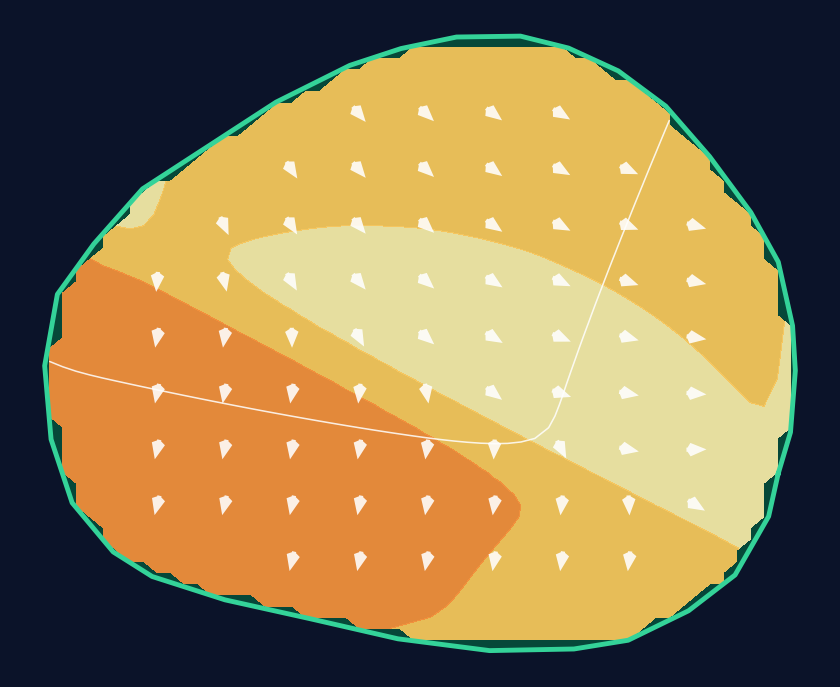
33 yd wide × 27 yd deep · 1.9 ft total elevation range
Light = gentler slope · Red = steeper slope
White lines: 1 foot of elevation. Arrows: downhill. General terrain, not a pin read.
Approach from bottom
Contour source
USGS 1 Arc Second n34w112 20260601 · collection 2018–2023
Map source & reference
Mapbox Satellite composite · capture date not provided. Green at the top; the labeled map reference is below.
Scorecard yardage is for Championship tees. The aerial shows its labeled reference position; distance rings measure to the green.
Championship tees · Par 4 · 413 yards
The plan for No. 1
Tom Fazio's opening statement at Grayhawk Golf Club (Raptor course) presents an immediate test of course management on this 413-yard par 4. The tee shot demands precision to avoid a gaping fairway bunker lurking on the right side, making the conservative play with a long iron or fairway wood the smart choice for most golfers. The real challenge emerges on the approach to an elevated green that slopes dramatically from back to front, featuring a lower left tier protected by a deep bunker. This green complex rewards accurate distance control while punishing anything short or left. The hole epitomizes Fazio's risk-reward philosophy, setting the tone for the high-stakes strategic decisions that define the Raptor course experience throughout the round.
Off the tee
The tee shot strategy revolves around the large fairway bunker positioned on the right side of the landing zone. **The conservative play is with a long iron or fairway wood just short of the right bunker**, which provides a safe angle into the green while avoiding trouble. More aggressive players can challenge the bunker with driver, but this requires precise execution and carries significant risk. Target the left-center of the fairway to provide maximum margin for error away from the bunker. Wind conditions in the Arizona desert can affect ball flight significantly, so factor in any crosswinds when selecting your target line. The straight layout means distance control is more important than working the ball, making this an ideal hole to establish rhythm early in the round.
Approach & recovery
The approach shot presents its own set of challenges with the elevated green featuring multiple tiers and strategic bunkering. The green slopes from back to front with a lower tier to the left that is guarded by a deep bunker. This creates a premium on club selection and precise distance control. When the pin is on the lower left tier, extra caution is required due to the protecting bunker. Favor the right side of the green to avoid this hazard, even if it means a longer putt. For pins on the main level, focus on taking enough club to ensure you reach the elevated surface, as coming up short often results in difficult recovery shots.
On the green
The small, elevated green rewards accurate approach shots but punishes misses. The back-to-front slope means putts from above the hole require delicate touch, while uphill putts from the front can be struck more aggressively. Pay special attention to the left tier, which plays significantly different from the main green surface. Putts crossing between tiers require careful speed control to navigate the slope effectively. The elevated nature of the green means approaches that miss the surface often leave challenging up-and-down opportunities. ## RISK VS REWARD The primary risk/reward decision occurs on the tee shot. Aggressive players can attempt to carry or work around the right fairway bunker with driver, potentially leaving a shorter iron into the green. However, finding the bunker typically results in a difficult recovery and potential bogey or worse. The safer strategy of laying back with a long iron or fairway wood leaves a longer approach but from a much more comfortable position. This conservative approach aligns well with the opening hole mentality of getting off to a solid start rather than gambling early in the round. ## DIFFERENT SKILL LEVELS **High-handicap players** should embrace the conservative strategy without hesitation. Use a long iron or hybrid off the tee, aiming for the left side of the fairway well away from the bunker. Focus on finding the green with the approach shot rather than attacking specific pin positions, and be content with two-putting for par. **Low-handicap players** can be more aggressive with driver if conditions permit, but should still respect the fairway bunker. These players can attack pin positions more aggressively and use the green's slopes to feed balls toward the hole. The key is recognizing when conditions favor aggression versus when discretion is the better part of valor. The first hole at Grayhawk Raptor exemplifies strategic golf course design, rewarding smart decision-making while punishing overly aggressive play. Success here comes from understanding your own capabilities and making club selections that maximize your chances of finding the fairway and green in regulation.
Watch for
- Course conditioning and mapped hazards may affect line selection; confirm from the aerial.
Hole 1 Green Complex & Slope
USGS 3DEP terrain analysis
Green size: 5,201 sq ft
How did Hole 1 play?
How did this hole play today?
Frequently asked questions
Yardage reference: Championship tees · 413 yards.
What's the best strategy off the tee?
↓
For this 413-yard par 4, most players will hit driver to set up a comfortable approach.
How difficult is hole 1?
↓
This hole is a moderate challenge for most golfers. Key challenges include: heavily bunkered.
How big is the green on hole 1?
↓
The green is medium-sized with moderate targets. Pay attention to pin placement when selecting your approach club.