Hole 8 at TPC Southwind
- Par
- 3
- Yardage
- 178 yds
- Stroke index
- 17
- Hazards
- 2 bunkers
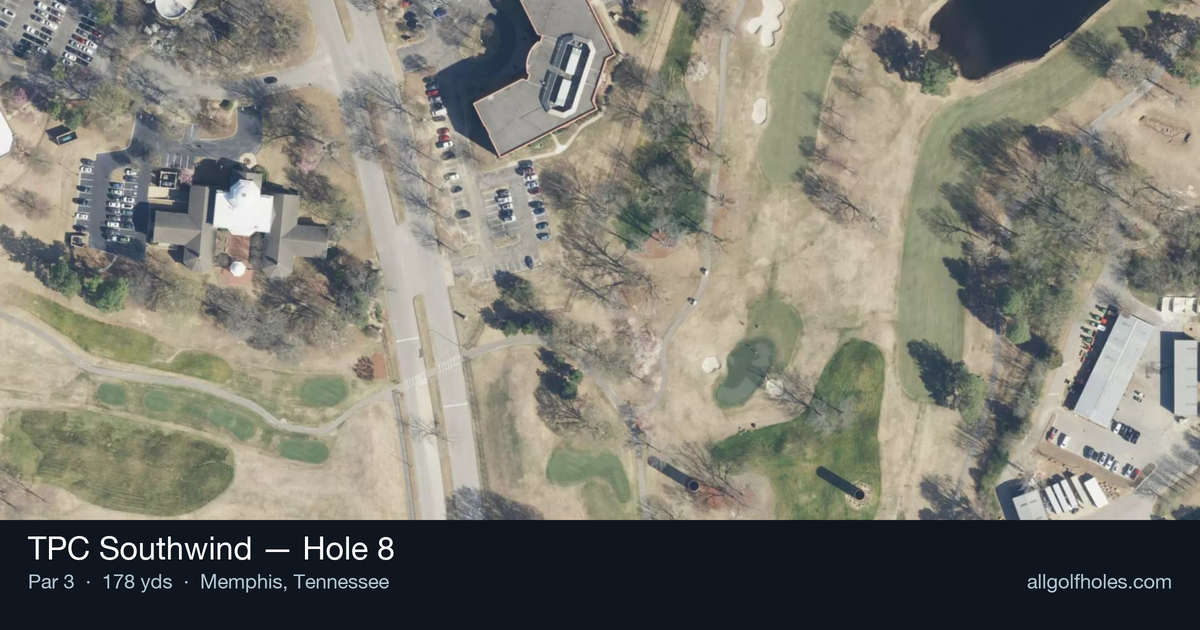
Aerial source not provided
Green size: 24 yds deep × 32 yds wide
Scorecard yardage is for Championship tees. The aerial shows its labeled reference position; distance rings measure to the green.
Championship tees · Par 3 · 178 yards
The plan for No. 8
TPC Southwind's hole 8 rewards precision over power, asking players to flight a short-to-mid iron into a green complex guarded on both sides by bunkers. At 178 yards, this par 3 looks simple on the scorecard but demands full attention on approach — flanking woods pinch the target line, particularly menacing on the right, while sand traps lurk to swallow any shot that drifts offline. The straight, direct routing offers no doglegs to disguise the challenge; what golfers see from the tee is exactly what they get; a clean, uncomplicated test of distance control. Miss the green complex and recovery becomes tricky, with bunkers and tree-lined edges complicating the up-and-down. It's a hole where club selection matters more than swagger, making disciplined golf strategy the real key to a solid score here.
Off the tee
Club selection is everything on this par 3, so commit to a number based on the pin position and prevailing wind rather than guessing. Take the yardage to the center of the green as your baseline, then adjust up or down depending on where the flag sits — favoring the fat part of the green is smarter than firing directly at a tucked pin guarded by sand. Around the green, remember the primary trouble here is the bunkering, not water, so your short-game focus should be on clean contact from the sand and on judging speed for slick, well-protected putting surfaces. If you miss, miss on the side away from the deepest bunker complex — an uphill chip or a green-side bunker shot with plenty of room to work is far preferable to a downhill recovery. What to avoid: don’t overthink this hole as some dramatic all-or-nothing shot — it’s a precision test, not a spectacle. Skip aggressive flag-hunting when the pin is tucked near a bunker, and don’t let the presence of nearby water distract you into playing too conservatively short, which brings the front bunkers into play. Stay focused on solid, center-of-green execution, and this hole will reward smart, repeatable ball-striking over heroics.
Approach & recovery
Because this is a par 3, "approach" strategy is really about shot shape and trajectory into the green. A higher, softer-landing ball flight is preferable here, allowing the shot to hold on the green rather than releasing toward trouble. Pay close attention to which side the bunkers and woods pinch in from — favoring the opposite side of the green off the tee gives you a bailout buffer without sacrificing your birdie chances.
On the green
With green specifics unknown in terms of size and shape, players should rely on a conservative read until they get a feel for the surface in person. Historically, greens surrounded by bunkers like this tend to have subtle breaks toward the bunker sides, so be mindful of gravity pulling putts toward the sand on approach putts. Two-putting from anywhere on this green should be considered a good result — pin-hunting from long range is a low-percentage play given the surrounding hazards that punish any bailout miss. 5. Risk vs. Reward The risk/reward calculation on Hole 8 is refreshingly simple: attacking a tucked pin near either bunker complex offers a scoring opportunity for confident ball-strikers, but the reward rarely outweighs the risk of a bunker lie or a punched-out recovery from the woods. The smarter play for most golfers is to target the fat, safe portion of the green — even from 15-20 feet, a two-putt par protects your scorecard far better than a bogey resulting from a missed aggressive shot. 6. Different Skill Levels High-Handicap Players: Prioritize staying out of the bunkers and trees over pin-hunting. Club up or down conservatively to ensure you're taking full swings rather than delicate half-shots, and always aim for the center of the green regardless of pin position. A bogey here is a fine result if it means avoiding a compounding big number from a poor recovery shot. Low-Handicap Players: Skilled players can and should look to attack pins that are accessible without bringing the bunkers or woods into play, using controlled ball flight and spin to hold greens. This hole, ranked 17th in difficulty on the course, is a legitimate scoring opportunity — but only for those who commit fully to their club selection and target line rather than playing defensively out of habit.
Hole 8 Green Complex
Mapped green boundary
Green size: 3,574 sq ft
Course coverage
Tournament and creator videos about TPC Southwind — shared course coverage, not hole-specific clips.
Tournament coverage
FedEx St. Jude Championship highlights
FedEx St. Jude Championship | Final Round Highlights
2025
How did Hole 8 play?
How did this hole play today?
Frequently asked questions
Yardage reference: Championship tees · 178 yards.
What club should I use on this par 3?
↓
At 178 yards, most golfers will need a mid-iron (7-iron to 8-iron) to reach this green. Adjust for elevation, wind, and pin position.
How difficult is hole 8?
↓
This hole is a moderate challenge for most golfers. Key challenges include: small green.
What hazards should I watch out for on hole 8?
↓
Key hazards include: 2 greenside bunkers. Plan your shots to avoid these trouble spots.
How big is the green on hole 8?
↓
The green is small and requires precision. The green is wider than it is deep, rewarding shots that find the correct tier. Expect challenging pin positions with limited room for error.
What's a good score on hole 8?
↓
This hole is a solid par with birdie chances for precise approach shots. Making par is a good result here. Focus on hitting the green and avoiding three-putts.