Hole 11 at Sage Valley Golf Club
- Par
- 4
- Yardage
- 440 yds
- Hazards
- 4 bunkers
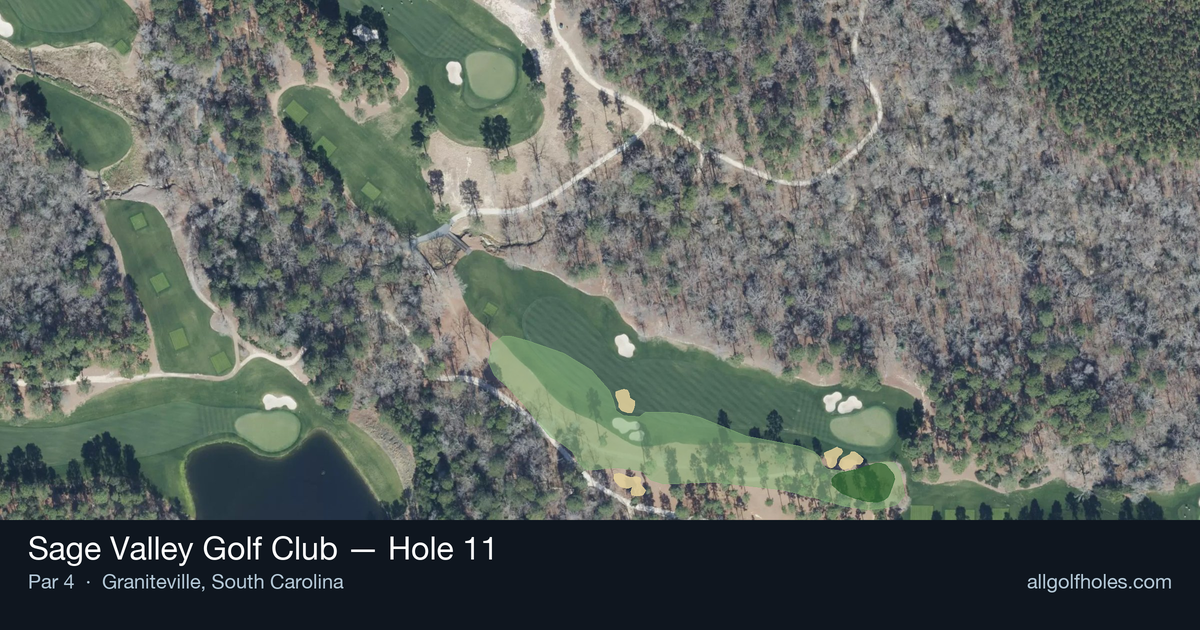
Aerial source not provided
Green size: 37 yds deep × 30 yds wide
Scorecard yardage is for Pro tees. The aerial shows its labeled reference position; distance rings measure to the green.
Pro tees · Par 4 · 440 yards
The plan for No. 11
Sage Valley Golf Club hole 11 presents a demanding 440-yard par 4 that epitomizes the championship caliber of this exclusive Tom Fazio masterpiece. This straight-away test requires precision from tee to green, with the small putting surface serving as the hole's primary defense. The generous fairway welcomes most tee shots, but the approach demands surgical accuracy to find the compact target. Without bunkers or water to intimidate, this hole relies purely on length and green complexity to challenge even accomplished players. The understated elegance typical of Sage Valley's design philosophy shines through, creating a deceptively simple hole that rewards strategic thinking and precise execution over raw power.
Off the tee
The key to success on this hole starts with finding the optimal landing zone off the tee. With a straight layout and no significant hazards, you have flexibility in your target line, but precision becomes paramount. Aim for the center-right portion of the fairway to set up the ideal approach angle. A well-struck driver or strong 3-wood should position you in the prime landing area, typically around 250-280 yards from the tee depending on conditions and your swing speed. Consider club selection carefully based on pin position and wind conditions. If the pin is tucked in a challenging location, prioritize accuracy over distance to ensure you have a clean look at your approach shot. The straight layout allows for aggressive play, but remember that positioning trumps pure distance on this hole.
Approach & recovery
The approach shot to this small green is where scores are truly made or broken. From your ideal fairway position, you'll likely face a mid-iron to short-iron approach, depending on your tee shot distance. The small green size means precision is non-negotiable – missing the putting surface will likely result in a challenging up-and-down opportunity. Focus on the center of the green unless you're completely confident in your distance control. With no major hazards protecting the green, the primary danger comes from simply missing the target altogether. Take one extra club if you're between distances, as being slightly long is often preferable to coming up short on approach shots to small greens.
On the green
Small greens typically feature subtle but significant slopes that can dramatically affect your putting. Spend extra time reading the green during your approach, as the limited real estate means every putt becomes crucial. Focus on speed control above all else – with less room for error, a putt that rolls off the green can quickly turn a scoring opportunity into a bogey or worse. Position your approach shots below the hole when possible, as uphill putts on small greens are generally more manageable than downhill attempts. The compact putting surface means most putts will be relatively short, so focus on starting your ball on the correct line rather than worrying about distance control. ## RISK VS REWARD This hole offers a classic risk/reward scenario in club selection and target choice. The aggressive play involves taking driver and attacking the pin position with your approach, potentially setting up birdie opportunities. The conservative approach focuses on finding the fairway with a controlled tee shot and hitting the center of the green with your approach. Given the small green size, the reward for aggressive play is significant – shorter approaches mean better birdie chances. However, the risk of missing the green entirely with a longer approach shot can lead to difficult recovery shots and potential bogeys. ## DIFFERENT SKILL LEVELS **High-Handicap Players:** Focus on finding the fairway with your most reliable tee shot, even if that means using a 3-wood or hybrid instead of driver. Aim for the center of the green with your approach shot and don't get greedy with pin hunting. Two-putting for par should be your primary goal, with any birdies being a bonus. **Low-Handicap Players:** You can be more aggressive with both tee shot and approach shot selection. Consider driver to maximize your scoring opportunity, but ensure you're committed to the shot. With shorter approaches available, you can attack pin positions more aggressively, but respect the small green size and have a solid miss strategy in place. The beauty of this hole lies in its apparent simplicity – no water hazards or bunkers to navigate – but the small green creates a precision challenge that separates good shots from great ones. Success here comes down to executing two quality shots and managing the putting surface effectively.
Watch for
- Course conditioning and mapped hazards may affect line selection; confirm from the aerial.
Hole 11 Green Complex
Mapped green boundary
Green size: 5,183 sq ft
Course coverage
Tournament and creator videos about Sage Valley Golf Club — shared course coverage, not hole-specific clips.
Featured by these creators
Creator videos about this course
YouTube creators who filmed or featured Sage Valley Golf Club. · Stats as of Oct 12, 2026 · 6d ago
The First Ever YouTube Match at Sage Valley
How did Hole 11 play?
How did this hole play today?
Frequently asked questions
Yardage reference: Pro tees · 440 yards.
What's the best strategy off the tee?
↓
For this 440-yard par 4, most players will hit driver to set up a comfortable approach.
How difficult is hole 11?
↓
This hole is a moderate challenge for most golfers. Key challenges include: heavily bunkered.
How big is the green on hole 11?
↓
The green is medium-sized with moderate targets. The green is wider than it is deep, rewarding shots that find the correct tier. Pay attention to pin placement when selecting your approach club.
What's a good score on hole 11?
↓
This hole is a demanding hole where bogey is not unusual. This longer par 4 will test most golfers. Focus on position over distance.