Hole 7 at Sage Valley Golf Club
- Par
- 3
- Yardage
- 240 yds
- Hazards
- 1 bunker · Water
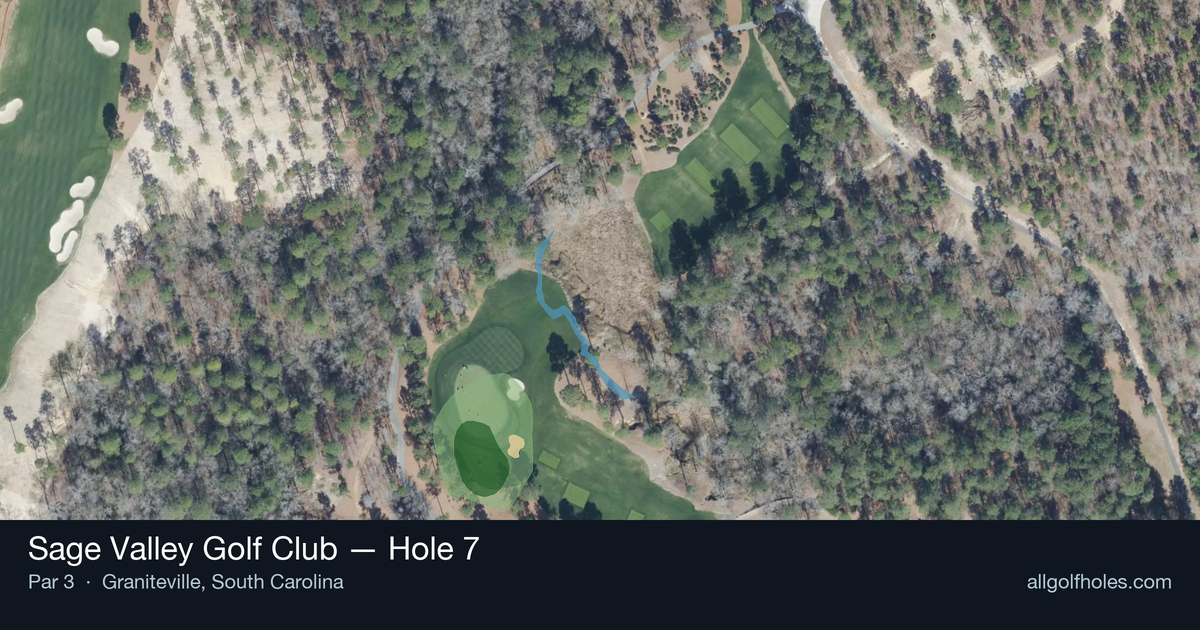
Aerial source not provided
Green size: 33 yds deep × 40 yds wide
Scorecard yardage is for Pro tees. The aerial shows its labeled reference position; distance rings measure to the green.
Pro tees · Par 3 · 240 yards
The plan for No. 7
At 240 yards, **Sage Valley Golf Club hole 7** presents a demanding **par 3** that epitomizes precision golf at this exclusive Tom Fazio masterpiece. This lengthy one-shotter demands complete commitment from the championship tees, where even accomplished players must reach for a mid-to-long iron to find the small, subtly contoured green complex. The hole's deceptive simplicity masks its true challenge – with minimal hazards protecting the target, success depends entirely on club selection and execution. The compact green rewards accurate **tee shots** but offers little margin for error, making distance control paramount. Wind conditions can dramatically alter club selection, adding another strategic layer to this elegant test. What makes this hole memorable is its pure, unadorned design philosophy – no tricks or gimmicks, just a straightforward examination of ball-striking ability that separates confident iron players from the field.
Off the tee
Club selection is paramount on this hole. Most golfers will be looking at anything from a 4-iron to a hybrid or even a fairway wood, depending on conditions and personal distances. The key is choosing a club you can swing with confidence and control rather than trying to muscle a shorter iron. Aim for the center of the green unless the pin position clearly favors one side. Take one extra club if there's any doubt - being long on a small green is often better than coming up short. Pay special attention to wind direction and strength, as it will significantly impact your club choice at this distance.
Approach & recovery
Since this is a par 3, your tee shot IS your approach shot. Focus on making a smooth, committed swing rather than trying to guide the ball to the target. The small green size means precision is more important than distance control - you want to find the putting surface first and worry about getting close to the pin second. If you're between clubs, take the longer option and make a controlled swing rather than forcing a shorter club.
On the green
Small greens typically feature subtle but important slopes that can be difficult to read from the tee. Take time during your pre-shot routine to study the green's contours and note the pin position. Two-putting from anywhere on this green should be considered a success. Be aggressive with your first putt to ensure you don't leave yourself a tricky second putt on what could be a sloped or undulating surface. ## RISK VS REWARD With no hazards present, the risk/reward calculation is refreshingly simple: the reward comes from being aggressive enough to attack the pin, while the risk lies in missing the small green entirely. The smart play is to aim for the center of the green and accept whatever putt you have, rather than getting too cute with pin-seeking shots that might miss the green completely. ## DIFFERENT SKILL LEVELS **High-Handicap Players:** Focus entirely on finding the green with whatever club gives you the most confidence. Don't worry about pin positions - aim for the fat part of the green and be thrilled with any putt inside 30 feet. Consider taking an extra club to ensure you carry any front-edge trouble. **Low-Handicap Players:** You can be more aggressive with pin hunting, especially when the pin is in the center or back portions of the green. Use the lack of hazards to your advantage by committing fully to your target line. This is a hole where good players should expect to make birdie with a quality shot, making it an important scoring opportunity in competitive rounds. The beauty of this hole lies in its simplicity - it's a pure test of ball-striking that rewards commitment and punishes indecision. Trust your yardage, pick your target, and execute with confidence.
Watch for
- Course conditioning and mapped hazards may affect line selection; confirm from the aerial.
Hole 7 Green Complex
Mapped green boundary
Green size: 6,716 sq ft
Course coverage
Tournament and creator videos about Sage Valley Golf Club — shared course coverage, not hole-specific clips.
Featured by these creators
Creator videos about this course
YouTube creators who filmed or featured Sage Valley Golf Club. · Stats as of Oct 12, 2026 · 6d ago
The First Ever YouTube Match at Sage Valley
How did Hole 7 play?
How did this hole play today?
Frequently asked questions
Yardage reference: Pro tees · 240 yards.
What club should I use on this par 3?
↓
At 240 yards, most golfers will need a fairway wood or hybrid to reach this green. Adjust for elevation, wind, and pin position.
How difficult is hole 7?
↓
This hole is one of the tougher holes on the course for most golfers. Key challenges include: long par 3, water in play.
What hazards should I watch out for on hole 7?
↓
Key hazards include: 1 greenside bunker; water at 138.9 yards. Plan your shots to avoid these trouble spots.
How big is the green on hole 7?
↓
The green is fairly large with multiple pin positions. The green is deeper than wide, so club selection is crucial. Lag putting becomes important on longer putts.
What's a good score on hole 7?
↓
This hole is a challenging par where bogey is acceptable. This longer par 3 will test your long iron or hybrid game. Par is a good score.