Hole 10 at Sage Valley Golf Club
- Par
- 5
- Yardage
- 580 yds
- Hazards
- 3 bunkers
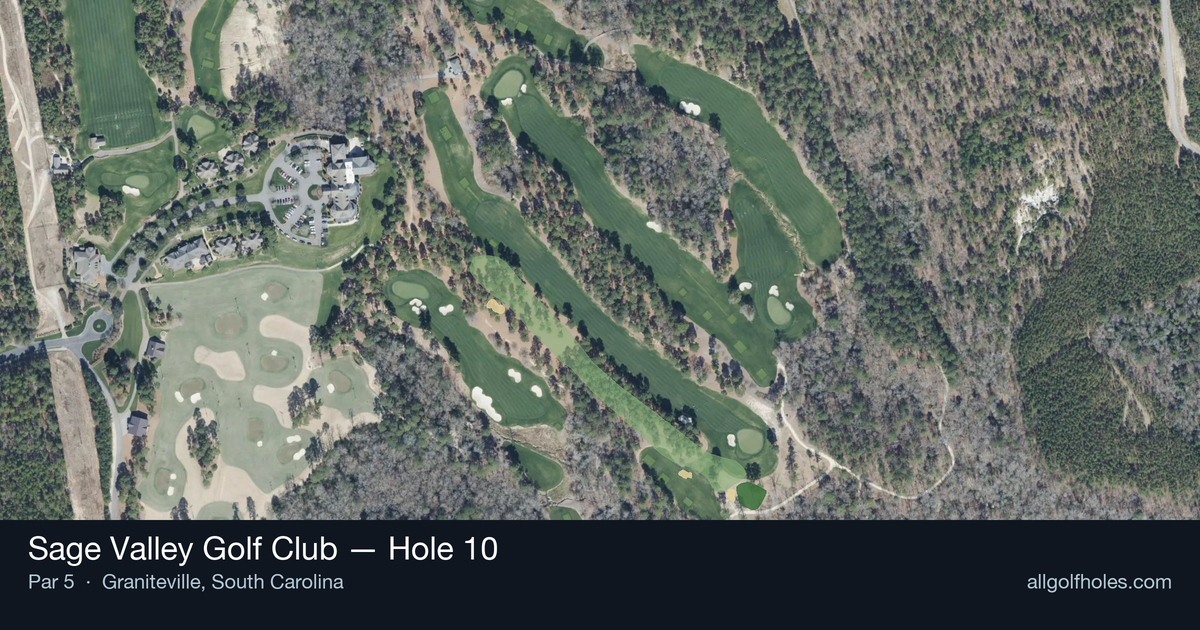
Aerial source not provided
Green size: 37 yds deep × 34 yds wide
Scorecard yardage is for Pro tees. The aerial shows its labeled reference position; distance rings measure to the green.
Pro tees · Par 5 · 580 yards
The plan for No. 10
The 10th hole at Sage Valley Golf Club presents a classic 580-yard par 5 that rewards bold play while punishing careless execution. This straight-away layout appears deceptively simple from the tee, but the absence of major hazards creates its own strategic complexity - demanding precision over power to navigate the narrow corridors between mature pines. The generous fairway invites aggressive tee shots, yet positioning becomes critical for the approach to the small, well-protected green complex. Players must carefully plan their second shot, as the compact putting surface leaves little margin for error on approaches from awkward angles. Without water or bunkers to define strategy, golfers rely purely on course management and shot-making ability. This hole epitomizes Sage Valley's philosophy of strategic design through natural terrain, where every shot matters in pursuit of birdie.
Off the tee
Your opening shot should prioritize finding the fairway over maximum distance. With the straight layout offering no doglegs to cut, there's no advantage to taking unnecessary risks off the tee. Choose a club that ensures you'll be in play - whether that's driver, 3-wood, or even a long iron depending on your comfort level and course conditions. Focus on the center of the fairway as your target line, as this will provide the most options for your second shot. The absence of hazards means you can be aggressive with your line choice, but remember that accuracy here sets up everything that follows.
Approach & recovery
Your second shot becomes the critical positioning play on this hole. Rather than trying to reach the green in two, most golfers should focus on advancing the ball to an ideal distance for their preferred approach yardage - typically leaving themselves with a comfortable wedge or short iron into the small green. Consider the pin position when planning your layup distance. A small green means precision is paramount, so ensure you're hitting your approach from a distance where you feel most confident. This might mean laying up to your favorite 100-yard distance or positioning yourself for a half-wedge rather than a full swing.
On the green
The small green size makes putting relatively straightforward in terms of distance control, but also means there's less margin for error on approach shots. Focus on getting your ball below the hole when possible, as uphill putts are generally easier to control on smaller surfaces. Pay attention to the overall slope and grain of the green during your practice rounds, as these subtle breaks become more significant on compact putting surfaces. Conservative putting strategy often works best - aim for the center of the cup rather than trying to be too aggressive with your lines. ## RISK VS REWARD The primary risk/reward decision comes on the second shot: attempting to reach the green in two versus laying up for a comfortable third. Given the small green size, going for it in two requires exceptional accuracy and carries significant risk of missing the target entirely. For most players, the smart play is treating this as a three-shot hole and focusing on positioning. The reward for successful course management here is a realistic birdie opportunity with minimal risk of big numbers. ## DIFFERENT SKILL LEVELS **High-handicap players** should embrace the three-shot mentality completely. Use whatever clubs ensure you stay in the fairway, advance the ball reasonable distances, and leave yourself with an approach shot from your most comfortable range. Don't be tempted to overswing or take on shots beyond your skill level. **Low-handicap players** have more flexibility in their approach strategy. While the small green still favors a conservative three-shot approach, skilled players might consider going for the green in two when conditions are favorable and they're hitting the ball particularly well. However, even accomplished players should carefully weigh whether the potential birdie is worth the risk of missing such a small target. The 10th hole rewards patience and precision over power, making it an excellent opportunity to demonstrate solid course management skills regardless of your handicap level.
Watch for
- Course conditioning and mapped hazards may affect line selection; confirm from the aerial.
Hole 10 Green Complex
Mapped green boundary
Green size: 6,449 sq ft
Course coverage
Tournament and creator videos about Sage Valley Golf Club — shared course coverage, not hole-specific clips.
Featured by these creators
Creator videos about this course
YouTube creators who filmed or featured Sage Valley Golf Club. · Stats as of Oct 12, 2026 · 6d ago
The First Ever YouTube Match at Sage Valley
How did Hole 10 play?
How did this hole play today?
Frequently asked questions
Yardage reference: Pro tees · 580 yards.
Can this par 5 be reached in two?
↓
At 580 yards, A true three-shot hole for most players. Position your layup to leave a comfortable wedge distance.
How difficult is hole 10?
↓
This hole is a good scoring opportunity for most golfers. Key challenges include: long par 5.
How big is the green on hole 10?
↓
The green is fairly large with multiple pin positions. Lag putting becomes important on longer putts.
What's a good score on hole 10?
↓
This hole is a true three-shot hole where birdie requires execution. This longer par 5 demands patience. Two good shots set up the scoring opportunity.