Hole 9 at Sage Valley Golf Club
- Par
- 4
- Yardage
- 430 yds
- Hazards
- 3 bunkers
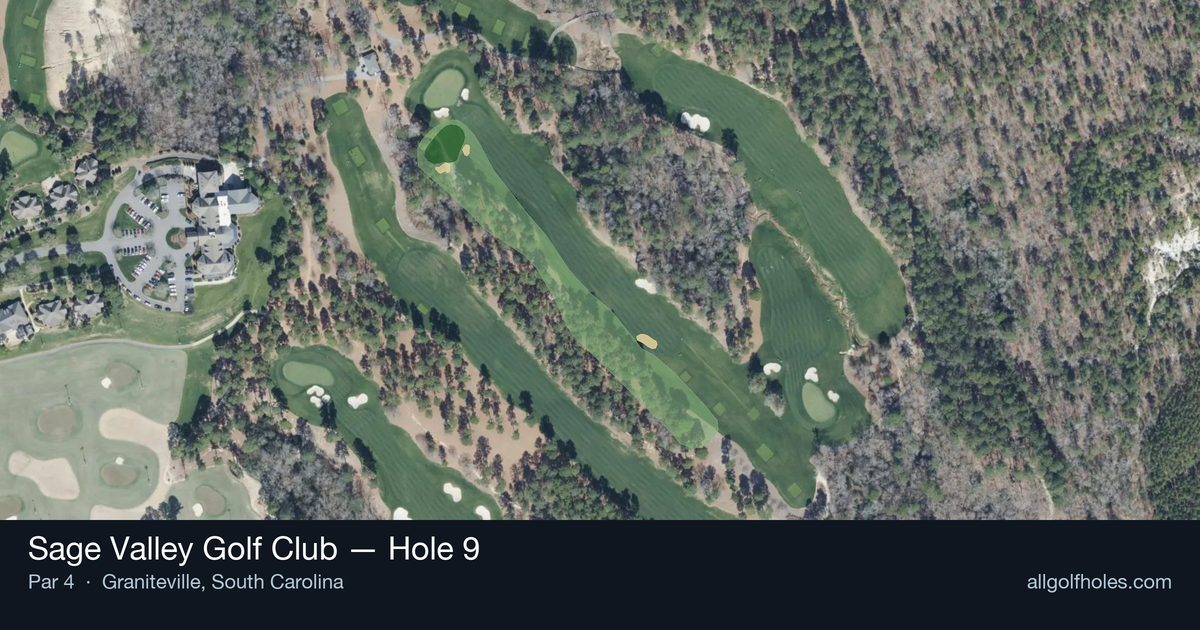
Aerial source not provided
Green size: 29 yds deep × 41 yds wide
Scorecard yardage is for Pro tees. The aerial shows its labeled reference position; distance rings measure to the green.
Pro tees · Par 4 · 430 yards
The plan for No. 9
The ninth hole at Sage Valley Golf Club presents a deceptively challenging finish to the front nine, demanding precision over power on this 430-yard par 4. The straight layout might appear straightforward from the tee, but the small green complex requires surgical accuracy with your approach shot. Without significant hazards to distract, this hole strips golf down to its purest form - hitting quality shots under pressure. The tee shot offers a generous target, allowing golfers to find their rhythm and set up an optimal angle for the approach. However, the diminutive green becomes the hole's defining feature, rewarding only the most precise iron play. Club selection proves critical, as the small target demands confident commitment to your yardage. This hole epitomizes Sage Valley's strategic design philosophy, where subtlety trumps spectacle.
Off the tee
The tee shot strategy centers on positioning for the optimal approach angle. With the fairway relatively open, focus on finding the center or slightly favoring your preferred approach side. Most golfers will benefit from a controlled driver or strong 3-wood, aiming to leave themselves with a comfortable mid-iron into the green. The key is avoiding the temptation to overpower the tee shot – accuracy trumps distance here. Target the widest part of the fairway, typically around the 250-yard mark, which sets up an ideal approach distance.
Approach & recovery
The approach shot is where this hole shows its teeth. With a small green as your target, club selection becomes critical. Take one extra club to ensure you clear any front trouble and give yourself margin for error. The green's compact size means there's little room for recovery shots, so prioritize hitting the putting surface over aggressive pin-hunting. When the pin is tucked, play to the center of the green and let your putting do the work. Wind conditions will play a significant role in club selection given the elevated nature of many approach shots at Sage Valley.
On the green
The small green demands respect with your putter. Expect subtle breaks that can be deceptive, and focus on lag putting to avoid three-putts. With limited green space, approach shots that miss the target often leave difficult up-and-downs. When you do find the green, take time to read the slope carefully – what appears to be a straight putt may have more break than expected. Two-putting should be your primary goal unless you have a clear makeable birdie opportunity. ## RISK VS REWARD This hole offers a more subtle risk/reward proposition. The reward comes from aggressive tee shots that set up shorter irons, but the risk increases exponentially if you miss the small green. Conservative players can take a 3-wood or hybrid off the tee, accepting a longer approach in exchange for better accuracy. Aggressive players might bomb driver to get closer, but must execute a precise approach shot to capitalize. ## DIFFERENT SKILL LEVELS **High-handicap players** should prioritize keeping the ball in play off the tee, even if it means hitting 3-wood or hybrid. Focus on hitting the green with your approach rather than attacking pins, and be content with two-putting for par. The small green makes recovery shots challenging, so staying on the putting surface is paramount. **Low-handicap players** can be more aggressive with driver off the tee to set up shorter irons, but must maintain precision on the approach shot. Consider the pin position when selecting your target line – sometimes playing away from the flag to the fat part of the green is the percentage play. Use your short game skills to get up and down when you do miss the green, as this will happen even to skilled players.
Watch for
- Course conditioning and mapped hazards may affect line selection; confirm from the aerial.
Hole 9 Green Complex
Mapped green boundary
Green size: 6,182 sq ft
Course coverage
Tournament and creator videos about Sage Valley Golf Club — shared course coverage, not hole-specific clips.
Featured by these creators
Creator videos about this course
YouTube creators who filmed or featured Sage Valley Golf Club. · Stats as of Oct 12, 2026 · 6d ago
The First Ever YouTube Match at Sage Valley
How did Hole 9 play?
How did this hole play today?
Frequently asked questions
Yardage reference: Pro tees · 430 yards.
What's the best strategy off the tee?
↓
For this 430-yard par 4, most players will hit driver to set up a comfortable approach.
How difficult is hole 9?
↓
This hole is a good scoring opportunity for most golfers.
How big is the green on hole 9?
↓
The green is fairly large with multiple pin positions. Lag putting becomes important on longer putts.
What's a good score on hole 9?
↓
This hole is a demanding hole where bogey is not unusual. This longer par 4 will test most golfers. Focus on position over distance.