Hole 2 at Aronimink Golf Club
- Par
- 4
- Yardage
- 412 yds
- Stroke index
- 13
- Hazards
- 5 bunkers
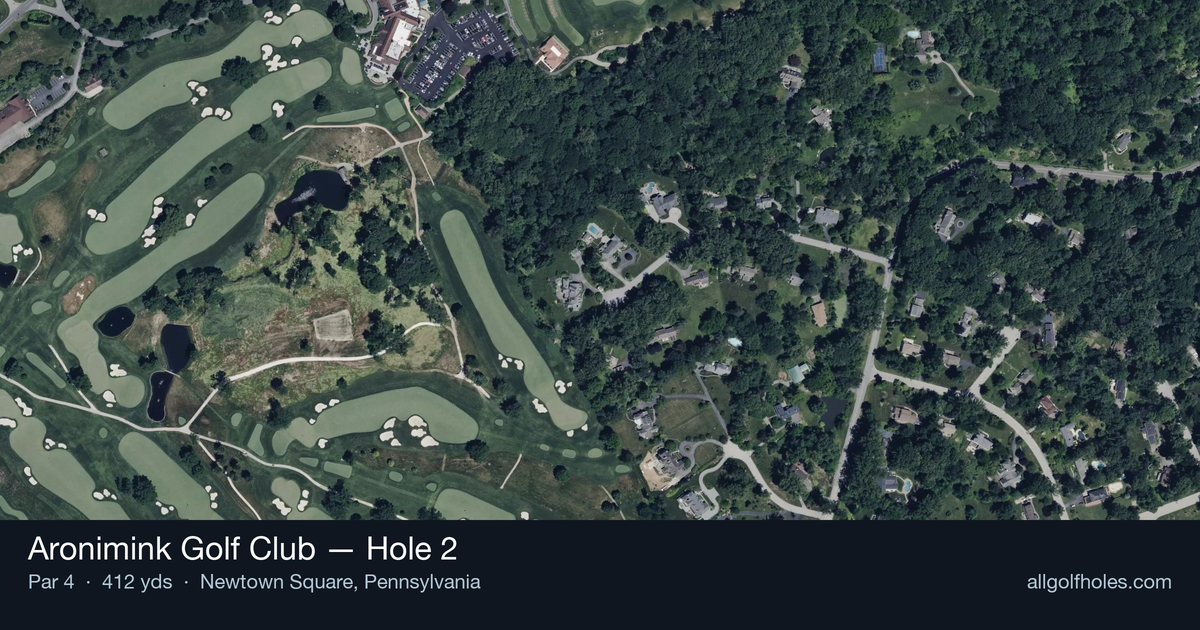
Aerial source not provided
Green size: 35 yds deep × 31 yds wide
Scorecard yardage is for Championship tees. The aerial shows its labeled reference position; distance rings measure to the green.
Championship tees · Par 4 · 412 yards
The plan for No. 2
The second hole at Aronimink Golf Club presents a classic Donald Ross design challenge wrapped in deceptive simplicity. This dogleg left par 4 stretches 412 yards and offers strategic options that separate thoughtful golfers from aggressive ones. The fairway bends sharply left around the driving zone, creating a compelling risk-reward decision off the tee. Players can either lay back with a shorter iron for position or challenge the corner with driver to shorten the approach shot. Ross's signature design philosophy shines through with the demanding approach to a small, well-protected green that requires precise long-iron play. The hole's modest handicap ranking belies its strategic complexity, where course management trumps raw power. Three large bunkers guard the turning point, adding visual intimidation and strategic consequence to an already compelling golf hole.
Off the tee
Your tee shot strategy hinges on the sharp left turn that occurs around 230 yards from the tee. Conservative players should aim for the center-right portion of the fairway with a controlled driver or 3-wood, ensuring they stay short of the dogleg to maintain a clear view of the green. More aggressive golfers can attempt to challenge the corner of the dogleg with a well-struck driver, potentially cutting off significant yardage and leaving a shorter approach. However, this risk/reward decision requires precise execution, as missing the fairway around the corner can leave you blocked out or in trouble. The target line should favor the right side of the fairway for most players, providing the safest angle while still allowing for a reasonable approach shot.
Approach & recovery
The approach shot to this small green demands precision and proper club selection, staying true to Ross's emphasis on long-iron play. From a well-positioned drive, you'll likely face a mid to short iron into the green, but the small target requires accuracy over distance. Focus on the center of the green regardless of pin position, as the compact putting surface doesn't offer much margin for error. Players who successfully challenged the dogleg will have a shorter approach but must still respect the green's size. Wind conditions and pin placement should heavily influence your club selection, and taking one extra club to ensure you reach the putting surface is often the wise play on this demanding Ross design.
On the green
The small green at the 2nd hole requires a conservative putting approach and careful speed control. Given the compact nature of the putting surface, most putts will be relatively straight, but the subtle undulations typical of Ross greens can still create challenging reads. Focus on lag putting to the center of the green when facing longer putts, as three-putting from the fringe or rough around this small target can quickly derail your score. Pin positions on the edges of the green should be treated with extra respect, as aggressive putts can easily roll off the putting surface. ## RISK VS REWARD The primary risk/reward decision comes at the tee, where aggressive players can attempt to cut the corner of the dogleg for a shorter approach. This strategy can leave you with a wedge or short iron instead of a mid-iron, significantly improving your chances of hitting the small green close to the pin. However, the penalty for missing the aggressive line can be severe, potentially leaving you blocked out or in hazards. The conservative play of staying right and short of the dogleg guarantees a clear approach shot, though from a longer distance that makes the small green more challenging to hit. ## DIFFERENT SKILL LEVELS **High-handicap players** should prioritize course management over aggressive play. Use a 3-wood or hybrid off the tee to ensure you stay in the fairway and short of the trouble around the dogleg. Focus on hitting the center of the green with your approach, accepting a longer putt rather than risking missing the small target entirely. This conservative strategy minimizes big numbers and gives you the best chance for par. **Low-handicap players** can consider the more aggressive line, especially if they're confident in their driver accuracy. The shorter approach shot from cutting the corner provides a legitimate birdie opportunity on this relatively short par 4. However, even skilled players should respect the precision required for the approach shot to the small green, as Ross's design philosophy ensures that even well-struck shots require careful planning and execution.
Watch for
- Course conditioning and mapped hazards may affect line selection; confirm from the aerial.
Hole 2 Green Complex
Mapped green boundary
Green size: 5,641 sq ft
Course and tournament history
Historical context for the course and venue. Each entry identifies the event or course it describes.
1962 · Gary Player
The finishing hole is a 436-yard (399 m) uphill par four, requires a precise tee shot and the approach shot is to a winding and sloped green with a numerous challenging pin locations.
Source →
Course coverage
Tournament and creator videos about Aronimink Golf Club — shared course coverage, not hole-specific clips.
Featured by these creators
Creator videos about this course
YouTube creators who filmed or featured Aronimink Golf Club. · Stats as of Oct 12, 2026 · 6d ago
2026 PGA Championship Preview: Who Will Win at Aronimink Golf Club? | The Fried Egg Golf Podcast
How did Hole 2 play?
How did this hole play today?
Frequently asked questions
Yardage reference: Championship tees · 412 yards.
What's the best strategy off the tee?
↓
For this 412-yard par 4, most players will hit driver to set up a comfortable approach.
How difficult is hole 2?
↓
This hole is a moderate challenge for most golfers. Key challenges include: heavily bunkered.
How big is the green on hole 2?
↓
The green is medium-sized with moderate targets. Pay attention to pin placement when selecting your approach club.