Hole 3 at Aronimink Golf Club
- Par
- 4
- Yardage
- 446 yds
- Stroke index
- 5
- Hazards
- 7 bunkers
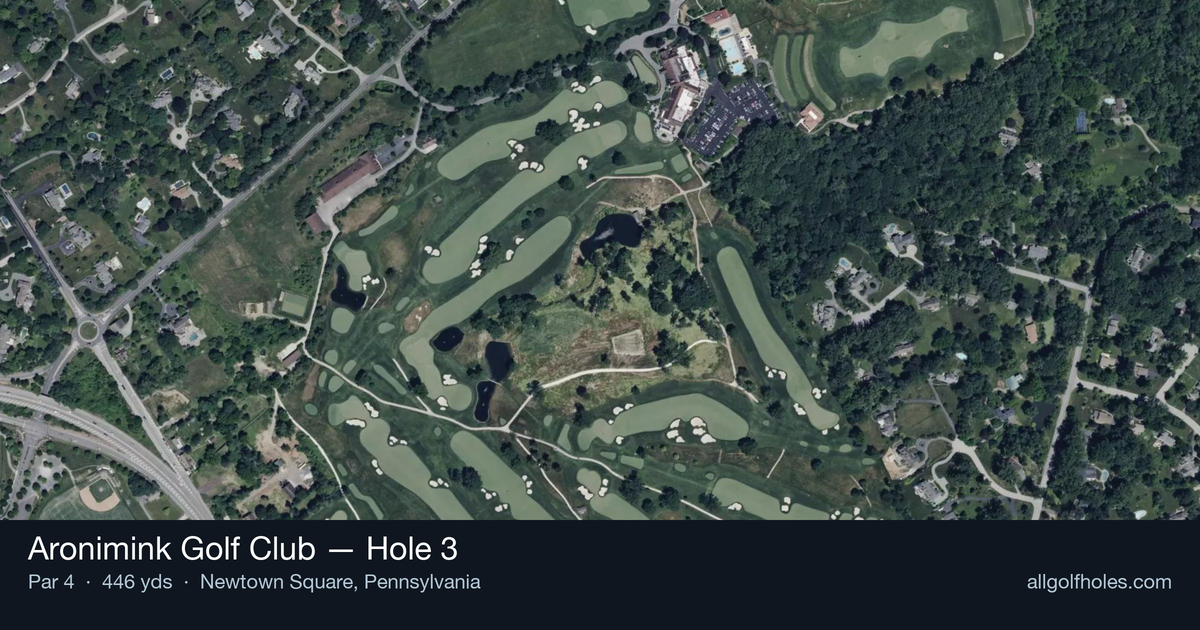
Aerial source not provided
Green size: 36 yds deep × 35 yds wide
Scorecard yardage is for Championship tees. The aerial shows its labeled reference position; distance rings measure to the green.
Championship tees · Par 4 · 446 yards
The plan for No. 3
Aronimink Golf Club hole 3 epitomizes Donald Ross's philosophy of testing exceptional long-iron play on this demanding 446-yard par 4. The straight layout may appear straightforward, but Ross's genius lies in the deceptive simplicity that masks a stern examination. A solid tee shot sets up a challenging approach to a small, elevated green complex featuring distinct pin positions on a left terrace and back-right perch. The deep bunker guarding the right side of the green punishes wayward approach shots, while the green's compact size and multiple levels demand precise club selection and trajectory control. Miss the target, and recovery options become severely limited, making this hole a true test of accuracy over distance that separates good rounds from great ones.
Off the tee
Your tee shot strategy should prioritize finding the optimal angle for your approach shot. With the hole playing straight, focus on positioning yourself in the center-left portion of the fairway to open up the best approach angle to the small green. A well-struck driver or strong 3-wood should leave you with a manageable mid-iron to long-iron approach shot. The key is avoiding any rough or fairway bunkers that could complicate your approach club selection.
Approach & recovery
The approach shot represents the true test of this hole, embodying Ross's emphasis on exceptional long-iron play. With the small green presenting limited target area, precision trumps power. Be particularly aware of the deep bunker positioned right of the green, which can severely penalize approaches that drift right. When the pin is placed on the small terrace on the left side or the perch on the back right, resist the temptation to fire directly at the flag unless you're completely confident in your strike. Instead, aim for the center of the green and take your two-putt par.
On the green
The small green at the 3rd demands respect with your putter. Pin positions on the left terrace or back right perch create challenging putting scenarios where distance control becomes paramount. Focus on leaving yourself below the hole when possible, as uphill putts on these elevated pin positions offer better scoring chances than downhill sliders. ## RISK VS REWARD This hole offers limited risk/reward opportunities, instead demanding consistent execution. The primary decision point comes on the approach shot - aggressive play toward tucked pins can yield birdie chances but also brings the deep right bunker into play. Conservative play to the center of the green virtually guarantees a par putt, making this a solid scoring opportunity for steady players. ## DIFFERENT SKILL LEVELS **Low Handicappers:** Focus on precise approach shots with mid to long irons, targeting specific quadrants of the green based on pin position. When the flag is tucked, play to the fat part of the green and rely on your putting to convert pars. **High Handicappers:** Prioritize keeping the ball in play off the tee, then focus on reaching the green in regulation rather than attacking pins. The small green rewards accuracy over aggression - aim for the center and avoid the right-side bunker at all costs. **Mid Handicappers:** Use this hole to practice course management skills. Choose clubs that leave comfortable approach distances, and resist the urge to attack difficult pin positions unless you're striking the ball exceptionally well. This classic Ross design rewards patient, strategic golf over aggressive play, making it an excellent test of your overall game management skills.
Watch for
- Course conditioning and mapped hazards may affect line selection; confirm from the aerial.
Hole 3 Green Complex
Mapped green boundary
Green size: 6,000 sq ft
Course coverage
Tournament and creator videos about Aronimink Golf Club — shared course coverage, not hole-specific clips.
Featured by these creators
Creator videos about this course
YouTube creators who filmed or featured Aronimink Golf Club. · Stats as of Oct 12, 2026 · 5d ago
2026 PGA Championship Preview: Who Will Win at Aronimink Golf Club? | The Fried Egg Golf Podcast
How did Hole 3 play?
How did this hole play today?
Frequently asked questions
Yardage reference: Championship tees · 446 yards.
What's the best strategy off the tee?
↓
For this 446-yard par 4, most players will hit driver to set up a comfortable approach.
How difficult is hole 3?
↓
This hole is a moderate challenge for most golfers. Key challenges include: heavily bunkered.
How big is the green on hole 3?
↓
The green is medium-sized with moderate targets. Pay attention to pin placement when selecting your approach club.
What's a good score on hole 3?
↓
This hole is a demanding hole where bogey is not unusual. This longer par 4 will test most golfers. Focus on position over distance.