Hole 12 at Aronimink Golf Club
- Par
- 4
- Yardage
- 465 yds
- Stroke index
- 6
- Hazards
- 5 bunkers
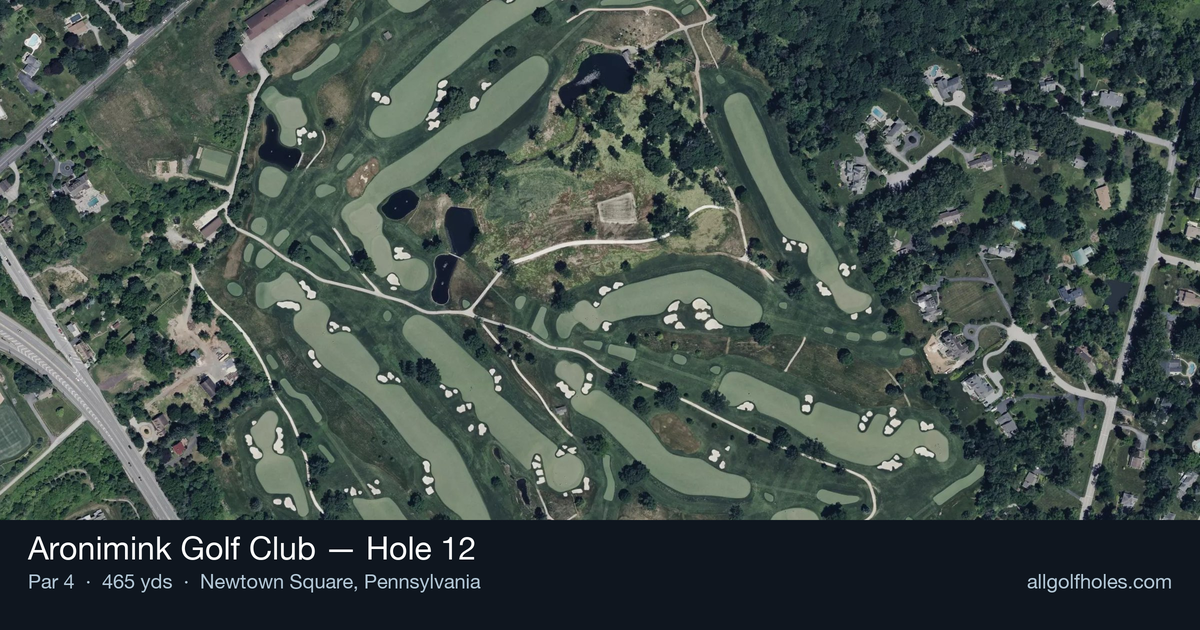
Aerial source not provided
Green size: 30 yds deep × 30 yds wide
Scorecard yardage is for Championship tees. The aerial shows its labeled reference position; distance rings measure to the green.
Championship tees · Par 4 · 465 yards
The plan for No. 12
The 12th hole at Aronimink Golf Club embodies Donald Ross's philosophy of demanding exceptional long-iron play from golfers at every level. This substantial 465-yard par 4 presents a deceptively straightforward challenge that rewards precision over power. The tee shot demands accuracy to find the optimal position in the fairway, setting up a crucial approach to a small, well-protected green complex. True to Ross's design principles, refined through Gil Hanse's recent restoration work, the hole's beauty lies in its strategic subtlety rather than obvious hazards. The compact green requires pinpoint accuracy with mid to long irons, testing players' ability to control distance and trajectory. This hole exemplifies Aronimink's reputation for rewarding thoughtful course management and punishing careless execution, making it a memorable test of golf strategy and skill.
Off the tee
The tee shot strategy centers on positioning for the optimal approach angle to the small green. With a straight layout and no major hazards threatening the landing zone, drivers can be aggressive while maintaining accuracy. Target the center-left portion of the fairway to open up the best angle to the green. Longer hitters may consider a 3-wood or driving iron if conditions are firm, as the key is leaving a comfortable distance for the approach rather than maximum distance. The fairway appears generous, but staying in the short grass is crucial for the demanding second shot ahead.
Approach & recovery
The approach shot epitomizes Ross's test of long-iron play. From the landing zone, expect to hit anything from a mid-iron to a long-iron depending on conditions and pin position. The small green demands pinpoint accuracy - there's little margin for error with your club selection and target line. Focus on the center of the green rather than attacking pins, as the compact putting surface makes recovery shots extremely challenging. Pay attention to wind conditions, as they'll significantly impact club selection on this lengthy approach. A shot that comes up short or drifts offline will leave a difficult up-and-down opportunity.
On the green
The small green requires careful speed control and precise putting. Expect subtle breaks typical of Ross greens, with slopes that can catch the unwary golfer off-guard. Two-putting becomes the primary objective here - aggressive putting on such a compact surface can easily lead to three-putts. Read putts carefully from below the hole, as the green's size amplifies any misjudgment in line or pace. Conservative lag putting to the fat part of the green often proves more rewarding than attacking difficult pin positions. ## RISK VS REWARD The primary risk/reward decision comes with tee shot aggression versus approach shot comfort. Bombing a driver may leave a shorter iron to the green, but it also increases the risk of finding trouble or an awkward lie. The reward for precise execution is significant - a well-struck approach to the small green sets up legitimate birdie opportunities. However, the penalty for missing the green is severe, making par a very respectable score for most golfers. ## DIFFERENT SKILL LEVELS **Low-handicap players** should embrace the Ross challenge by playing aggressively off the tee while respecting the small green. These golfers can attack pins when the approach shot is from their preferred distance range, typically with a mid-iron. Course management becomes crucial - knowing when to be aggressive versus when to play for the center of the green. **High-handicap players** should focus on two solid shots rather than trying to overpower the hole. Consider a 3-wood or hybrid off the tee for improved accuracy, accepting a longer approach shot in exchange for better positioning. Aim for the center of the green regardless of pin position, as the small target demands your best swing. Remember that bogey is not a disaster on this challenging hole - avoid the temptation to force shots that aren't there. The 12th hole at Aronimink perfectly demonstrates why Donald Ross remains revered among golf course architects. Success here requires the complete golf strategy package: smart tee shot placement, precise iron play, and disciplined putting on a demanding green.
Watch for
- Course conditioning and mapped hazards may affect line selection; confirm from the aerial.
Hole 12 Green Complex
Mapped green boundary
Green size: 5,169 sq ft
Course coverage
Tournament and creator videos about Aronimink Golf Club — shared course coverage, not hole-specific clips.
Featured by these creators
Creator videos about this course
YouTube creators who filmed or featured Aronimink Golf Club. · Stats as of Oct 12, 2026 · 6d ago
2026 PGA Championship Preview: Who Will Win at Aronimink Golf Club? | The Fried Egg Golf Podcast
How did Hole 12 play?
How did this hole play today?
Frequently asked questions
Yardage reference: Championship tees · 465 yards.
What's the best strategy off the tee?
↓
For this 465-yard par 4, most players will hit driver to set up a comfortable approach.
How difficult is hole 12?
↓
This hole is a moderate challenge for most golfers. Key challenges include: long par 4, heavily bunkered.
How big is the green on hole 12?
↓
The green is medium-sized with moderate targets. Pay attention to pin placement when selecting your approach club.
What's a good score on hole 12?
↓
This hole is one of the tougher holes where par feels like birdie. A challenging par 4. Accept that bogey happens and avoid big numbers.