Hole 1 at Aronimink Golf Club
- Par
- 4
- Yardage
- 430 yds
- Stroke index
- 3
- Hazards
- 3 bunkers · Water
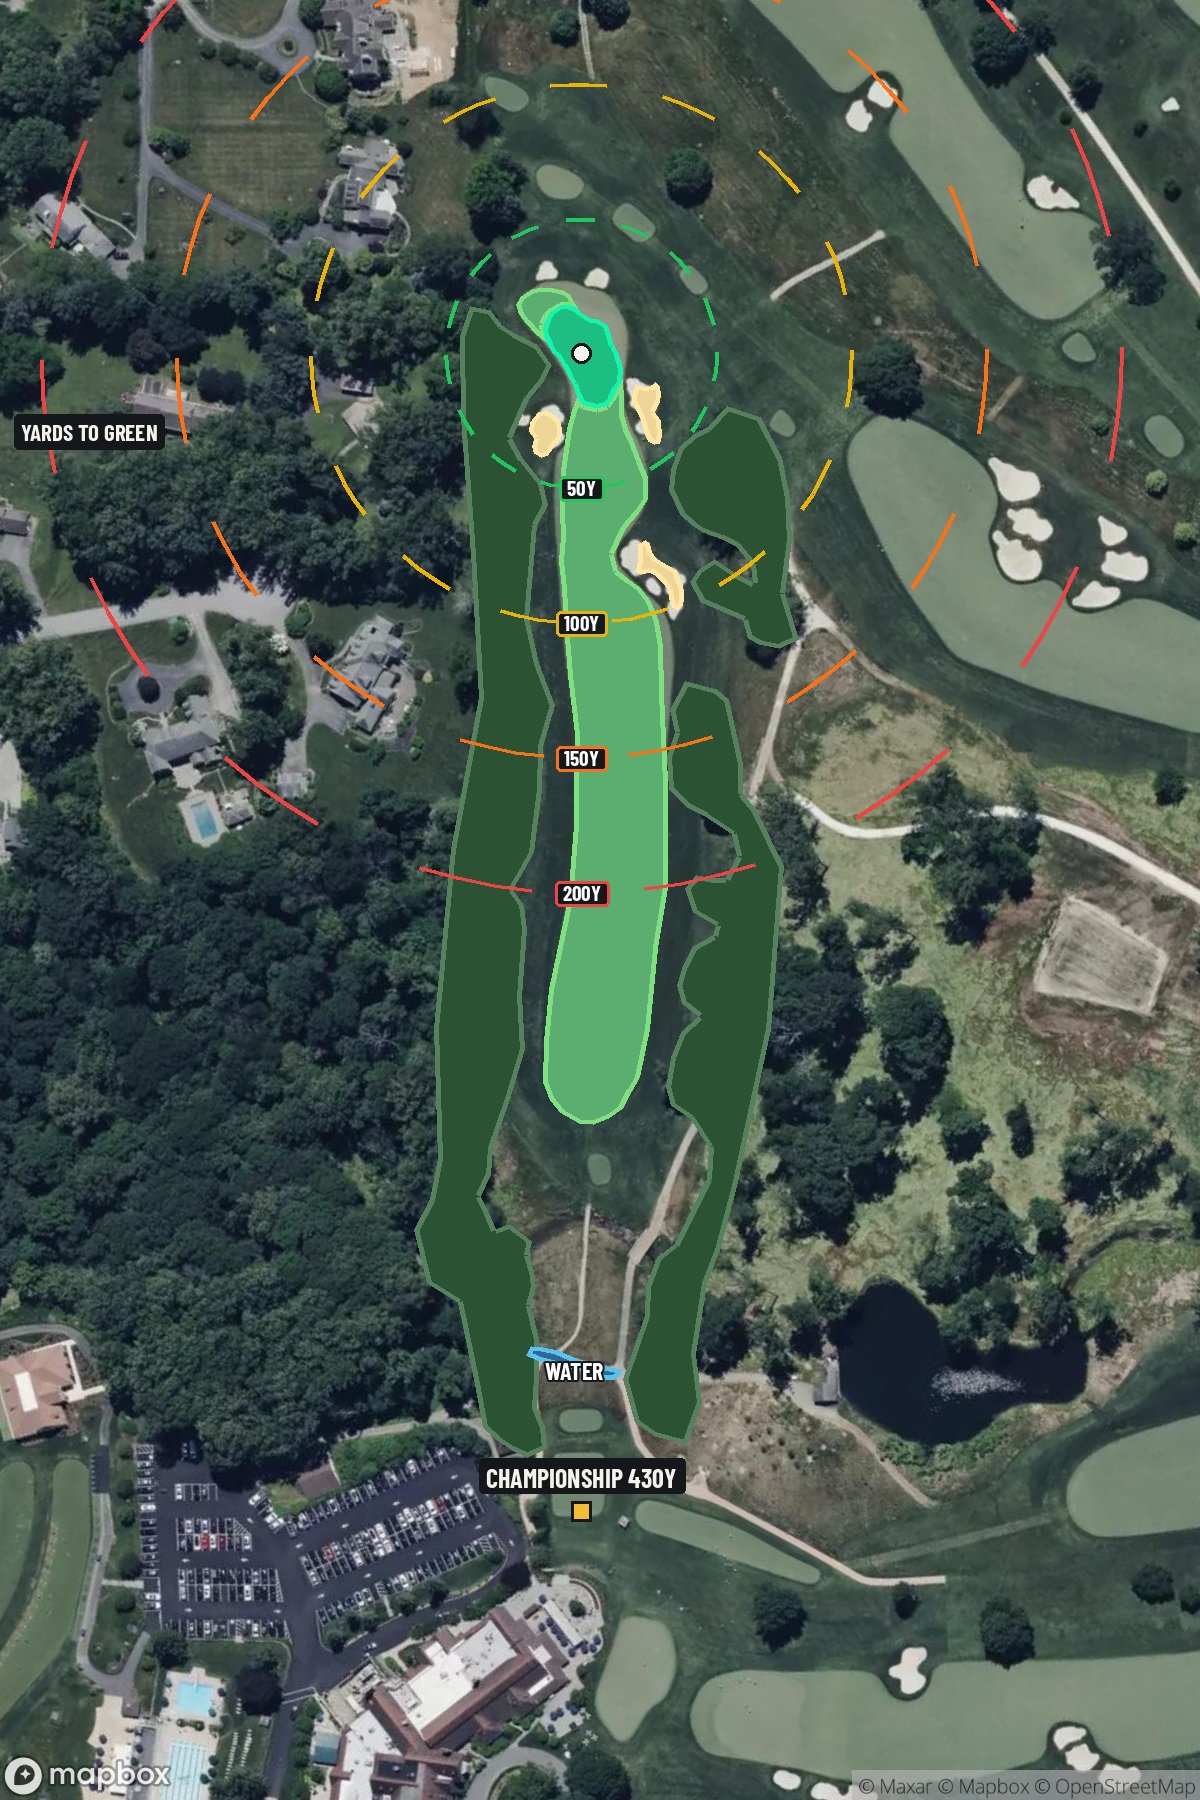 Hole 1 map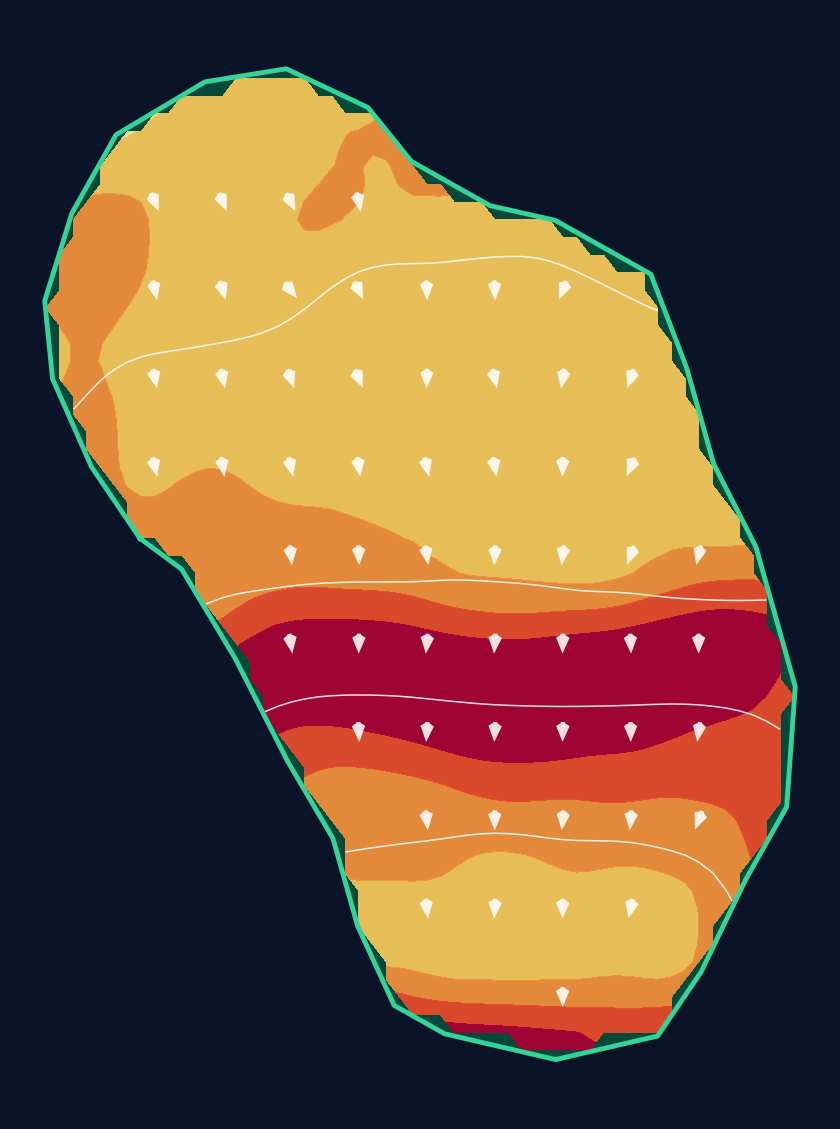
29 yd wide × 39 yd deep · 4.8 ft total elevation range
Light = gentler slope · Red = steeper slope
White lines: 1 foot of elevation. Arrows: downhill. General terrain, not a pin read.
Approach from bottom
Contour source
USGS one meter x46y443 DE DelawareValley HD 2015 · collection 2015
Map source & reference
Mapbox Satellite composite · capture date not provided. Green at the top; the labeled map reference is below.
Scorecard yardage is for Championship tees. The aerial shows its labeled reference position; distance rings measure to the green.
Championship tees · Par 4 · 430 yards
The plan for No. 1
Aronimink Golf Club hole 1 wastes no time introducing golfers to Donald Ross's architectural brilliance, presenting an immediate test of both power and precision on this demanding 430-yard par 4. The tee shot plunges dramatically downhill before the fairway begins its relentless uphill climb toward a small, elevated green complex. This classic Ross design philosophy creates a deceptive challenge where distance control becomes paramount on the approach shot, as the uphill angle can easily fool even experienced players. The green's compact size demands accuracy, rewarding those who commit fully to their club selection while punishing tentative swings. It's a masterful opening statement that sets the tone for the walking-only experience ahead, embodying the timeless architecture that has made Aronimink a revered test of golf for nearly a century.
Off the tee
The tee shot strategy centers on managing the sharp elevation drop while positioning for the uphill approach. Driver is often the right play here, as you'll need the extra distance to reduce the length of your uphill second shot. Aim for the center-left portion of the fairway to give yourself the best angle into the small green. The elevation drop will add significant carry to your drive, so trust the yardage and focus on finding the fairway rather than trying to crush it. Wind conditions can be tricky to judge with the elevation change, so pay attention to how the ball reacts in the air.
Approach & recovery
The approach shot is where this hole truly shows its teeth - expect about a 250-yard uphill climb to reach the green. Club selection is critical here; the uphill nature means you'll need at least one extra club, possibly two depending on conditions. A mid-iron to long-iron will typically be required, and the key is committing fully to your club choice. The small green demands precision, so focus on the center of the putting surface rather than attacking pins. Take note of pin position during your pre-round preparation, as this will influence your target line significantly.
On the green
Ross's small green design philosophy is evident here, requiring precise approach shots to avoid lengthy recovery putts. The green's compact size means most putts will have manageable length, but reading the subtle breaks correctly is essential. Pay attention to the overall slope and how the uphill approach might affect ball spin and release. Conservative putting strategy often pays dividends - lag putting to ensure two-putts rather than being aggressive with longer attempts. ## RISK VS REWARD This hole offers limited risk/reward opportunities, instead demanding solid, strategic golf. The primary risk comes from being too aggressive with pin hunting on the approach shot - the small green severely punishes misses. The reward for good course management is clear: finding the fairway off the tee sets up a manageable approach, while hitting the green in regulation provides excellent birdie opportunities on a hole where many players struggle. ## DIFFERENT SKILL LEVELS **Lower Handicap Players:** Focus on precise distance control for the uphill approach shot. Consider the pin position when selecting your target line, and don't be afraid to use one more club than you think you need. Your short game skills will be crucial if you miss the small green. **Higher Handicap Players:** Prioritize finding the fairway with your tee shot, even if it means using a 3-wood or hybrid for better accuracy. On the approach, aim for the center of the green regardless of pin position - the small target makes this a challenging hole even for accomplished players. Accept that par is a good score here and avoid the temptation to force birdies early in the round. The opening hole at Aronimink serves as both welcome and warning - showcasing the classic architecture that makes this course special while immediately testing your ability to execute under pressure. Smart club selection and conservative target selection will serve you well as you begin your round at this historic Donald Ross design.
Watch for
- Course conditioning and mapped hazards may affect line selection; confirm from the aerial.
Hole 1 Green Complex & Slope
USGS 3DEP terrain analysis
Green size: 5,606 sq ft
Course and tournament history
Historical context for the course and venue. Each entry identifies the event or course it describes.
1962 · Gary Player
The 17th is a 187-yard (171 m) par three. An errant tee shot often finds the lake guarding the green. The finishing hole is a 436-yard (399 m) uphill par four, requires a precise tee shot and the appr
Source →
Course coverage
Tournament and creator videos about Aronimink Golf Club — shared course coverage, not hole-specific clips.
Featured by these creators
Creator videos about this course
YouTube creators who filmed or featured Aronimink Golf Club. · Stats as of Oct 12, 2026 · 5d ago
2026 PGA Championship Preview: Who Will Win at Aronimink Golf Club? | The Fried Egg Golf Podcast
How did Hole 1 play?
How did this hole play today?
Frequently asked questions
Yardage reference: Championship tees · 430 yards.
What's the best strategy off the tee?
↓
For this 430-yard par 4, most players will hit driver to set up a comfortable approach.
How difficult is hole 1?
↓
This hole is a moderate challenge for most golfers. Key challenges include: water in play.
How big is the green on hole 1?
↓
The green is medium-sized with moderate targets. Pay attention to pin placement when selecting your approach club.
What's a good score on hole 1?
↓
This hole is a demanding hole where bogey is not unusual. This longer par 4 will test most golfers. Focus on position over distance.