Hole 13 at Aronimink Golf Club
- Par
- 4
- Yardage
- 393 yds
- Stroke index
- 16
- Hazards
- 6 bunkers
Aerial source not provided
Green size: 42 yds deep × 29 yds wide
Scorecard yardage is for Championship tees. The aerial shows its labeled reference position; distance rings measure to the green.
Championship tees · Par 4 · 393 yards
The plan for No. 13
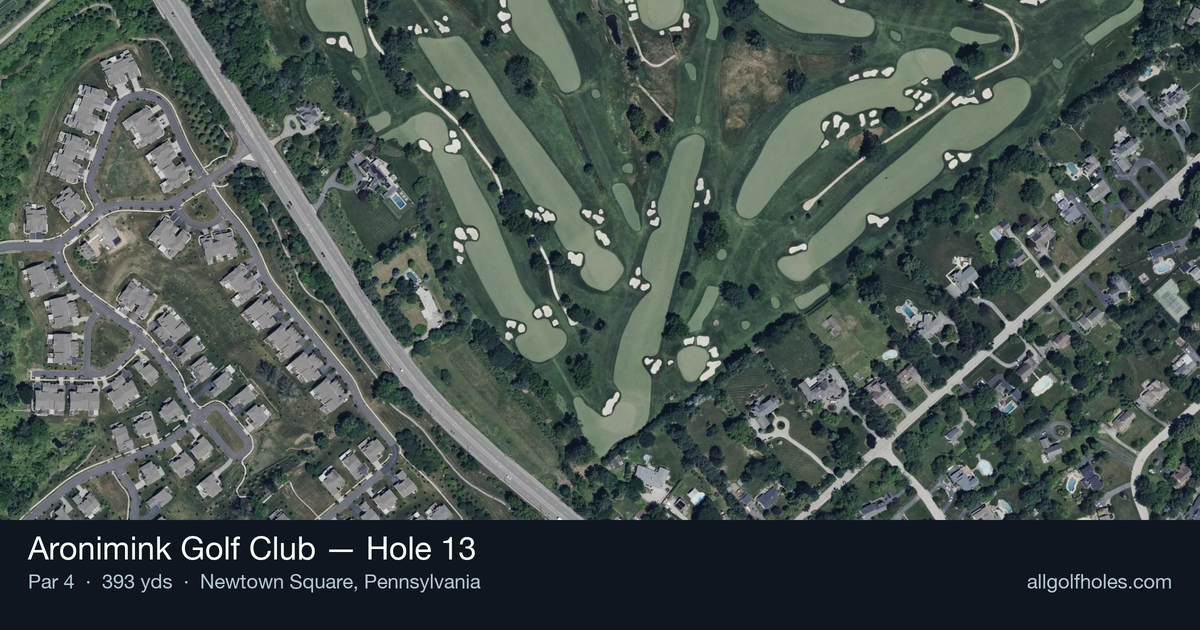
The shortest par 4 at Aronimink Golf Club, hole 13 presents a deceptively strategic challenge at 393 yards. Six fairway bunkers create visual intimidation from the tee, with three positioned left and three right, though they're easily cleared with conservative club selection. This Donald Ross design embodies the architect's philosophy of testing precise iron play rather than raw distance. The straight layout invites aggressive play, but the small green demands accuracy on the approach shot. Smart golfers can take advantage of the shorter length by laying back with an iron off the tee, leaving a comfortable mid-iron to the putting surface. Despite its modest yardage and high handicap ranking, this hole rewards course management and punishes overly aggressive play, making it a perfect example of Ross's strategic brilliance.
Off the tee
The tee shot strategy revolves around clearing the six fairway bunkers while positioning for an optimal approach angle. Since these bunkers can be easily cleared with even a mid-iron, resist the urge to overpower the tee shot. A controlled long-iron or fairway wood aimed at the center of the fairway provides the safest route while leaving a manageable approach distance. The visual intimidation of the bunkers often causes players to overthink the tee shot. Focus on a smooth tempo and commit to your club selection. The fairway beyond the bunkers offers adequate landing area for most golfers, making accuracy more important than maximum distance.
Approach & recovery
The approach shot to the small green is where this hole shows its teeth. With a shorter approach distance available, focus on precision and proper club selection based on pin position. The compact green leaves little margin for error, making it essential to hit the correct yardage rather than simply getting close. Pay careful attention to wind conditions, as the shorter approach can be significantly affected by even moderate breezes. Aim for the center of the green when in doubt, as missing the small target can lead to difficult up-and-down situations that quickly turn a scoring opportunity into a bogey or worse.
On the green
The small green demands respect with your putting approach. While specific break information isn't available, expect subtle movements typical of Ross designs. Focus on speed control above all else, as the compact surface means longer putts are rare but precision is paramount. Take extra time to read shorter putts carefully, as the small green often creates deceptive slopes. Conservative lag putting to the center of the green on longer attempts helps avoid three-putts that can derail your score on this birdie opportunity. ## RISK VS REWARD This hole offers one of the better scoring opportunities at Aronimink, but only for players who respect its subtleties. The reward of a potential birdie is significant, especially given the difficulty of the surrounding holes. However, the risk lies in getting too aggressive and missing the small green, leading to challenging recovery shots. The key risk/reward decision comes with approach club selection. Taking one more club and playing to the center of the green often yields better results than trying to attack pins near the edges of the small putting surface. ## DIFFERENT SKILL LEVELS **High-Handicap Players:** Play conservatively off the tee with a club you can hit straight consistently, even if it's a mid-iron. Focus on finding the fairway beyond the bunkers, then play a controlled approach to the center of the green. Don't let the shorter length tempt you into overly aggressive play. **Low-Handicap Players:** Use this hole as a scoring opportunity while respecting the precision required. Consider the pin position when selecting your tee shot strategy - some pins may favor approaches from specific angles. Your superior ball-striking ability should allow you to attack more pins, but always have a bail-out plan to the fat part of the green. The 13th hole at Aronimink proves that in golf strategy, sometimes less is more. Smart course management and precise execution on this shorter par-4 can provide a crucial scoring boost in your round at this historic Donald Ross masterpiece.
Watch for
- Course conditioning and mapped hazards may affect line selection; confirm from the aerial.
Hole 13 Green Complex
Mapped green boundary
Green size: 6,810 sq ft
Course coverage
Tournament and creator videos about Aronimink Golf Club — shared course coverage, not hole-specific clips.
Featured by these creators
Creator videos about this course
YouTube creators who filmed or featured Aronimink Golf Club. · Stats as of Oct 12, 2026 · 6d ago
2026 PGA Championship Preview: Who Will Win at Aronimink Golf Club? | The Fried Egg Golf Podcast
How did Hole 13 play?
How did this hole play today?
Frequently asked questions
Yardage reference: Championship tees · 393 yards.
What's the best strategy off the tee?
↓
For this 393-yard par 4, most players will hit driver to set up a comfortable approach.
How difficult is hole 13?
↓
This hole is a good scoring opportunity for most golfers. Key challenges include: heavily bunkered.
How big is the green on hole 13?
↓
The green is fairly large with multiple pin positions. Lag putting becomes important on longer putts.
What's a good score on hole 13?
↓
This hole is a medium-length test where par is a solid result. A straightforward par 4 where course management pays off.