Hole 3 at Pinehurst Resort #7
- Par
- 4
- Yardage
- 406 yds
- Stroke index
- 13
- Hazards
- 1 bunker
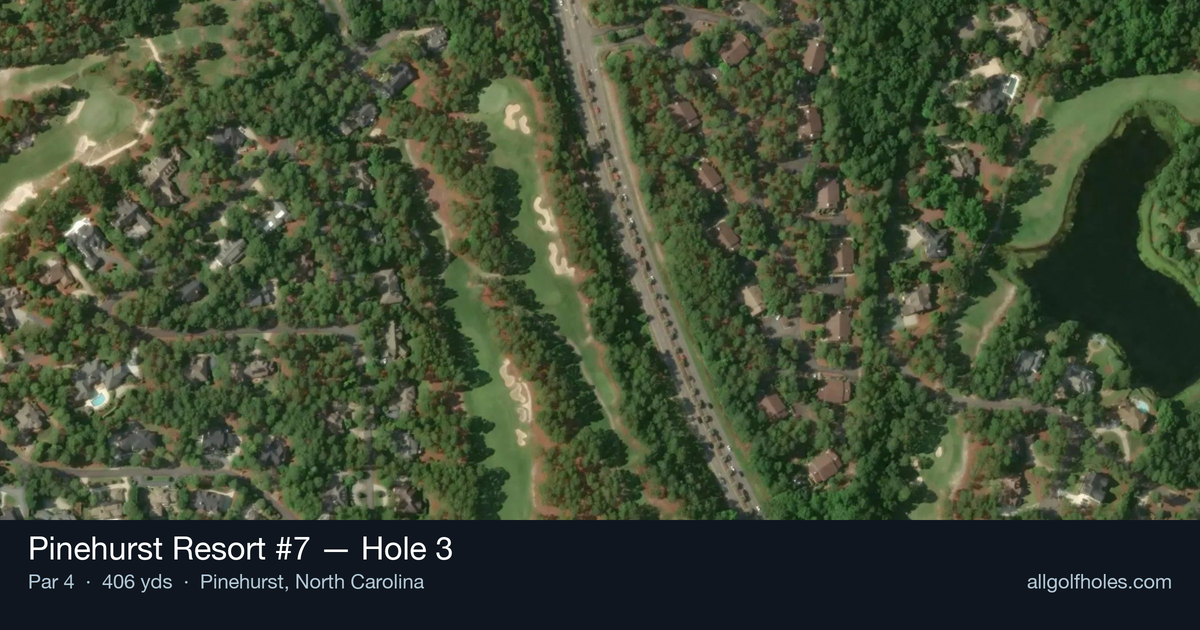
Aerial source not provided
Green size: 29 yds deep × 28 yds wide
Scorecard yardage is for Championship tees. The aerial shows its labeled reference position; distance rings measure to the green.
Championship tees · Par 4 · 406 yards
The plan for No. 3
The third hole at Pinehurst Resort #7 presents a deceptively straightforward par 4 that embodies the course's philosophy of rewarding precision over power. This 406-yard test features a generous fairway framed by the resort's signature longleaf pines, creating a natural cathedral effect that defines the Pinehurst experience. The tee shot demands accuracy rather than distance, as the straight layout allows players to focus on positioning for the crucial approach shot. The small green complex becomes the hole's primary defense, requiring pinpoint iron play and thoughtful club selection. With its mid-tier handicap rating, this hole serves as an excellent barometer of a golfer's short game prowess, where conservative strategy often trumps aggressive play in Rees Jones' masterful design.
Off the tee
The tee shot strategy revolves around positioning yourself for the best approach angle while avoiding any trouble areas that may lurk in the landing zone. Given the straight layout, focus on finding the center-left portion of the fairway, which typically provides the most favorable angle into the small green. Driver may be the obvious choice for longer hitters, but consider a 3-wood or hybrid if accuracy is a concern - leaving yourself a full wedge or short iron often trumps a longer approach with a less reliable club. The key is avoiding any fairway bunkers or rough that could complicate your approach shot.
Approach & recovery
With the small green as your target, precision takes precedence over power on the approach shot. The compact putting surface means you'll need to commit to your yardage and trust your club selection. Aim for the center of the green unless the pin position clearly favors one side, as missing this small target can leave you with challenging up-and-down opportunities. A mid-iron to short iron will typically be your weapon of choice, depending on your tee shot position. Focus on a smooth, controlled swing that prioritizes accuracy over distance - this isn't the hole to be aggressive with pin hunting.
On the green
The small green size means every putt becomes crucial for your scoring. Spend extra time reading the subtle breaks, as even short putts can be tricky on a compact surface. Position your approach shots below the hole when possible, as uphill putts are generally more manageable on smaller greens. If you find yourself above the hole, focus on speed control to avoid running your first putt well past and facing a challenging comeback attempt. ## RISK VS REWARD This hole offers a moderate risk/reward proposition. The absence of major hazards encourages aggressive play, but the small green punishes wayward approach shots. The scoring opportunity comes from precise execution rather than bold strategy - players who can consistently hit their targets will find birdie chances, while those who get careless may struggle to find the putting surface altogether. ## DIFFERENT SKILL LEVELS **Higher Handicap Players:** Focus on course management and playing within your abilities. Consider laying back off the tee with a fairway wood or hybrid to ensure you're hitting from the short grass. Aim for the center of the green regardless of pin position, and don't be afraid to take your medicine if you miss the target - a solid bogey beats a big number. **Lower Handicap Players:** Use your precision to be more aggressive with both tee shot positioning and approach angles. You can afford to challenge pin positions more directly, but respect the small green size. This is an excellent hole to attack when conditions are favorable and your ball-striking is sharp. The 3rd hole at Pinehurst No. 7 rewards golfers who understand that sometimes the most aggressive play is the most conservative approach - finding the fairway and the green in regulation sets up excellent scoring opportunities on this seemingly straightforward but strategically nuanced par 4.
Watch for
- Course conditioning and mapped hazards may affect line selection; confirm from the aerial.
Hole 3 Green Complex
Mapped green boundary
Green size: 4,609 sq ft
How did Hole 3 play?
How did this hole play today?
Frequently asked questions
Yardage reference: Championship tees · 406 yards.
What's the best strategy off the tee?
↓
For this 406-yard par 4, most players will hit driver to set up a comfortable approach.
How difficult is hole 3?
↓
This hole is a good scoring opportunity for most golfers.
What hazards should I watch out for on hole 3?
↓
Key hazards include: 1 greenside bunker. Plan your shots to avoid these trouble spots.
How big is the green on hole 3?
↓
The green is medium-sized with moderate targets. Pay attention to pin placement when selecting your approach club.