Hole 9 at Pinehurst Resort #7
- Par
- 3
- Yardage
- 191 yds
- Stroke index
- 15
- Hazards
- 2 bunkers · Water
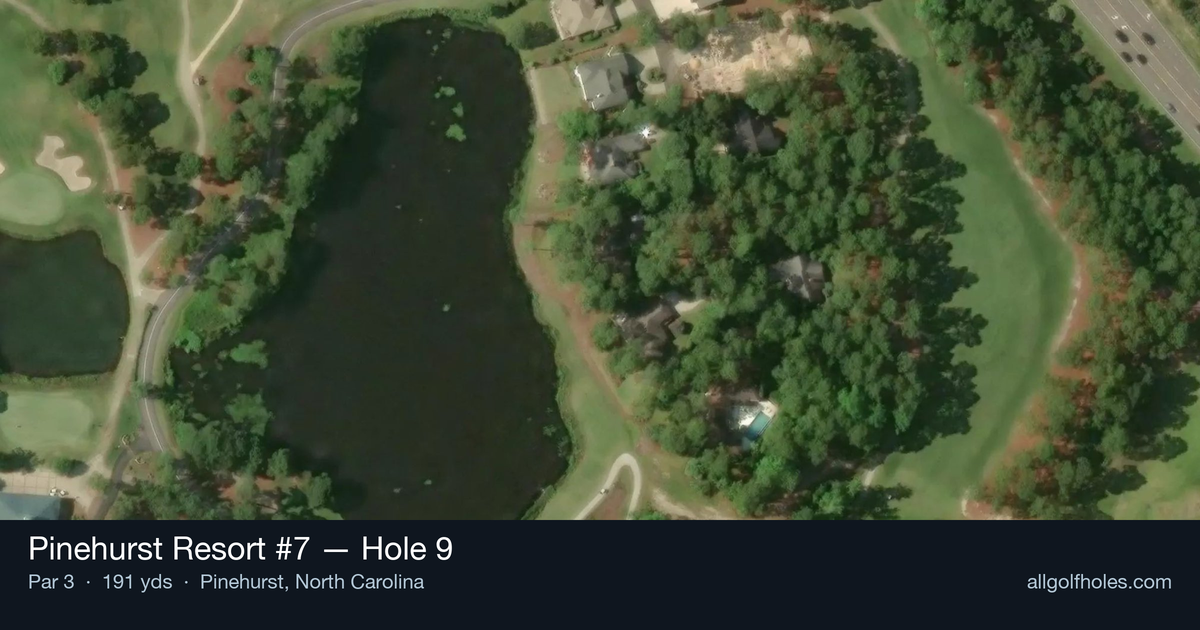
Aerial source not provided
Green size: 27 yds deep × 20 yds wide
Scorecard yardage is for Championship tees. The aerial shows its labeled reference position; distance rings measure to the green.
Championship tees · Par 3 · 191 yards
The plan for No. 9
The ninth hole at Pinehurst Resort #7 serves as a pivotal turning point in Rees Jones' challenging design, offering a deceptively straightforward par 3 that demands precision over power. At 191 yards, this tee shot requires careful club selection to find the small, well-protected green nestled among the towering Carolina pines that define Pinehurst's legendary landscape. The absence of major water hazards doesn't diminish the challenge – instead, the emphasis shifts to distance control and accuracy, as missing the compact green leaves difficult recovery shots from the surrounding sandy areas and native vegetation. As the final hole of the front nine, it exemplifies the strategic thinking required throughout this dramatic layout, where both birdie and bogey remain equally possible depending on execution.
Off the tee
Club selection is paramount on this tee shot, with most players looking at a mid to long iron depending on conditions and pin position. The key is committing to your yardage and swinging with confidence rather than trying to steer the ball. Aim for the center of the green when the pin is tucked, as the small target leaves little margin for error. Wind conditions can significantly impact club choice, so factor in any breeze before making your selection. Trust your distance control and focus on a smooth, balanced swing that finds the putting surface.
Approach & recovery
Since this is a par 3, your tee shot serves as your approach shot. The small green demands pinpoint accuracy, making target line selection crucial based on pin position. When the flag is positioned toward the edges of the green, play conservatively to the center to ensure you're putting rather than chipping. The compact nature of the green means even a well-struck shot that's slightly off-line could find trouble around the putting surface.
On the green
The small green creates interesting putting dynamics, with subtle breaks that can be deceiving given the limited real estate. Pay close attention to the grain and slope during your pre-round preparation, as these factors become magnified on a smaller putting surface. Lag putting becomes essential when you're on the wrong tier or far from the pin, as aggressive putts can easily run off the green. Focus on getting your first putt close rather than trying to hole everything from distance. ## RISK VS REWARD While this hole lacks dramatic hazards, the risk/reward equation centers on pin hunting versus playing safe. Aggressive plays toward tucked pins can yield birdie opportunities, but the small green punishes misses severely. The reward for finding the putting surface is significant - a legitimate birdie chance and momentum heading to the back nine. However, missing the green entirely can lead to difficult up-and-downs that turn a scoring opportunity into a bogey. ## DIFFERENT SKILL LEVELS **High Handicappers** should focus entirely on finding the green, regardless of pin position. Choose a club that comfortably covers the distance and aim for the center of the green every time. This conservative approach maximizes your chances of two-putting for par and avoiding the big numbers that come from missing greens. **Low Handicappers** can be more aggressive with pin hunting, especially when conditions favor precision shots. Use your distance control skills to attack pins when they're accessible, but recognize when to play conservatively to the fat part of the green. Your short game skills allow for more aggressive plays, knowing you can get up and down if you miss slightly. The 9th hole at Pinehurst No. 7 rewards golfers who understand that sometimes the simplest-looking holes require the most precise execution. Make your par here, and you'll head to the back nine with confidence and momentum.
Watch for
- Course conditioning and mapped hazards may affect line selection; confirm from the aerial.
Hole 9 Green Complex
Mapped green boundary
Green size: 2,864 sq ft
How did Hole 9 play?
How did this hole play today?
Frequently asked questions
Yardage reference: Championship tees · 191 yards.
What club should I use on this par 3?
↓
At 191 yards, most golfers will need a long iron or hybrid (5-iron to 6-iron) to reach this green. Adjust for elevation, wind, and pin position.
How difficult is hole 9?
↓
This hole is one of the tougher holes on the course for most golfers. Key challenges include: water in play, small green.
What hazards should I watch out for on hole 9?
↓
Key hazards include: 2 greenside bunkers; water at 68.0 yards. Plan your shots to avoid these trouble spots.
How big is the green on hole 9?
↓
The green is small and requires precision. Expect challenging pin positions with limited room for error.