Hole 2 at Pinehurst Resort #7
- Par
- 4
- Yardage
- 462 yds
- Stroke index
- 1
- Hazards
- 5 bunkers
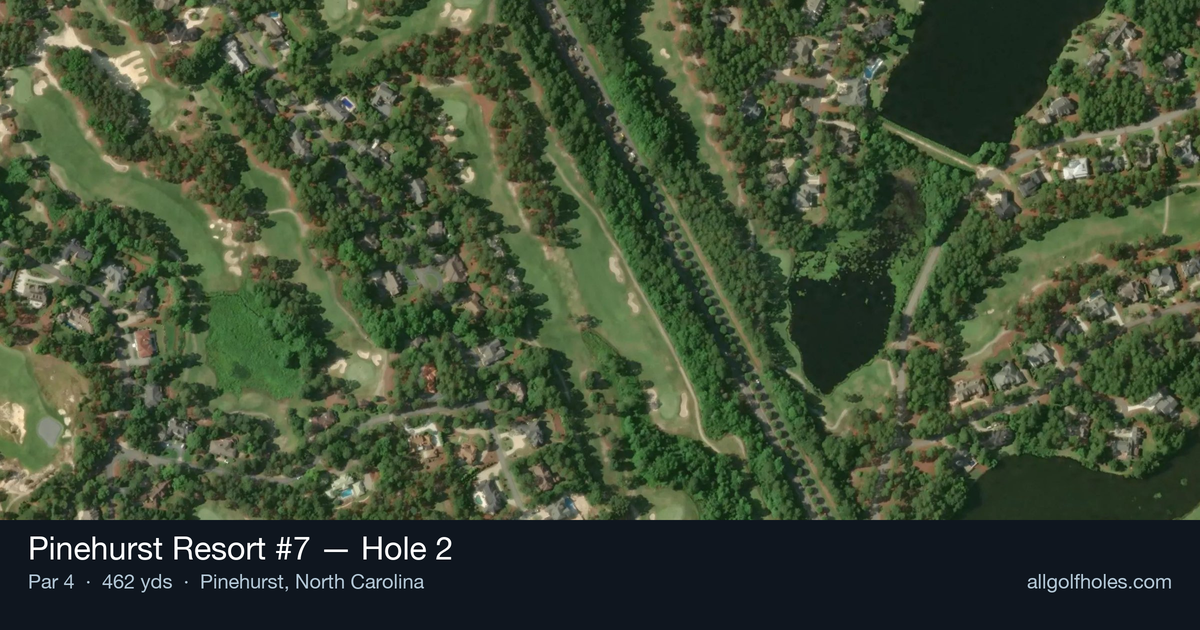
Aerial source not provided
Green size: 29 yds deep × 28 yds wide
Scorecard yardage is for Championship tees. The aerial shows its labeled reference position; distance rings measure to the green.
Championship tees · Par 4 · 462 yards
The plan for No. 2
The #1 handicap hole at Pinehurst Resort #7 immediately announces itself as the course's most formidable challenge. This 462-yard par 4 demands both power and precision from the championship tees, embodying Rees Jones' reputation for creating dramatic, strategic golf holes. The straight layout might appear straightforward, but the combination of length and a small green complex creates a deceptive test that separates skilled players from the field. A commanding tee shot sets up everything on this hole, as players must find the optimal position in the fairway to attack the compact green. The approach shot becomes increasingly challenging as the small target demands pinpoint accuracy, particularly with mid-to-long irons in hand. Without significant hazards to distract, the hole's difficulty lies purely in its honest examination of ball-striking ability and course management. This opening statement from Jones' design philosophy makes Pinehurst Resort #7 hole 2 a memorable early test that sets the tone for the round ahead.
Off the tee
Your tee shot strategy should focus on finding the optimal position in the fairway for your approach angle. With 462 yards to navigate, most players will need their driver to have any realistic chance of reaching the green in regulation. The key is selecting a target line that provides the best angle into the small green while avoiding any trouble areas that may not be immediately visible from the tee. Since this is a straight hole without major hazards, focus on hitting to your preferred side of the fairway based on your natural shot shape. Right-handed players who fade the ball should aim slightly left of center, while those who draw should target the right side. The generous fairway allows for this strategic positioning without severe penalties for minor misses.
Approach & recovery
The approach shot to this small green is where the hole's true difficulty reveals itself. From the likely distance of 150-180 yards remaining, club selection becomes crucial. The small green size demands precision, so take one more club than the yardage suggests to ensure you clear any front-edge trouble and give yourself the best chance to hold the putting surface. Focus on the center of the green regardless of pin position - with such a small target, aggressive pin-hunting often leads to missed greens and difficult up-and-downs. A mid-iron to long-iron approach, depending on conditions and your driving distance, should be struck with confidence and committed tempo.
On the green
The small green at this hole means that even well-struck approach shots may leave longer putts than expected. Read the green carefully, as subtle breaks can be deceiving on smaller putting surfaces. The key is getting your first putt close enough to eliminate three-putt possibilities. Pay attention to the overall slope and grain direction typical of Pinehurst greens. Conservative putting strategy works best here - aim for the fat part of the hole and focus on solid contact rather than aggressive lines that might lead to comebackers. ## RISK VS REWARD This hole offers limited risk/reward opportunities due to its straightforward design and lack of significant hazards. The primary strategic decision involves tee shot positioning and approach club selection. The reward for aggressive play is minimal compared to the penalty for missing the small green, making conservative, center-target golf the optimal strategy. Consider laying up if your second shot would require a low-percentage long iron or hybrid to reach the green. A controlled wedge from 100 yards often provides better scoring opportunities than a marginal approach from longer distance. ## DIFFERENT SKILL LEVELS **High-Handicap Players:** Focus on keeping the ball in play off the tee, even if it means using a 3-wood or hybrid for better accuracy. From the fairway, prioritize hitting the green over attacking pins. Two-putt pars or even bogeys represent good scores on this challenging hole. **Low-Handicap Players:** Use driver aggressively to get as close as possible for a shorter iron approach. With better distance control, you can be slightly more aggressive with pin positions, but still respect the small green size. This hole demands your A-game in both power and precision. The #1 handicap rating tells the story - this hole will test every aspect of your game and reward those who combine strategic thinking with quality execution throughout the entire hole.
Watch for
- Course conditioning and mapped hazards may affect line selection; confirm from the aerial.
Hole 2 Green Complex
Mapped green boundary
Green size: 4,305 sq ft
How did Hole 2 play?
How did this hole play today?
Frequently asked questions
Yardage reference: Championship tees · 462 yards.
What's the best strategy off the tee?
↓
For this 462-yard par 4, most players will hit driver to set up a comfortable approach.
How difficult is hole 2?
↓
This hole is one of the tougher holes on the course for most golfers. Key challenges include: long par 4, heavily bunkered, small green.
How big is the green on hole 2?
↓
The green is small and requires precision. Expect challenging pin positions with limited room for error.
What's a good score on hole 2?
↓
This hole is one of the tougher holes where par feels like birdie. A challenging par 4. Accept that bogey happens and avoid big numbers.