Hole 11 at Pinehurst Resort #7
- Par
- 4
- Yardage
- 421 yds
- Stroke index
- 10
- Hazards
- 4 bunkers
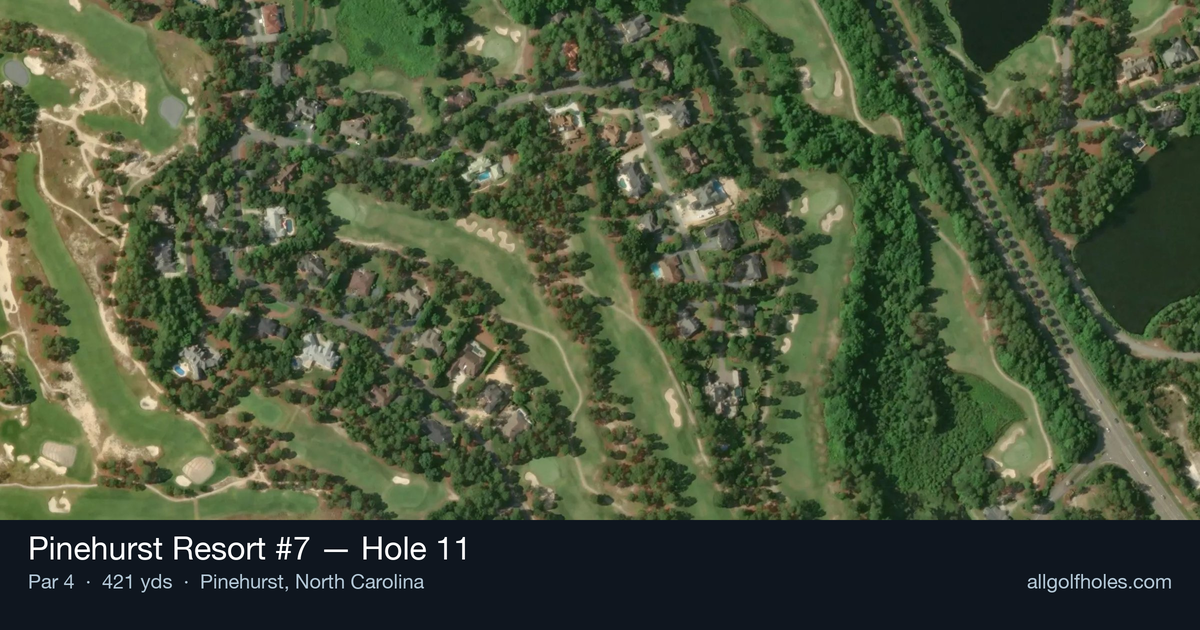
Aerial source not provided
Green size: 32 yds deep × 21 yds wide
Scorecard yardage is for Championship tees. The aerial shows its labeled reference position; distance rings measure to the green.
Championship tees · Par 4 · 421 yards
The plan for No. 11
The 11th hole at Pinehurst Resort #7 exemplifies Rees Jones' strategic design philosophy, presenting a deceptively straightforward par 4 that demands precision over power. This 421-yard test features a generous fairway that invites an aggressive tee shot, but the real challenge emerges on the approach to the compact green complex. Without significant hazards to intimidate, golfers must rely on course management and shot execution, making club selection critical from both tee and fairway. The small green rewards accurate iron play while punishing wayward approaches with difficult recovery shots. True to Pinehurst tradition, this hole embodies the "challenging but fair" design ethos, where strategic thinking trumps brute force, creating a memorable mid-round examination that separates thoughtful players from the field.
Off the tee
The tee shot strategy centers on positioning for the optimal approach angle. With no major hazards threatening, focus on finding the center of the fairway with a controlled swing rather than maximum distance. A driver or 3-wood should leave you in prime position, typically around 250-280 yards from the tee depending on conditions. The key is avoiding the rough, as any wayward drive will complicate your approach to the small green. Choose your target line down the middle and commit to a smooth, controlled swing that prioritizes accuracy over distance.
Approach & recovery
The approach shot represents the hole's primary scoring opportunity and biggest challenge. From a well-positioned drive, you'll face a mid-iron to long-iron shot into a small green that demands precision. Without significant hazards to avoid, the focus shifts entirely to distance control and accuracy. Study the pin position carefully - with limited green space, being on the correct tier or section becomes crucial. Favor the center of the green when in doubt, as short-siding yourself on this compact target can lead to difficult up-and-downs.
On the green
The small green size means putting becomes a premium skill on this hole. Expect subtle breaks and firm conditions typical of Pinehurst layouts. Distance control takes precedence over aggressive line-taking, as three-putts can quickly derail your score. Read the green carefully from multiple angles, and remember that most putts will have less break than they appear due to the firm surfaces. Focus on getting your first putt close rather than trying to hole everything. ## RISK VS REWARD This hole offers limited risk/reward opportunities, instead demanding steady, percentage golf. The primary decision point comes with club selection off the tee - longer hitters might consider a 3-wood or hybrid to ensure optimal approach distance, while others will need driver to get close enough for a manageable iron shot. The reward comes from executing two solid shots rather than taking chances with aggressive lines or risky pin-hunting. ## DIFFERENT SKILL LEVELS **High-handicap players** should embrace conservative course management here. Use whatever club gives you confidence off the tee, even if it means a longer approach shot. Aim for the center of the green regardless of pin position, and focus on two-putting for par. The lack of major hazards makes this hole more forgiving for higher handicappers than many others at Pinehurst. **Low-handicap players** can be more aggressive with pin-hunting, but only when the approach shot is from an ideal distance and lie. Consider the wind conditions and green firmness when selecting your approach club, and don't hesitate to take one more club to ensure you clear any front pin positions. This is a hole where steady pars build momentum rather than risky birdies. The strategic thinking required here reflects the broader challenge of Pinehurst No. 7 - a course that rewards precision and punishes carelessness, even on seemingly straightforward holes.
Watch for
- Course conditioning and mapped hazards may affect line selection; confirm from the aerial.
Hole 11 Green Complex
Mapped green boundary
Green size: 3,828 sq ft
How did Hole 11 play?
How did this hole play today?
Frequently asked questions
Yardage reference: Championship tees · 421 yards.
What's the best strategy off the tee?
↓
For this 421-yard par 4, most players will hit driver to set up a comfortable approach.
How difficult is hole 11?
↓
This hole is a moderate challenge for most golfers. Key challenges include: heavily bunkered, small green.
How big is the green on hole 11?
↓
The green is small and requires precision. Expect challenging pin positions with limited room for error.