Hole 3 at Bethpage State Park (Black Course)
- Par
- 3
- Yardage
- 205 yds
- Hazards
- 3 bunkers
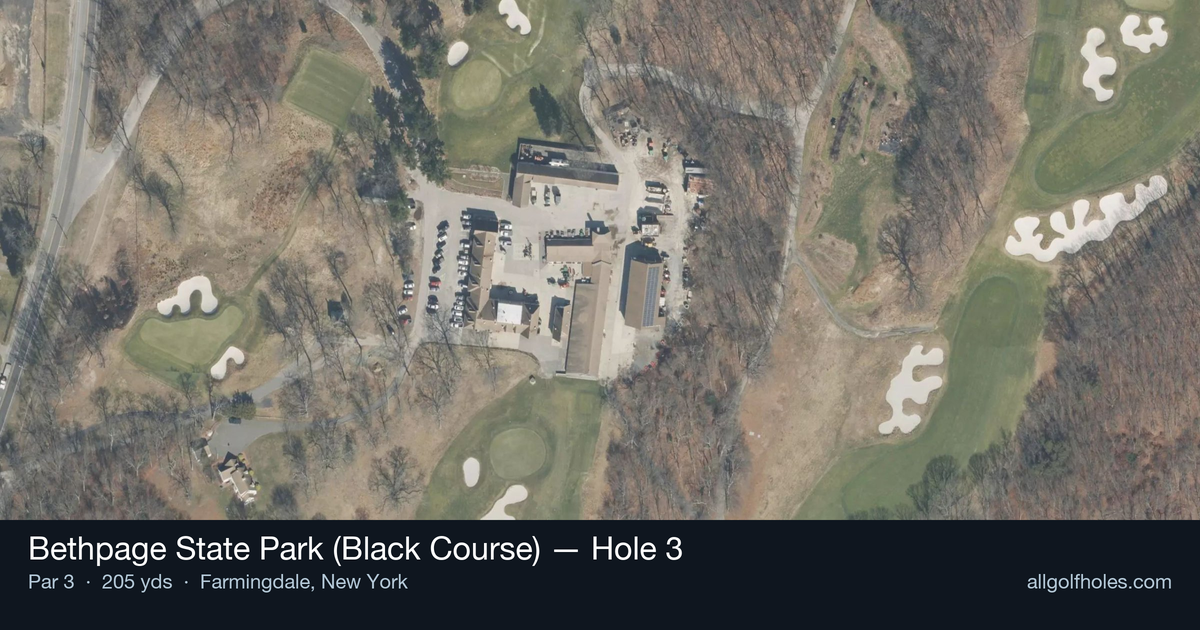
Aerial source not provided
Green size: 41 yds deep × 40 yds wide
Scorecard yardage is for Championship tees. The aerial shows its labeled reference position; distance rings measure to the green.
Championship tees · Par 3 · 205 yards
The plan for No. 3
The third hole at Bethpage State Park (Black Course) presents a deceptively challenging par 3 that exemplifies the course's reputation for punishing precision. At 205 yards, this straightforward hole demands a confident tee shot to a small, well-protected green that offers little margin for error. The elevated tee provides a commanding view of the target, but the distance and green complex require careful club selection and precise execution. What appears simple from the tee quickly reveals its teeth, as the compact putting surface punishes anything less than a committed swing. This hole embodies Bethpage Black's philosophy of rewarding bold, accurate play while severely testing golfers who lack conviction in their approach.
Off the tee
Your tee shot strategy centers entirely around club selection and commitment to your target line. From 205 yards, most golfers will need anywhere from a long iron to a hybrid or fairway wood, depending on conditions and personal distance. The key is selecting enough club to reach the green while maintaining control - this isn't a hole where you want to be short. Aim for the center of the green regardless of pin position, as the small target demands a conservative approach. Take one extra club if there's any doubt, as missing long is typically more forgiving than coming up short.
Approach & recovery
Since this is a par 3, your tee shot IS your approach shot. Focus on a smooth, controlled swing rather than trying to muscle the ball to the hole. The small green means there's little margin for error, so commit fully to your club selection and swing with confidence. Pay attention to wind conditions, which can significantly affect club selection on a hole of this length. A well-struck shot to the center of the green will always give you a reasonable birdie opportunity.
On the green
The small green size means putting becomes crucial to your score. While the specific green contours aren't detailed, expect subtle breaks that can be tricky to read. Focus on getting your first putt close rather than being overly aggressive with birdie attempts. Two-putting from anywhere on this small green should be your primary goal, as three-putts can quickly derail a good round. Study the green carefully during your approach to get an early read on the slopes. ## RISK VS REWARD This hole offers limited risk/reward opportunities due to its par 3 nature and small green. The main strategic decision involves club selection - taking enough club to comfortably reach the green versus trying to flight the ball perfectly to a specific pin position. Generally, the reward of being aggressive doesn't outweigh the risk of missing this small target entirely. ## DIFFERENT SKILL LEVELS **High-Handicap Players:** Focus entirely on reaching the green with your tee shot. Don't worry about pin hunting - aim for the center and be satisfied with any shot that finds the putting surface. Consider taking an extra club to ensure you don't come up short, and remember that bogey is a respectable score on a hole of this caliber. **Low-Handicap Players:** While you can be more precise with your target selection, still respect the small green size. You might work the ball slightly toward certain pin positions, but never at the expense of missing the green entirely. Your superior short game skills give you more confidence to be slightly more aggressive, but course management remains key. This hole embodies the championship character of Bethpage Black - it rewards precision and punishes overconfidence, making it a true test of both skill and mental fortitude.
Watch for
- 3 mapped bunkers influence club selection and recovery options on this hole.
Hole 3 Green Complex
Mapped green boundary
Green size: 7,246 sq ft
Course and tournament history
Historical context for the course and venue. Each entry identifies the event or course it describes.
Jack Nicklaus
The “Bear Trap,” a 3-hole stretch including 15, 16, and 17, was named in honor of Jack Nicklaus, who said, “it should all be won or lost here
Source →
How did Hole 3 play?
How did this hole play today?
Frequently asked questions
Yardage reference: Championship tees · 205 yards.
What club should I use on this par 3?
↓
At 205 yards, most golfers will need a long iron or hybrid (5-iron to 6-iron) to reach this green. Adjust for elevation, wind, and pin position.
What hazards should I watch out for on hole 3?
↓
Key hazards include: 3 greenside bunkers. Plan your shots to avoid these trouble spots.
How big is the green on hole 3?
↓
The green is fairly large with multiple pin positions. Lag putting becomes important on longer putts.