Hole 17 at Bethpage State Park (Black Course)
- Par
- 3
- Yardage
- 207 yds
- Hazards
- 5 bunkers
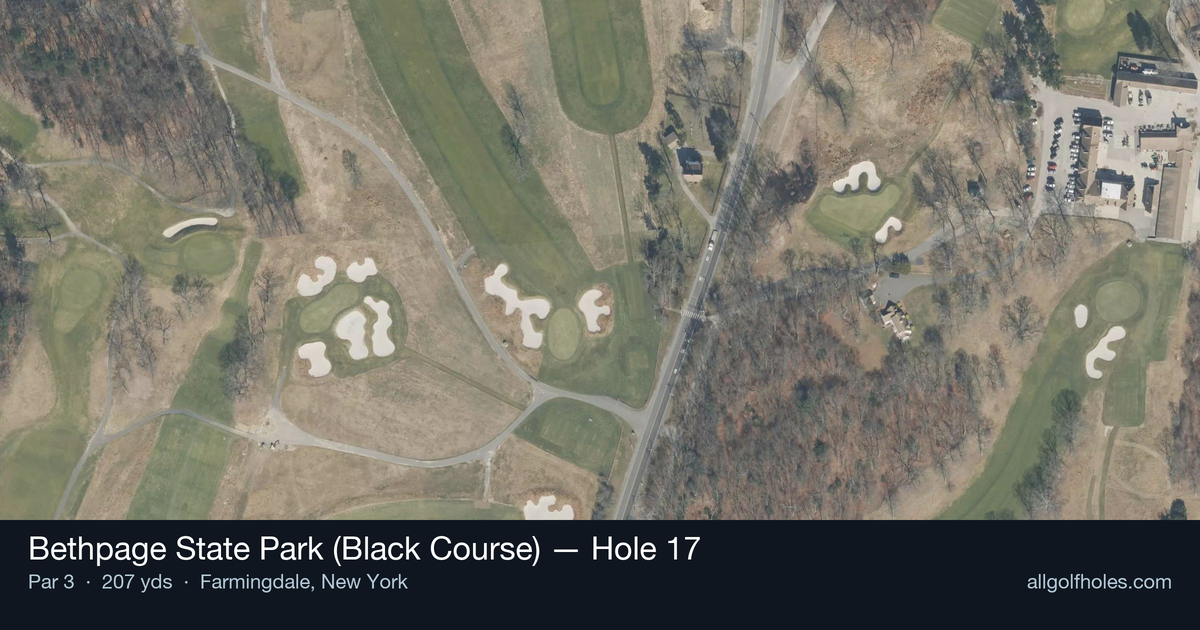
Aerial source not provided
Green size: 31 yds deep × 42 yds wide
Scorecard yardage is for Championship tees. The aerial shows its labeled reference position; distance rings measure to the green.
Championship tees · Par 3 · 207 yards
The plan for No. 17
The penultimate hole at Bethpage State Park (Black Course) stands as one of golf's most intimidating par 3s, forming the climactic moment of Jack Nicklaus's famed "Bear Trap." This 207-yard test perches dramatically on a hillside, demanding a precise tee shot to a small green heavily fortified by menacing bunkers. The elevated setting amplifies every challenge—distance, wind, and the crushing pressure of championship golf combine to create one of the most daunting single shots in the game. As part of the three-hole stretch where Nicklaus declared tournaments "should all be won or lost," this hole has witnessed countless dreams shattered and legends born. With the 2025 Ryder Cup approaching, this theater of golf drama continues to separate champions from contenders.
Off the tee
Your tee shot strategy must account for the elevated green position and the fortress of bunkers surrounding the putting surface. Take extra club due to the uphill nature of the shot - what might normally be a 7-iron could easily require a 6-iron or even 5-iron depending on pin position and wind conditions. Aim for the center of the green regardless of pin position, as the small target leaves little margin for error. The key is committing fully to your club selection and swing - any hesitation or deceleration will leave you short in the bunkers. Pay special attention to wind direction, as the exposed hillside position makes this hole particularly susceptible to crosswinds that can dramatically affect ball flight.
Approach & recovery
Since this is a par 3, your tee shot IS your approach shot, making club selection and execution absolutely critical. The green's small size means you must be precise with both distance and direction control. Focus on a smooth, controlled swing rather than trying to muscle the ball to the pin. The elevated green means shots that appear to be tracking perfectly can still come up short, so err on the side of taking more club. If you're between clubs, always take the longer option - being long on this green is far preferable to being short in the bunkers.
On the green
The small green size means putting becomes a premium skill on this hole. With limited space, even approach shots that find the putting surface can leave challenging two-putts if you're on the wrong tier or section. Read putts carefully, as the elevated position can create subtle breaks that aren't immediately apparent. Focus on lag putting to ensure you don't compound a good tee shot with a three-putt. The psychological pressure of this hole can affect putting stroke, so maintain your routine and trust your read. ## RISK VS REWARD This hole offers little in terms of traditional risk/reward decisions - it's more about risk management and execution under pressure. The only "reward" is making par on one of the course's most challenging holes. The risk is significant: missing the green means a difficult bunker shot or worse, and even finding the green doesn't guarantee par. The smart play is always targeting the center of the green, regardless of pin position. Aggressive pin-hunting on this hole rarely pays off and often leads to big numbers. ## DIFFERENT SKILL LEVELS **High-Handicap Players:** Focus entirely on finding the green, regardless of pin position. Take plenty of club and aim for the center of the putting surface. Accept that par here is a great score and don't let the hole's intimidating reputation affect your swing. If you miss the green, focus on getting up and down for bogey rather than trying hero shots. **Low-Handicap Players:** While you have the skill to be more aggressive, this hole still demands respect. You can consider pin position more than higher handicappers, but only when the pin is in a relatively accessible location. Use your course management skills to factor in wind, adrenaline, and match situation. Remember that even tour professionals often aim for the center of this green - there's no shame in playing conservatively on one of golf's most challenging par 3s. The 17th at Bethpage Black embodies everything that makes championship golf compelling: it rewards precision, punishes mistakes, and creates moments that separate good rounds from great ones. Approach it with respect, commit to your decisions, and remember that par here is always a victory.
Watch for
- 5 mapped bunkers influence club selection and recovery options on this hole.
Hole 17 Green Complex
Mapped green boundary
Green size: 6,491 sq ft
Course and tournament history
Historical context for the course and venue. Each entry identifies the event or course it describes.
Jack Nicklaus
The “Bear Trap,” a 3-hole stretch including 15, 16, and 17, was named in honor of Jack Nicklaus, who said, “it should all be won or lost here
Source →
How did Hole 17 play?
How did this hole play today?
Frequently asked questions
Yardage reference: Championship tees · 207 yards.
What club should I use on this par 3?
↓
At 207 yards, most golfers will need a long iron or hybrid (5-iron to 6-iron) to reach this green. Adjust for elevation, wind, and pin position.
What hazards should I watch out for on hole 17?
↓
Key hazards include: 5 greenside bunkers. Plan your shots to avoid these trouble spots.
How big is the green on hole 17?
↓
The green is fairly large with multiple pin positions. Lag putting becomes important on longer putts.