Hole 2 at Bethpage State Park (Black Course)
- Par
- 4
- Yardage
- 389 yds
- Hazards
- 2 bunkers
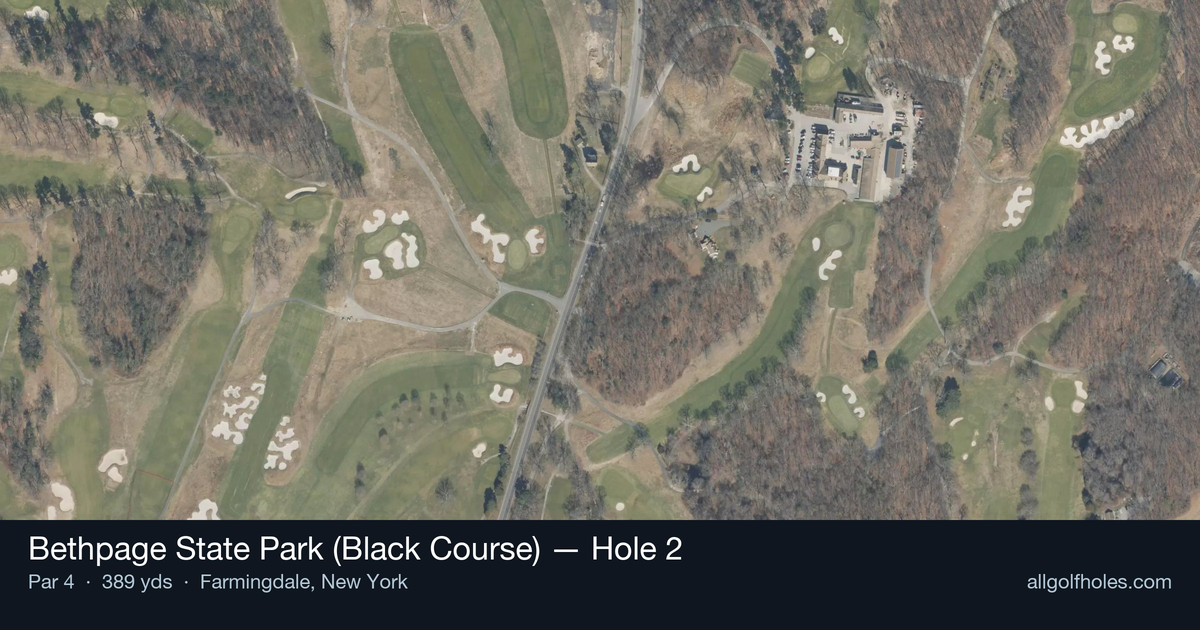
Aerial source not provided
Green size: 31 yds deep × 29 yds wide
Scorecard yardage is for Championship tees. The aerial shows its labeled reference position; distance rings measure to the green.
Championship tees · Par 4 · 389 yards
The plan for No. 2
The deceptively challenging second hole at Bethpage State Park (Black Course) presents one of golf's most intriguing paradoxes - what appears straightforward from the tee becomes a stern test of precision and course management. This 389-yard par 4 plays as the stroke index hole, earning its reputation as one of the most difficult holes for amateur golfers while simultaneously ranking among the easiest for touring professionals. The straight layout demands an accurate tee shot to find the optimal position for the approach to a small, unforgiving green complex. Without significant hazards to navigate, success hinges entirely on execution and distance control. The hole's deceptive nature lies in its requirement for two perfectly struck shots, making it a true separator that rewards only the most committed swings on this legendary Long Island layout.
Off the tee
The tee shot strategy revolves around positioning for the optimal approach angle. With no significant hazards mentioned in the immediate landing area, the primary focus should be finding the center of the fairway to ensure a clean lie for your approach. Most players will benefit from a controlled driver or strong 3-wood, aiming for the heart of the landing zone around the 250-yard mark. The straight layout allows for an aggressive target line down the middle, but resist the temptation to overpower the tee shot – accuracy trumps distance on this hole.
Approach & recovery
The approach shot is where this hole shows its teeth. The small green demands pinpoint accuracy with your club selection and target line. Depending on your tee shot position, you'll likely face a short to mid-iron into the green. The key is committing to the center of the green rather than chasing pin positions, especially when the flag is tucked near edges. Take one extra club to ensure you carry any front protection and focus on a smooth, controlled swing that prioritizes accuracy over aggressive pin-hunting.
On the green
The small green size means every putt becomes crucial for scoring. With limited surface area, even slight misreads can result in lengthy comeback putts. Focus on lag putting to the center of the green when facing longer putts, as three-putting from this compact surface can quickly derail your scorecard. Pay special attention to green speed and subtle breaks – what appears flat may have more movement than expected. ## RISK VS REWARD This hole offers a fascinating risk/reward dynamic that varies dramatically by skill level. The reward potential exists in the relatively short yardage, but the risk comes from the precision required into the small green. Aggressive players might be tempted to fire at pins, but the smart play focuses on hitting the green center and taking your chances with the putter. The risk of missing this small target far outweighs the reward of getting close to challenging pin positions. ## DIFFERENT SKILL LEVELS **High-handicap players** should adopt a conservative approach: hit fairway with whatever club ensures accuracy, then focus entirely on hitting the green with the approach shot, regardless of pin position. Two-putt par represents an excellent score here. **Low-handicap players** can be more aggressive off the tee with driver, but should still exercise caution on the approach shot. While birdie opportunities exist, the small green punishes even slight misses. Consider the pin position carefully – center-green approaches often yield better results than aggressive shots at tucked flags. The strategic lesson of this hole is clear: respect the small target, prioritize accuracy over aggression, and understand why this seemingly short par 4 has earned its reputation as one of Bethpage Black's most challenging holes for amateur golfers.
Watch for
- 2 mapped bunkers influence club selection and recovery options on this hole.
- Fairway width is roughly 33 yards at the landing zone.
Hole 2 Green Complex
Mapped green boundary
Green size: 5,608 sq ft
How did Hole 2 play?
How did this hole play today?
Frequently asked questions
Yardage reference: Championship tees · 389 yards.
What's the best strategy off the tee?
↓
For this 389-yard par 4, most players will hit driver to set up a comfortable approach.
How difficult is hole 2?
↓
This hole is a good scoring opportunity for most golfers.
What hazards should I watch out for on hole 2?
↓
Key hazards include: 2 greenside bunkers. Plan your shots to avoid these trouble spots.
How big is the green on hole 2?
↓
The green is medium-sized with moderate targets. Pay attention to pin placement when selecting your approach club.
What's a good score on hole 2?
↓
This hole is a medium-length test where par is a solid result. A straightforward par 4 where course management pays off.