Hole 17 at Hazeltine National Golf Club
- Par
- 3
- Yardage
- 182 yds
- Stroke index
- 0
- Hazards
- 4 bunkers · Water
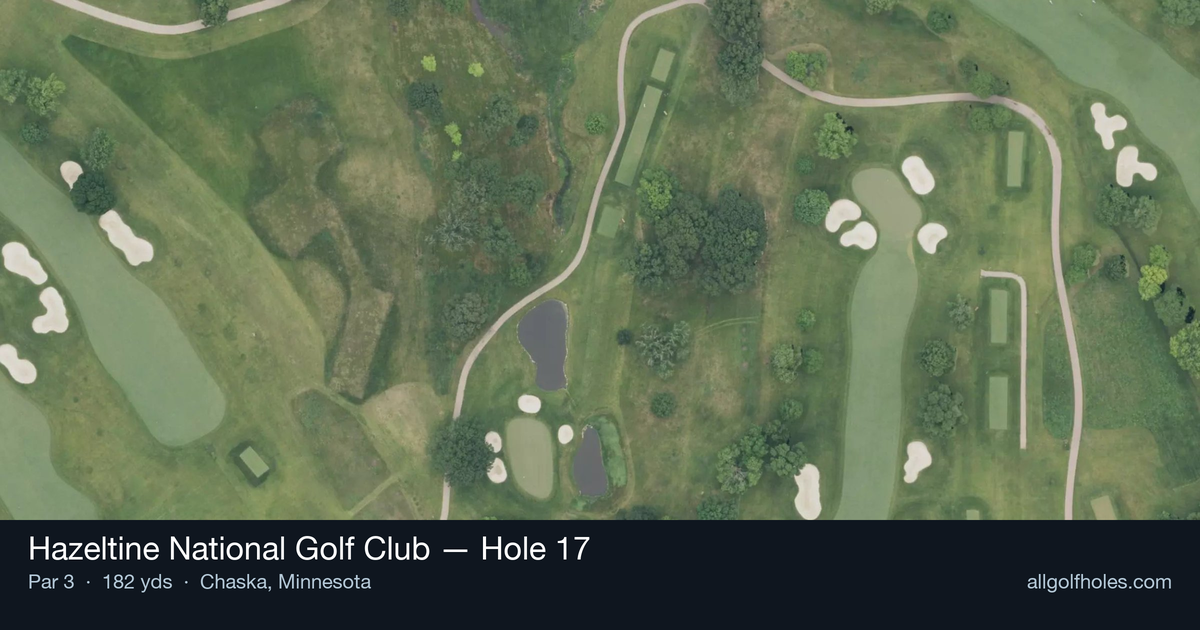
Aerial source not provided
Green size: 35 yds deep × 28 yds wide
Scorecard yardage is for Championship tees. The aerial shows its labeled reference position; distance rings measure to the green.
Championship tees · Par 3 · 182 yards
The plan for No. 17
Following the signature 16th hole, the 17th presents a demanding par 3 that has tested the world's best during major championships at Hazeltine National. This short iron challenge requires precision to a small green, serving as a crucial scoring opportunity before the closing stretch. The hole exemplifies Hazeltine's reputation for strategic shot-making under pressure.
Off the tee
Your tee shot strategy centers on precise yardage calculation and committed execution. The 182-yard distance typically calls for a mid to long iron, depending on conditions and your personal carry distances. Focus on smooth tempo rather than forcing extra distance - the small green rewards accuracy over power. Pay close attention to pin position, as even a well-struck shot to the wrong section of the green can leave a challenging two-putt. Wind assessment is crucial here, as Hazeltine's exposed location can create swirling conditions that affect ball flight.
Approach & recovery
Since this is a par 3, your tee shot is your approach. The key is selecting a club that ensures you reach the green comfortably without flying it. Aim for the center of the green unless the pin is accessible, as the small target makes aggressive pin-hunting a risky proposition. Consider taking one extra club and making a smooth, controlled swing rather than forcing a shot. The straight layout eliminates side-to-side concerns, allowing you to focus entirely on distance control and trajectory.
On the green
The small green size means every putt matters significantly. Focus on getting your first putt close rather than being overly aggressive, as three-putts can quickly derail your score. Read the green carefully from multiple angles, as subtle breaks can be magnified on smaller putting surfaces. Pay attention to grain direction and any slope that might not be immediately obvious from ground level.
Watch for
- 2 water hazards along the hole
- Greenside bunker (greenside)
Hole 17 Green Complex
Mapped green boundary
Green size: 5,267 sq ft
How did Hole 17 play?
How did this hole play today?
Frequently asked questions
Yardage reference: Championship tees · 182 yards.
What club should I use on this par 3?
↓
At 182 yards, most golfers will need a long iron or hybrid (5-iron to 6-iron) to reach this green. Adjust for elevation, wind, and pin position.
How difficult is hole 17?
↓
This hole is one of the tougher holes on the course for most golfers. Key challenges include: water in play, heavily bunkered.
What hazards should I watch out for on hole 17?
↓
Key hazards include: 4 greenside bunkers; water at 176.6 yards. Plan your shots to avoid these trouble spots.
How big is the green on hole 17?
↓
The green is medium-sized with moderate targets. The green is deeper than wide, so club selection is crucial. Pay attention to pin placement when selecting your approach club.