Hole 2 of 18 · Frankfort, Michigan

Hole 2 at Crystal Downs Country Club

Par
4
Yards
425
Bunkers
6
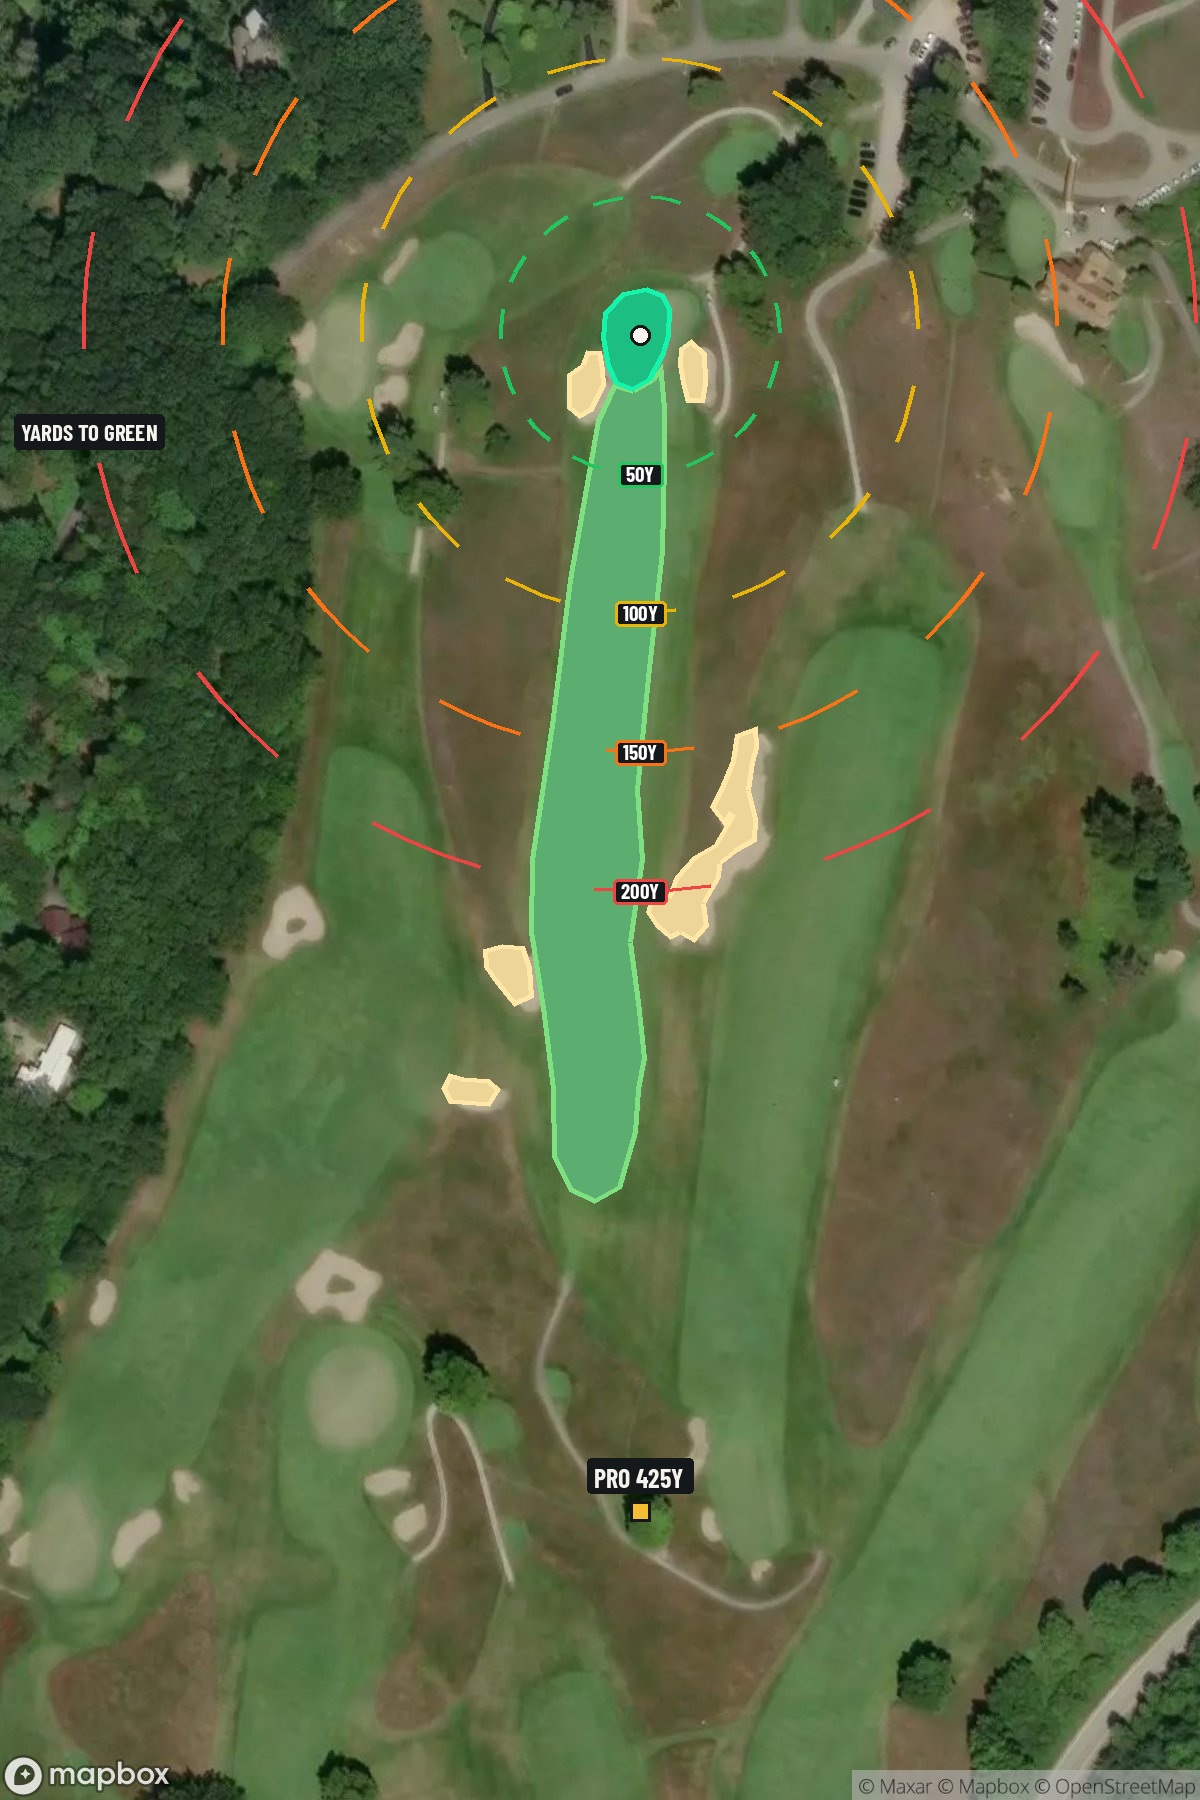
Hole 2 aerial at Crystal Downs Country Club
Map distances from Pro tee · 425 yds

The map's printed distances are measured from the Pro tee to the green; they do not move when you change tees.

Green size: 37 yds deep × 25 yds wide

Mapbox Satellite composite · capture date not provided. Green at the top.

Where this map comes from

Satellite photo
Date not published
Mapbox satellite
Green contours
2015–2016 survey
USGS lidar survey
Report a map problem
100%
Hole 2 aerial at Crystal Downs Country Club

The plan for No. 2

The play: Crystal Downs Country Club hole 2 presents a deceptively straightforward par 4 that exemplifies Alister MacKenzie's brilliant design philosophy. This 425-yard straight-away hole may appear uncomplicated from the tee, but its subtle complexities reveal themselves with each shot. The generous fairway invites an aggressive tee shot, yet the small, intricately contoured green demands precision on the approach. Without bunkers or water hazards to distract, golfers must focus entirely on club selection and pin placement strategy. The green's modest size punishes wayward approach shots, making distance control paramount. What makes this hole memorable is its pure test of fundamental golf skills—driving accuracy followed by precise iron play—embodying the understated elegance that has made Crystal Downs a revered destination for over nine decades.

Shot by shot

  1. Off the tee

    The tee shot strategy centers on finding the optimal distance for your approach while staying in the fairway's center. Most players should focus on a controlled drive that leaves a comfortable mid-iron into the green - typically positioning the ball around 140-160 yards from the pin. Longer hitters might consider throttling back to ensure proper distance control, while shorter players can take an aggressive line knowing the lack of hazards provides forgiveness. The target line should favor the center of the fairway, setting up a straight-on approach to the small green.

  2. Approach & recovery

    The approach shot is where this hole's true challenge reveals itself. The small green demands pinpoint accuracy, making club selection critical. Depending on pin position, you'll likely be hitting anything from a 7-iron to a 4-iron, with the priority being landing the ball on the correct level of the green. Favor the center of the green when in doubt, as short-siding yourself on such a small target can lead to difficult up-and-downs. Pay close attention to wind conditions, as they'll significantly impact club selection on this exposed approach.

  3. On the green

    Crystal Downs' small greens are notorious for subtle breaks and firm conditions. Focus on speed control above all else, as three-putts can quickly turn a scoring opportunity into a bogey. Read the green carefully from multiple angles, as the compact surface can hide deceptive slopes. When facing longer putts, prioritize leaving yourself an uphill second putt rather than charging past the hole. ## RISK VS REWARD This hole offers a classic risk/reward scenario in club selection and aggression level. The reward is clear - a well-positioned drive and accurate approach can easily yield birdie opportunities. The risk lies in being overly aggressive with approach shots to tucked pins, potentially leaving difficult recovery shots around the small green. Smart players will take what the hole gives them, aiming for the fat part of the green and relying on putting to create scoring chances. ## DIFFERENT SKILL LEVELS **Low Handicappers** should view this as a birdie hole, focusing on precise distance control and attacking favorable pin positions. Consider the risk of going at tight pins versus playing to the center of the green. **High Handicappers** should prioritize finding the fairway with their tee shot and the green with their approach. Don't get greedy with pin hunting - aim for the middle of the green and rely on solid putting. This hole rewards patience and smart course management over heroic shots. The second hole at Crystal Downs exemplifies strategic golf design, where the absence of obvious trouble creates its own form of pressure to perform and capitalize on a scoring opportunity.

  4. Watch for

    • Course conditioning and mapped hazards may affect line selection; confirm from the aerial.

The green on No. 2

Mapped boundary
Wide × deepyards
25×37
Areasq ft
6,131

Gear for Hole 2

We may earn a commission when you buy through these links.

Golfer feedback

How did Hole 2 play?

⚡ Quick Golfer Pulse

How did this hole play today?

1-tap anonymous vote

Frequently asked questions

Yardage reference: Pro tees · 425 yards.

What's the best strategy off the tee?

↓

For this 425-yard par 4, most players will hit driver to set up a comfortable approach.

How difficult is hole 2?

↓

This hole is a good scoring opportunity for most golfers.

How big is the green on hole 2?

↓

The green is fairly large with multiple pin positions. Lag putting becomes important on longer putts.