Hole 14 of 18 · Frankfort, Michigan

Hole 14 at Crystal Downs Country Club

Par
3
Yards
147
Bunkers
5
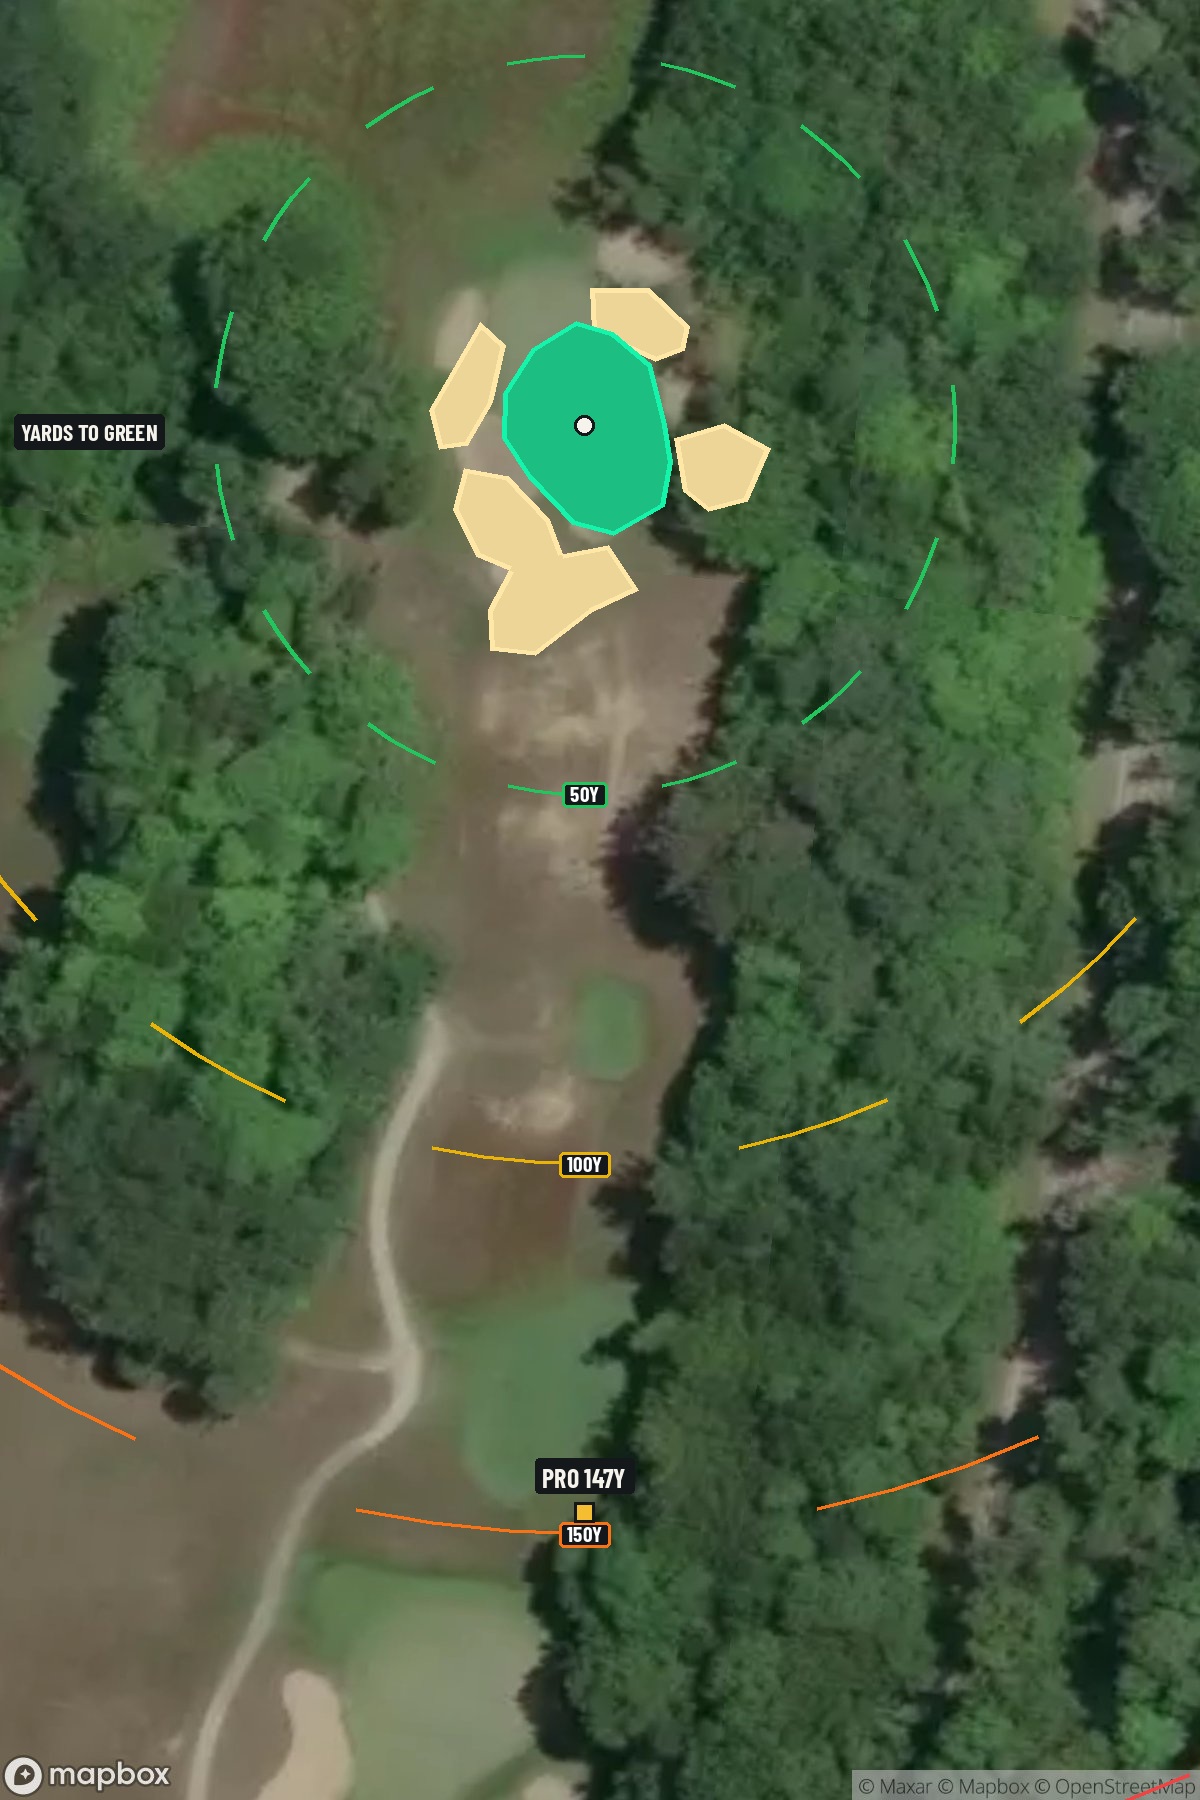
Hole 14 aerial at Crystal Downs Country Club
Map distances from Pro tee · 147 yds

The map's printed distances are measured from the Pro tee to the green; they do not move when you change tees.

Green size: 29 yds deep × 23 yds wide

Mapbox Satellite composite · capture date not provided. Green at the top.

Where this map comes from

Satellite photo
Date not published
Mapbox satellite
Green contours
2015–2016 survey
USGS lidar survey
Report a map problem
100%
Hole 14 aerial at Crystal Downs Country Club

The plan for No. 14

The play: At Crystal Downs Country Club hole 14, this deceptively challenging 147-yard par 3 demands precision over power on one of northern Michigan's most revered courses. The straight shot to a small green leaves little margin for error, requiring golfers to commit fully to their club selection and trust their swing. With minimal hazards to distract, the hole's difficulty lies in its demand for accuracy – anything less than a pure strike will leave a demanding recovery shot. This beautifully framed short iron test epitomizes the strategic design philosophy that has made Crystal Downs a pilgrimage site for serious golfers seeking authentic, no-nonsense golf architecture.

Shot by shot

  1. Off the tee

    Club selection is paramount on this hole, with most golfers looking at anything from a wedge to a mid-iron depending on conditions and pin position. The key is committing fully to your yardage and swinging smoothly rather than trying to guide the ball. Aim for the center of the green unless you're confident in your distance control with a specific pin position. Take one extra club if there's any doubt - being long is often better than coming up short on a small green. Pay particular attention to wind direction and strength, as the exposed location can turn a comfortable wedge into a challenging mid-iron shot.

  2. Approach & recovery

    Since this is a par 3, your tee shot IS your approach shot. Focus on a controlled, balanced swing that prioritizes accuracy over distance. The small green demands precision, so visualize your landing spot and commit to hitting it there. Consider the pin position when selecting your target - if the flag is tucked in a corner, playing to the center of the green is often the percentage play. Ensure your follow-through is complete and balanced, as any deceleration or steering will likely result in a missed green.

  3. On the green

    The small green size means that even successful approaches may leave challenging putts due to limited pin positions and potential slopes. Read the green carefully during your approach, noting any subtle breaks or tiers. Speed control becomes crucial on a compact surface where there's less room for error. If you do miss the green, focus on getting your chip or pitch shot close, as the small target makes recovery shots particularly demanding. ## RISK VS REWARD The primary risk/reward decision involves pin hunting versus playing safe to the center of the green. With no hazards to avoid, aggressive players might be tempted to fire directly at tucked pins, but the small green severely punishes misses. The reward for finding the green is typically a makeable birdie putt, while missing the target often results in difficult up-and-downs. Conservative play to the green's center usually yields the best scoring average. ## DIFFERENT SKILL LEVELS **High-Handicap Players:** Focus exclusively on finding the green rather than attacking specific pin positions. Take enough club to ensure you reach the putting surface, and aim for the largest part of the green. A bogey from the green is far better than a double bogey from the surrounding area. **Low-Handicap Players:** Can be more aggressive with pin positions, especially when confidence is high with distance control. Still respect the small target, but skilled players can take advantage of scoring opportunities by being precise with their club selection and execution. Consider course conditions and your current form when deciding how aggressively to attack pins. The key to success on this hole lies in respecting the small green and prioritizing accuracy through proper club selection and committed execution.

  4. Watch for

    • Course conditioning and mapped hazards may affect line selection; confirm from the aerial.

The green on No. 14

Mapped boundary
Wide × deepyards
23×29
Areasq ft
4,116

Gear for Hole 14

We may earn a commission when you buy through these links.

Golfer feedback

How did Hole 14 play?

⚡ Quick Golfer Pulse

How did this hole play today?

1-tap anonymous vote

Frequently asked questions

Yardage reference: Pro tees · 147 yards.

What club should I use on this par 3?

↓

At 147 yards, most golfers will need a short iron (9-iron to PW) to reach this green. Adjust for elevation, wind, and pin position.

How difficult is hole 14?

↓

This hole is a good scoring opportunity for most golfers. Key challenges include: small green.

How big is the green on hole 14?

↓

The green is small and requires precision. Expect challenging pin positions with limited room for error.

What's a good score on hole 14?

↓

This hole is a legitimate birdie opportunity for accurate iron players. Most golfers should target par, with birdie chances if you hit the green in regulation.