Hole 18 at PGA WEST (Norman course)
- Par
- 4
- Yardage
- 461 yds
- Stroke index
- 2
- Hazards
- 4 bunkers · Water
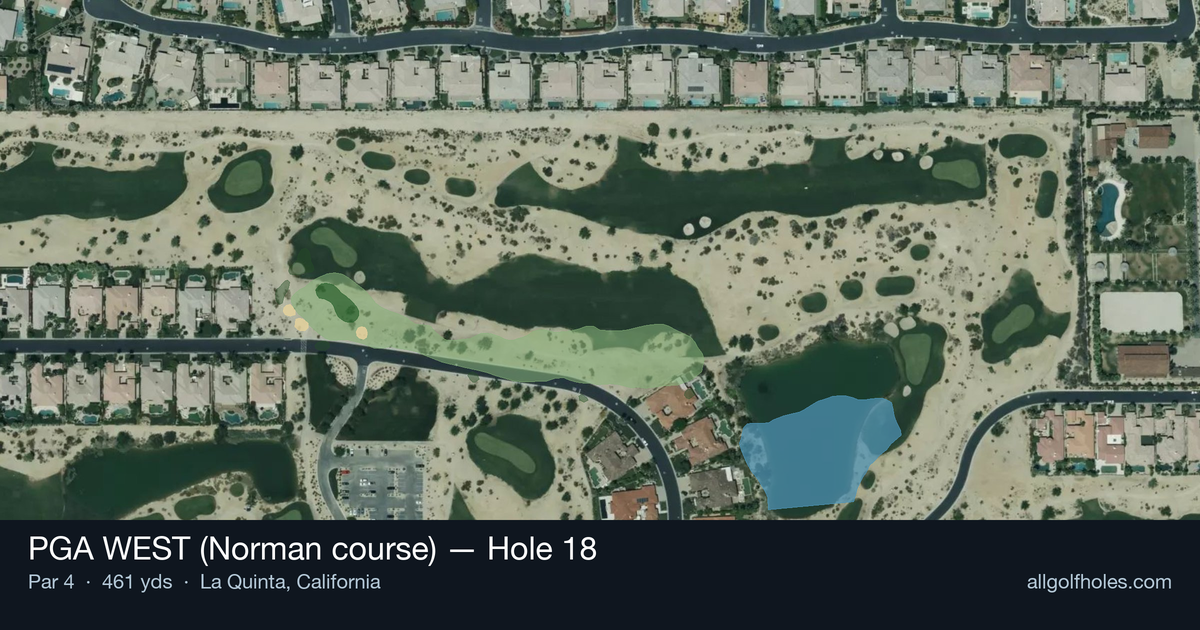
Aerial source not provided
Green size: 33 yds deep × 30 yds wide
Scorecard yardage is for Championship tees. The aerial shows its labeled reference position; distance rings measure to the green.
Championship tees · Par 4 · 461 yards
The plan for No. 18
The 18th hole at PGA WEST's Norman course serves as a demanding finale to Greg Norman's desert masterpiece, requiring precision and power over its 461-yard stretch. This straight par 4 presents a deceptively challenging tee shot across the desert landscape, where accuracy becomes paramount despite the absence of traditional water hazards or bunkers. The hole's true test emerges on the approach, where players must navigate to a small, well-guarded green complex that punishes anything less than a committed strike. With its intimidating length and unforgiving target, this closing hole embodies the strategic philosophy that made Norman one of golf's great competitors, demanding golfers finish their round with both courage and precision.
Off the tee
Your tee shot strategy centers on maximizing distance while maintaining accuracy down the center of the fairway. Given the 461-yard length, you'll want to use driver for most golfers to leave a manageable approach distance. Focus on a smooth, controlled swing rather than trying to overpower the shot - accuracy is crucial since you'll need every yard you can get while staying in the short grass. Target the center-left portion of the fairway to set up the optimal angle for your approach. The straight layout means there's no dogleg to cut, so focus on finding the widest part of the landing zone. Wind conditions in the desert can be a factor, so pay attention to how it might affect both distance and direction.
Approach & recovery
The approach shot is where this hole truly shows its teeth. With a small green as your target, precision becomes paramount. Depending on your tee shot distance, you'll likely be hitting anything from a mid-iron to a hybrid or even fairway wood for shorter hitters. Club selection should prioritize accuracy over distance - it's better to be slightly short and have a straightforward chip than to miss the small green entirely. The compact putting surface means there's little margin for error, so commit fully to your yardage and swing with confidence. Focus on the center of the green unless the pin position clearly favors one side. With such a small target, playing to the middle gives you the best chance of finding the putting surface and avoiding a difficult up-and-down situation.
On the green
The small green demands respect with your putter. Pace control becomes critical since there's limited room for error on longer putts. Study the subtle breaks carefully, as even minor undulations can significantly affect ball roll on a compact surface. Position yourself below the hole whenever possible, as uphill putts are much easier to control on a small green. If you find yourself above the pin, focus on a dead-weight stroke that just reaches the hole - better to leave it short than race it well past on such a small target. ## RISK VS REWARD This hole offers limited risk/reward opportunities given its straightforward design, but the primary decision comes with approach club selection. The reward for aggressive play is minimal since the small green doesn't offer many easy pin positions. The risk of missing the green entirely and facing a difficult chip shot far outweighs any potential benefit of attacking a tucked pin. The smart play is conservative course management - fairway off the tee, center of green on approach, and two-putt for par. This strategy minimizes big numbers and gives you the best chance at a solid finish. ## DIFFERENT SKILL LEVELS **High Handicappers:** Focus on keeping the ball in play rather than maximizing distance. Consider hitting 3-wood or hybrid off the tee if driver accuracy is inconsistent. On the approach, aim for the center of the green regardless of pin position and accept that par is an excellent score on this demanding hole. **Low Handicappers:** You can be more aggressive with driver off the tee, but maintain precision. Your approach shot becomes crucial - use your yardage book religiously and commit to your number. Consider pin position more carefully, but don't get overly aggressive unless you're in a must-birdie situation. **Scratch Players:** This hole rewards patience and precision over power. Execute your normal pre-shot routine on both shots, and don't let the finishing hole pressure affect your decision-making. Trust your yardages and commit to center-green approaches unless the situation demands otherwise.
Watch for
- Course conditioning and mapped hazards may affect line selection; confirm from the aerial.
Hole 18 Green Complex
Mapped green boundary
Green size: 3,618 sq ft
How did Hole 18 play?
How did this hole play today?
Frequently asked questions
Yardage reference: Championship tees · 461 yards.
What's the best strategy off the tee?
↓
For this 461-yard par 4, most players will hit driver to set up a comfortable approach.
How difficult is hole 18?
↓
This hole is one of the tougher holes on the course for most golfers. Key challenges include: long par 4, water in play, small green.
What hazards should I watch out for on hole 18?
↓
Key hazards include: water at 127.2 yards. Plan your shots to avoid these trouble spots.
How big is the green on hole 18?
↓
The green is small and requires precision. Expect challenging pin positions with limited room for error.
Which side of the fairway is safer on hole 18?
↓
Aim for the right side of the fairway when possible. Missing left (water) brings more trouble into play.
What's a good score on hole 18?
↓
This hole is one of the tougher holes where par feels like birdie. A challenging par 4. Accept that bogey happens and avoid big numbers.