Hole 9 at PGA WEST (Norman course)
- Par
- 4
- Yardage
- 359 yds
- Stroke index
- 7
- Hazards
- 6 bunkers · Water
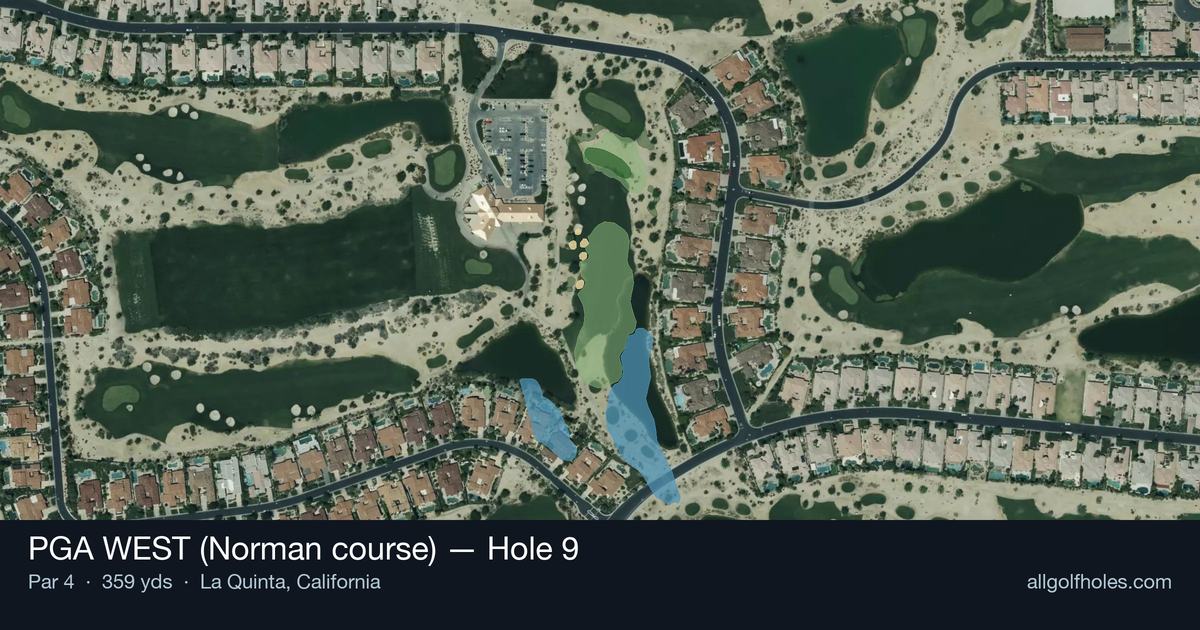
Aerial source not provided
Green size: 36 yds deep × 45 yds wide
Scorecard yardage is for Championship tees. The aerial shows its labeled reference position; distance rings measure to the green.
Championship tees · Par 4 · 359 yards
The plan for No. 9
The ninth hole at PGA WEST's Norman course presents a deceptively challenging par 4 that demands precision over power. At 359 yards, this straight-away hole might appear manageable, but the small green complex requires a calculated approach. The generous fairway invites aggressive tee shots, yet the real test comes with the approach shot to a compact putting surface that punishes wayward iron play. Without significant hazards to navigate, golfers must focus on distance control and pin placement, making club selection critical for scoring opportunities. This strategic finishing hole to the front nine rewards course management and precise execution, embodying the thoughtful design philosophy that makes PGA WEST's Norman course a true test of skill.
Off the tee
The tee shot strategy centers on leaving yourself a comfortable approach distance to the small green. Most players should consider hitting less than driver to ensure they're in the optimal scoring zone - typically somewhere between 100-130 yards from the pin. A 3-wood or long iron off the tee often provides the ideal combination of distance control and accuracy. The straight layout means you can aim directly at your intended landing zone without worrying about significant doglegs or forced carries.
Approach & recovery
This is where the hole's true challenge reveals itself. The small green demands pinpoint accuracy, making club selection critical. Take one extra club and swing smoothly rather than forcing a shot. Pay close attention to pin position - with a small target, being on the correct tier or section of the green is crucial. If the pin is tucked, don't be afraid to aim for the center of the green and rely on your putting. The approach shot is your scoring opportunity, so commit fully to your target line and trust your distance control.
On the green
Small greens typically feature more dramatic slopes and breaks than their larger counterparts. Spend extra time reading putts from multiple angles, as subtle breaks can be deceiving. Lag putting becomes especially important - three-putting from anywhere on this green would be a costly mistake on a hole where birdie should be in play. Focus on speed control above all else, as the smaller surface means less margin for error on pace. ## RISK VS REWARD The primary risk/reward decision comes with tee shot aggression. Driver might leave you closer to the green but could also put you in an awkward wedge distance or create a more difficult angle. The reward for proper positioning is significant - a well-struck approach to this small green can set up legitimate birdie chances. Conservative play with accurate iron shots typically yields better results than aggressive driving followed by difficult short irons. ## DIFFERENT SKILL LEVELS **High-Handicap Players:** Focus on hitting the fairway with a comfortable club off the tee, even if it means a longer approach shot. Aim for the center of the green regardless of pin position, and don't get greedy with pin-hunting. Two-putt par should be the primary goal. **Low-Handicap Players:** This hole demands precision that better players can execute. Consider the pin position when selecting your tee shot strategy - if the pin is accessible, position yourself for the optimal approach angle. Don't hesitate to be aggressive with approach shots when conditions allow, as this represents one of the better birdie opportunities on the course. The key to mastering this hole lies in understanding that its length makes it a scoring opportunity, but the small green demands respect and precision in execution.
Watch for
- Course conditioning and mapped hazards may affect line selection; confirm from the aerial.
Hole 9 Green Complex
Mapped green boundary
Green size: 5,511 sq ft
How did Hole 9 play?
How did this hole play today?
Frequently asked questions
Yardage reference: Championship tees · 359 yards.
What's the best strategy off the tee?
↓
For this 359-yard par 4, most players will hit 3-wood or driver to set up a comfortable approach.
How difficult is hole 9?
↓
This hole is a moderate challenge for most golfers. Key challenges include: water in play.
What hazards should I watch out for on hole 9?
↓
Key hazards include: water at 137.7 yards. Plan your shots to avoid these trouble spots.
How big is the green on hole 9?
↓
The green is medium-sized with moderate targets. The green is wider than it is deep, rewarding shots that find the correct tier. Pay attention to pin placement when selecting your approach club.
Which side of the fairway is safer on hole 9?
↓
Aim for the right side of the fairway when possible. Missing left (water) brings more trouble into play.
What's a good score on hole 9?
↓
This hole is a medium-length test where par is a solid result. A straightforward par 4 where course management pays off.