Hole 5 at PGA WEST (Norman course)
- Par
- 4
- Yardage
- 380 yds
- Stroke index
- 11
- Hazards
- 2 bunkers · Water
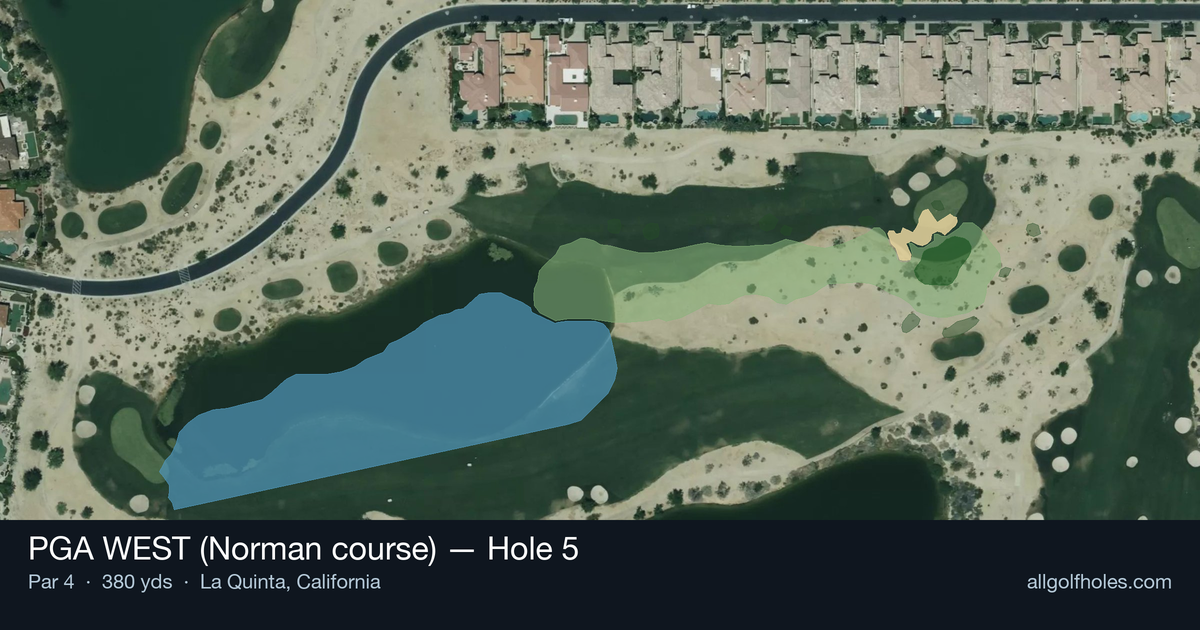
Aerial source not provided
Green size: 32 yds deep × 25 yds wide
Scorecard yardage is for Championship tees. The aerial shows its labeled reference position; distance rings measure to the green.
Championship tees · Par 4 · 380 yards
The plan for No. 5
The fifth hole at PGA WEST's Norman course presents a deceptively straightforward par 4 that demands precision over power. At 380 yards, this straight layout appears generous from the tee, but the small green complex becomes the focal point of strategy. Without significant hazards guarding the fairway, golfers can be aggressive off the tee, yet the approach shot requires careful club selection and accurate distance control. The compact putting surface punishes wayward iron shots, making course management essential. What makes PGA WEST (Norman course) hole 5 memorable is its emphasis on execution – a seemingly simple design that rewards thoughtful play and exposes any lapses in concentration, embodying the strategic philosophy that made Greg Norman's design work renowned throughout the desert golf community.
Off the tee
The key to success here starts with finding the fairway. With a straight layout and no bunkers or water to avoid, your primary focus should be on positioning for the best approach angle. Most players will benefit from a controlled tee shot that leaves a comfortable approach distance - typically a driver for longer hitters or a 3-wood for those prioritizing accuracy. Target the center-left portion of the fairway to open up the best angle to the small green. The lack of hazards allows for aggressive play, but remember that missing the fairway on a hole this length can leave difficult recovery shots. Choose the club that gives you the highest percentage of finding the short grass.
Approach & recovery
The small green is the defining feature of this hole's strategy. Your approach shot needs to be precise both in distance control and direction. From the fairway, you'll typically have anywhere from a wedge to a mid-iron depending on your tee shot placement. Focus on the center of the green unless the pin position clearly favors one side. Small greens are unforgiving to shots that miss the target, so club selection becomes critical. Take one more club than you think you need and make a smooth, controlled swing. The putting surface may be compact, but it's better to have a longer putt than to miss the green entirely.
On the green
While the green shape is unknown, small greens typically feature subtle breaks that can be deceptive. Spend extra time reading your putts, as the compact surface means every foot counts. Lag putting becomes especially important - getting your first putt close to the hole is crucial for scoring. Pay attention to grain direction and any slope from back to front or side to side. On small greens, even slight misreads can result in putts rolling well past the hole. Focus on speed control above all else. ## RISK VS REWARD This hole presents a different type of risk/reward scenario than water-laden or bunker-heavy holes. The reward comes from aggressive play toward scoring, while the risk lies in being too casual about execution. The temptation might be to view this as an "easy" hole, but that mindset can lead to sloppy shots. The real reward opportunity comes on the approach shot - if you've positioned yourself well off the tee, you can be aggressive toward pins and hunting for birdie. Conservative play focusing on the center of the green ensures par while keeping bogey largely out of play. ## DIFFERENT SKILL LEVELS **High Handicappers:** Focus on fairway first, green second. Use whatever club gives you confidence off the tee, even if it's a hybrid or long iron. On the approach, aim for the center of the green regardless of pin position. Two-putt par should be the goal, with any birdies being a bonus. **Low Handicappers:** This hole should be a scoring opportunity. Driver off the tee for optimal positioning, then attack pins when the approach shot allows. The small green requires precision, so trust your yardages and commit to your club selection. This is a hole where you should expect to make birdie regularly and never worse than par. The beauty of this hole lies in its straightforward challenge - execute quality golf shots and you'll score well. Let course management guide your decisions, and remember that sometimes the holes without obvious trouble can be the most demanding of precise execution.
Watch for
- Course conditioning and mapped hazards may affect line selection; confirm from the aerial.
Hole 5 Green Complex
Mapped green boundary
Green size: 3,697 sq ft
How did Hole 5 play?
How did this hole play today?
Frequently asked questions
Yardage reference: Championship tees · 380 yards.
What's the best strategy off the tee?
↓
For this 380-yard par 4, most players will hit 3-wood or driver to set up a comfortable approach.
How difficult is hole 5?
↓
This hole is a moderate challenge for most golfers. Key challenges include: water in play, small green.
What hazards should I watch out for on hole 5?
↓
Key hazards include: water at 82.3 yards. Plan your shots to avoid these trouble spots.
How big is the green on hole 5?
↓
The green is small and requires precision. Expect challenging pin positions with limited room for error.
What's a good score on hole 5?
↓
This hole is a medium-length test where par is a solid result. A straightforward par 4 where course management pays off.