Hole 2 at PGA WEST (Norman course)
- Par
- 5
- Yardage
- 526 yds
- Stroke index
- 13
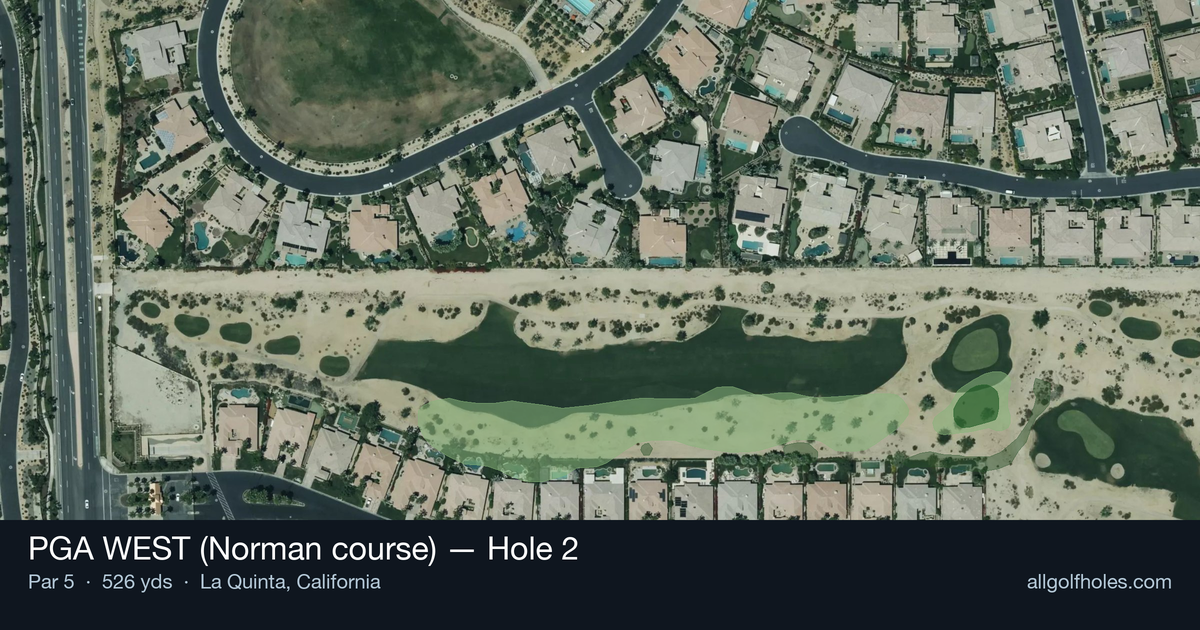
Aerial source not provided
Green size: 29 yds deep × 28 yds wide
Scorecard yardage is for Championship tees. The aerial shows its labeled reference position; distance rings measure to the green.
Championship tees · Par 5 · 526 yards
The plan for No. 2
The second hole at PGA WEST's Norman course presents a classic risk-reward par 5 that epitomizes Greg Norman's strategic design philosophy. Stretching 526 yards with a straight layout, this hole invites aggressive play while punishing poor execution. The generous fairway encourages drivers to unleash their power, but precision remains paramount as the hole progresses toward its challenging conclusion. What makes this hole particularly intriguing is its deceptively simple appearance contrasted with the complexity around the small green complex. The lack of major hazards might suggest an easy birdie opportunity, but the compact putting surface demands pinpoint accuracy on approach shots. Longer hitters face the tantalizing prospect of reaching in two, while others must carefully position their layup for an optimal angle into the tight target. The hole's mid-level handicap ranking reflects this strategic balance perfectly.
Off the tee
The opening shot should prioritize finding the fairway center, setting up the ideal angle for your second shot. Most players can confidently use driver here, aiming down the middle of the fairway without concern for major trouble. Focus on a smooth, controlled swing rather than maximum distance - position trumps power on this hole. The generous landing area allows for slight misses, but staying in the short grass is essential for accessing the green in regulation.
Approach & recovery
Your strategy for the second shot depends entirely on your distance remaining and comfort level. Longer hitters may have a mid-iron into the green, while others will need to position their layup carefully. If going for the green in two, aim for the center of the putting surface - the small target leaves little room for error. For layup shots, position yourself around 100-120 yards out with a clear angle to the pin. Avoid leaving yourself an awkward distance or angle that complicates the third shot.
On the green
The compact green size demands precise approach shots and careful speed control on putts. Focus on getting your ball below the hole whenever possible, as uphill putts will be more manageable on a smaller surface. Pay attention to the grain and any subtle slopes that could affect ball roll. Two-putting should be your primary goal unless you have a clear makeable birdie opportunity. ## RISK VS REWARD This hole offers excellent risk/reward balance for players of all abilities. The absence of major hazards means aggressive play won't result in big numbers, but the small green punishes imprecise shots with difficult up-and-downs. Going for the green in two shots can yield eagle opportunities, but laying up ensures a comfortable wedge distance for birdie chances. The conservative approach often proves most rewarding here. ## DIFFERENT SKILL LEVELS **High Handicappers:** Play this hole as a three-shot par 5. Hit a comfortable tee shot, advance the ball with your second shot to within 100 yards, then attack the green with a full wedge. Don't be tempted to reach in two - the small green makes this risky for inconsistent ball-strikers. **Low Handicappers:** Assess conditions and pin position before deciding whether to attack. With a favorable pin and good lie, the small green is reachable with a well-struck mid-iron. However, don't force the shot if conditions aren't ideal - a controlled layup and wedge can be equally effective for securing birdie. This hole rewards smart golf strategy and precise execution over raw power, making it an excellent opportunity to gain strokes on the field through intelligent course management.
Watch for
- Course conditioning and mapped hazards may affect line selection; confirm from the aerial.
Hole 2 Green Complex
Mapped green boundary
Green size: 4,354 sq ft
How did Hole 2 play?
How did this hole play today?
Frequently asked questions
Yardage reference: Championship tees · 526 yards.
Can this par 5 be reached in two?
↓
At 526 yards, A true three-shot hole for most players. Position your layup to leave a comfortable wedge distance.
How difficult is hole 2?
↓
This hole is a good scoring opportunity for most golfers. Key challenges include: small green.
How big is the green on hole 2?
↓
The green is small and requires precision. Expect challenging pin positions with limited room for error.
What's a good score on hole 2?
↓
This hole is a solid birdie opportunity with smart layup strategy. Most golfers can reach in three. Position your layup to leave a comfortable wedge.