Hole 1 at PGA WEST (Norman course)
- Par
- 4
- Yardage
- 409 yds
- Stroke index
- 9
- Hazards
- 9 bunkers · Water
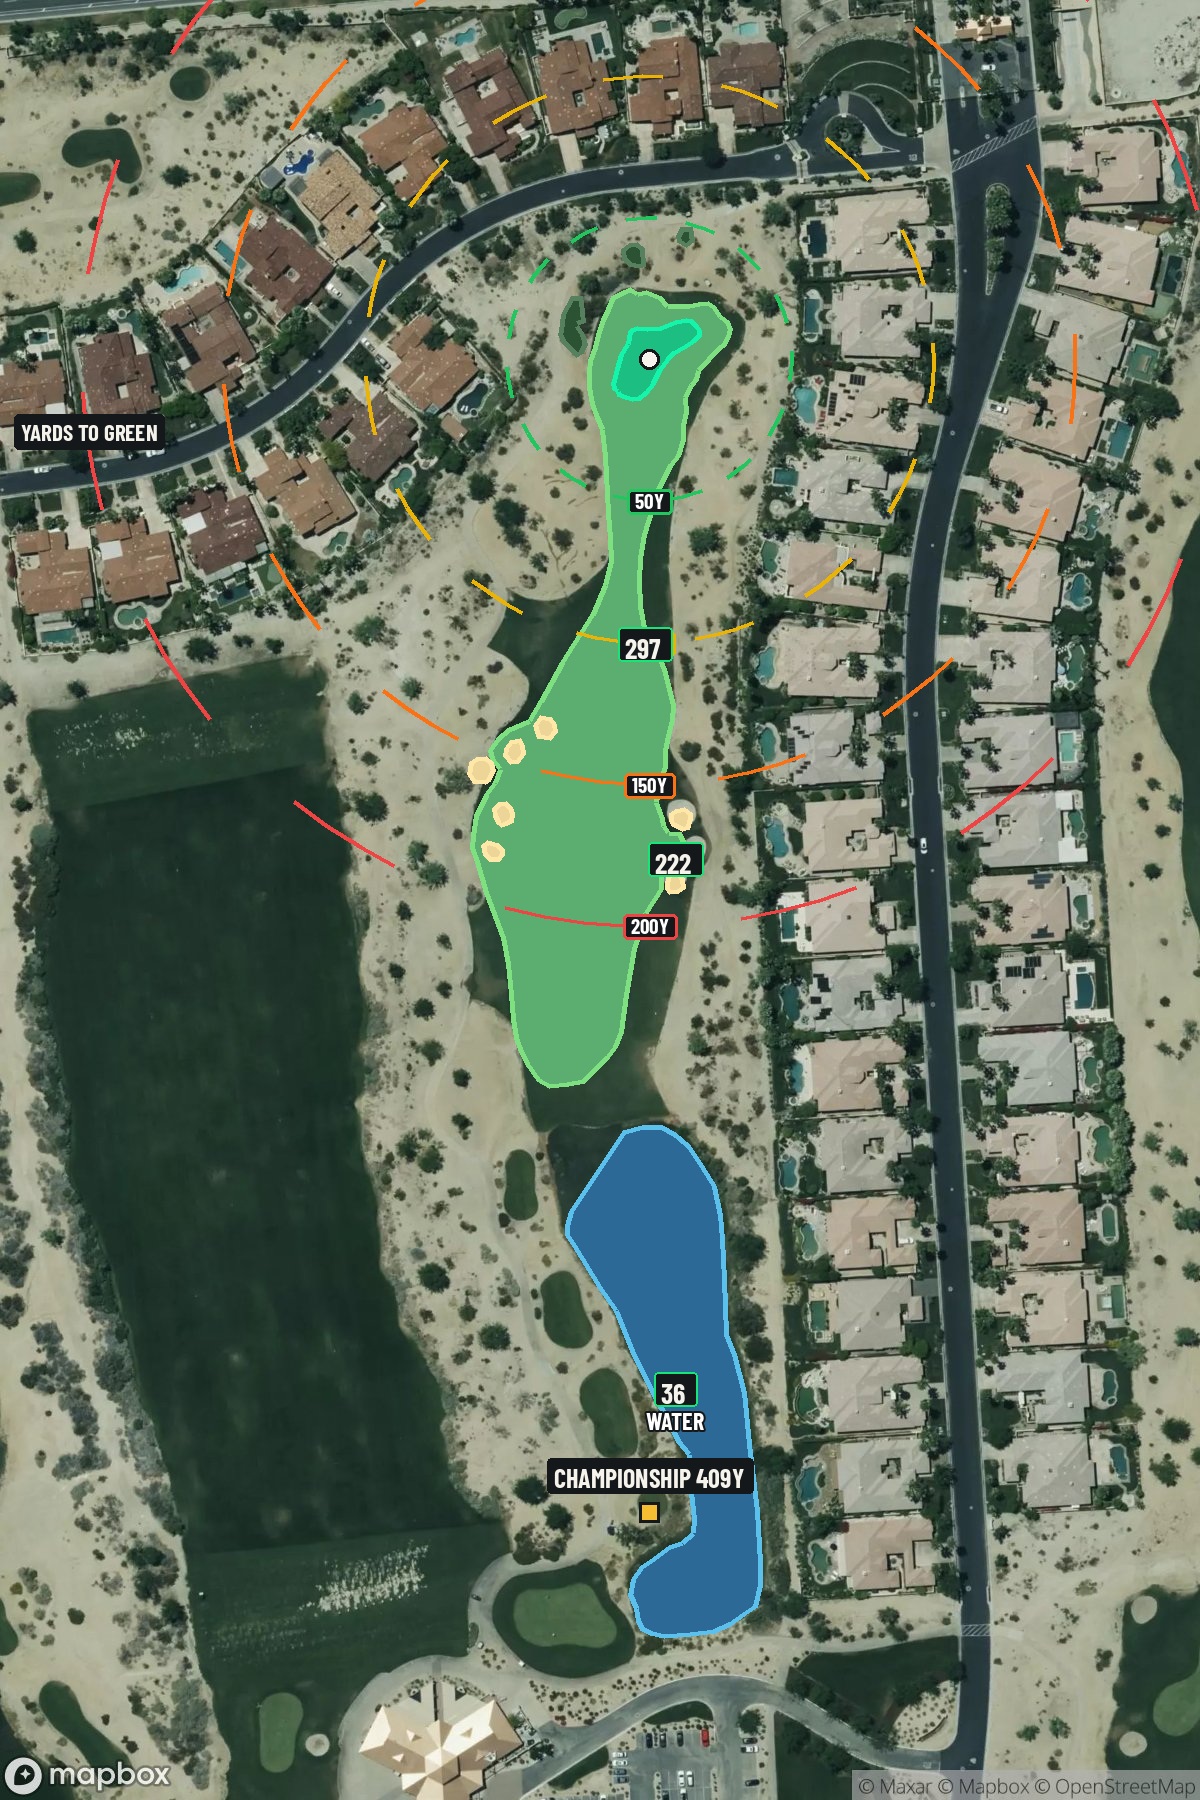 Hole 1 map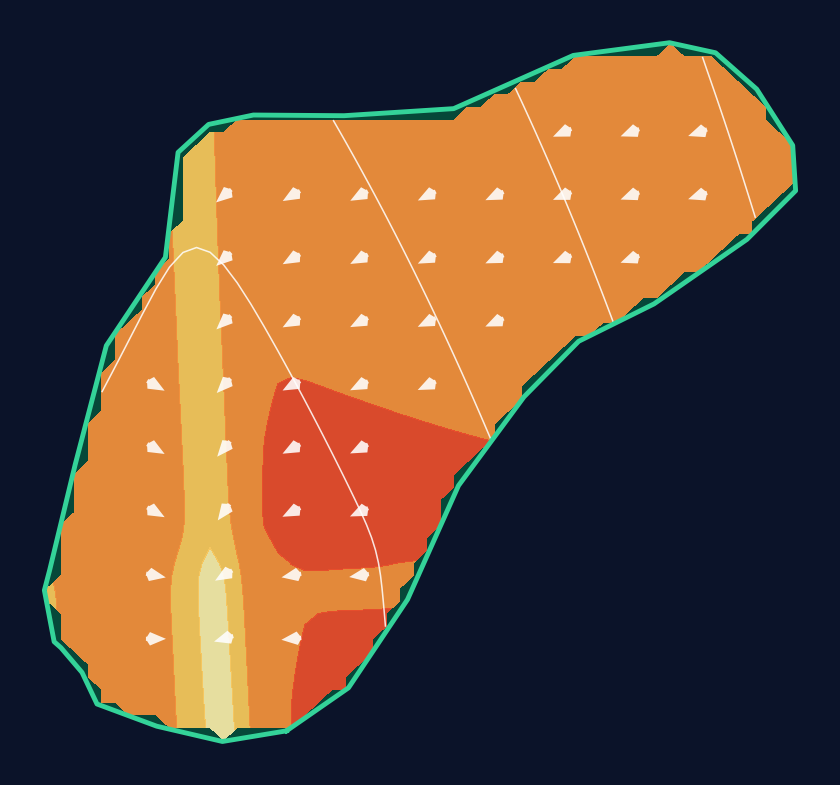
31 yd wide × 29 yd deep · 4.3 ft total elevation range
Light = gentler slope · Red = steeper slope
White lines: 1 foot of elevation. Arrows: downhill. General terrain, not a pin read.
Approach from bottom
Contour source
USGS 1 Arc Second n34w117 20260915
Map source & reference
Mapbox Satellite composite · capture date not provided. Green at the top; the labeled map reference is below.
Scorecard yardage is for Championship tees. The aerial shows its labeled reference position; distance rings measure to the green.
Championship tees · Par 4 · 409 yards
The plan for No. 1
The opening hole at PGA WEST's Norman course sets an inviting yet strategic tone for Greg Norman's desert masterpiece. This 409-yard par 4 presents a relatively straightforward challenge with its straight layout, but don't let that fool you into complacency. The tee shot rewards accuracy over distance, demanding proper positioning to set up the ideal approach angle to the small, well-protected green complex. Without major hazards cluttering the fairway, golfers can focus on execution and course management from the start. The compact green requires precise iron play, as missing the putting surface leaves challenging up-and-down opportunities. Norman's design philosophy shines through here—rewarding thoughtful strategy while punishing careless shots. This opening hole serves as the perfect introduction to the tactical demands that await throughout this acclaimed La Quinta layout.
Off the tee
Focus on finding the center of the fairway with a controlled swing rather than trying to overpower this opening hole. A driver or 3-wood aimed down the middle gives you the best angle for your approach, though the straight layout means there's room for slight misses on either side. The key is establishing rhythm and confidence early in your round - avoid the temptation to swing out of your shoes on the first tee. Consider the wind conditions and pin position when selecting your target line, as these factors will influence your ideal approach angle.
Approach & recovery
The small green demands pinpoint accuracy on your approach shot, making club selection critical. Take one more club than you think you need to ensure you reach the putting surface, as short shots will leave difficult up-and-down opportunities. Study the pin position carefully - when the flag is tucked, aim for the center of the green rather than attacking the pin directly. The straight hole layout means you'll likely have a good angle regardless of your tee shot position, so focus on solid contact and distance control over trying to work the ball.
On the green
With a small green, you'll want to be aggressive with your putting once you're on the surface. The compact putting area means most putts will be relatively straight, but pay attention to any subtle slopes that could affect ball roll. Take time to read the green carefully, as first-hole nerves can lead to rushed putts. Focus on speed control rather than trying to hole everything - two-putting from anywhere on this green should be your primary goal. ## RISK VS REWARD This hole offers a scoring opportunity if you execute two solid shots, but the small green punishes aggressive play that misses the target. The reward for finding the green in regulation is a legitimate birdie chance, while the risk of missing the green entirely can lead to bogey or worse. The smart play is conservative positioning off the tee followed by a committed approach shot to the center of the green. ## DIFFERENT SKILL LEVELS **High-Handicap Players:** Use a fairway wood or hybrid off the tee for better accuracy, then focus on getting your approach shot anywhere on the green. Don't worry about pin-hunting - the center of the green gives you the best chance for a routine two-putt and a solid start to your round. **Low-Handicap Players:** Driver is likely the right play to set up a shorter iron into the green, but maintain focus on fairway position. You can be more aggressive with pin positions, especially when the flag is in the middle or front of the green. This hole should be a birdie opportunity with two quality shots. The first hole at PGA WEST's Norman course rewards patience and precision - exactly the mindset you'll need for the challenges ahead on this championship layout.
Watch for
- Course conditioning and mapped hazards may affect line selection; confirm from the aerial.
Hole 1 Green Complex & Slope
USGS 3DEP terrain analysis
Green size: 3,668 sq ft
How did Hole 1 play?
How did this hole play today?
Frequently asked questions
Yardage reference: Championship tees · 409 yards.
What's the best strategy off the tee?
↓
For this 409-yard par 4, most players will hit driver to set up a comfortable approach.
How difficult is hole 1?
↓
This hole is one of the tougher holes on the course for most golfers. Key challenges include: water in play, small green.
What hazards should I watch out for on hole 1?
↓
Key hazards include: water at 35.6 yards. Plan your shots to avoid these trouble spots.
How big is the green on hole 1?
↓
The green is small and requires precision. Expect challenging pin positions with limited room for error.