Hole 7 at Troon North Golf Club (Monument course)
- Par
- 3
- Yardage
- 209 yds
- Hazards
- 2 bunkers
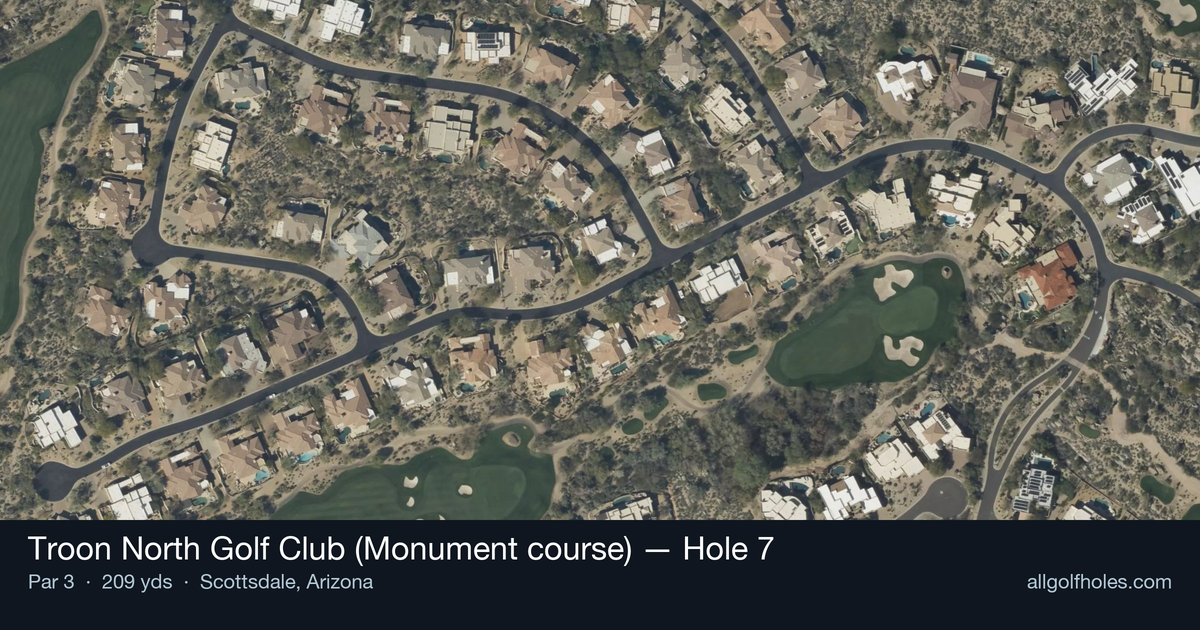
Aerial source not provided
Green size: 43 yds deep × 27 yds wide
Scorecard yardage is for Championship tees. The aerial shows its labeled reference position; distance rings measure to the green.
Championship tees · Par 3 · 209 yards
The plan for No. 7
The seventh hole at Troon North Golf Club Monument course presents a deceptively challenging par 3 that epitomizes desert golf at its finest. This 209-yard test demands precision over the rugged Sonoran landscape, where the elevated tee shot must carry natural desert terrain to reach a small, well-protected green. Set against the dramatic backdrop of Pinnacle Peak, the hole's visual intimidation factor is as formidable as its technical demands. The compact green complex requires golfers to commit fully to their club selection, as the unforgiving desert surrounds punish any wayward shots. With its designation as the number one handicap hole, this par 3 serves as Monument course's signature challenge, where even accomplished players must respect the demanding approach and pristine conditioning that defines the Troon North experience.
Off the tee
Club selection is paramount on this straightforward par-3. Most players will need a long iron to hybrid depending on conditions, with desert courses often playing firmer and faster than traditional parkland layouts. The target line is directly at the center of the green, as the small putting surface offers little margin for error. Take one extra club to ensure you clear any front-edge trouble and commit fully to your swing - tentative shots in the desert often find the native areas. Pay close attention to wind conditions, which can be particularly tricky in the Scottsdale foothills.
Approach & recovery
Since this is a par-3, your tee shot is your approach. The key is selecting a club that will carry the ball all the way to the green rather than trying to run it up, as desert courses typically have firm conditions around the greens. Aim for the center of the green regardless of pin position - the small green size makes going for specific pin locations a high-risk strategy for most players. Trust your yardage and swing smoothly through the ball.
On the green
The small green demands accurate putting and careful speed control. Desert greens often play faster than expected due to the dry climate, so err on the side of leaving putts short of the hole rather than racing them past. Focus on getting your first putt close rather than being aggressive, as three-putts can quickly turn a manageable par into a frustrating bogey. Read the subtle breaks carefully, as desert greens can have deceptive slopes. ## RISK VS REWARD This hole offers little in terms of risk/reward options - it's purely about execution. The reward comes from making par or better through precise shot-making, while the risk lies in missing the green entirely and facing a challenging desert recovery. The conservative play is always to aim for the center of the green and accept whatever birdie opportunities present themselves. ## DIFFERENT SKILL LEVELS **High-handicap players** should focus on club selection that guarantees reaching the green, even if it means being long. Take an extra club and swing smoothly - better to be on the back of a small green than short in the desert. Don't get greedy with pin positions. **Low-handicap players** can be more aggressive with pin hunting, but should still respect the small green size. Consider the pin position in your club selection, and be prepared to work the ball slightly if needed. This is a hole where course management skills really show, as even skilled players must resist the urge to overpower the shot. The 7th hole at Troon North's Monument Course exemplifies why desert golf requires a different mindset - precision and smart course management will always trump raw power in the shadows of Pinnacle Peak.
Watch for
- Course conditioning and mapped hazards may affect line selection; confirm from the aerial.
Hole 7 Green Complex
Mapped green boundary
Green size: 6,010 sq ft
How did Hole 7 play?
How did this hole play today?
Frequently asked questions
Yardage reference: Championship tees · 209 yards.
What club should I use on this par 3?
↓
At 209 yards, most golfers will need a long iron or hybrid (5-iron to 6-iron) to reach this green. Adjust for elevation, wind, and pin position.
What hazards should I watch out for on hole 7?
↓
Key hazards include: 2 greenside bunkers. Plan your shots to avoid these trouble spots.
How big is the green on hole 7?
↓
The green is fairly large with multiple pin positions. Lag putting becomes important on longer putts.