Hole 6 at Troon North Golf Club (Monument course)
- Par
- 4
- Yardage
- 299 yds
- Hazards
- 5 bunkers
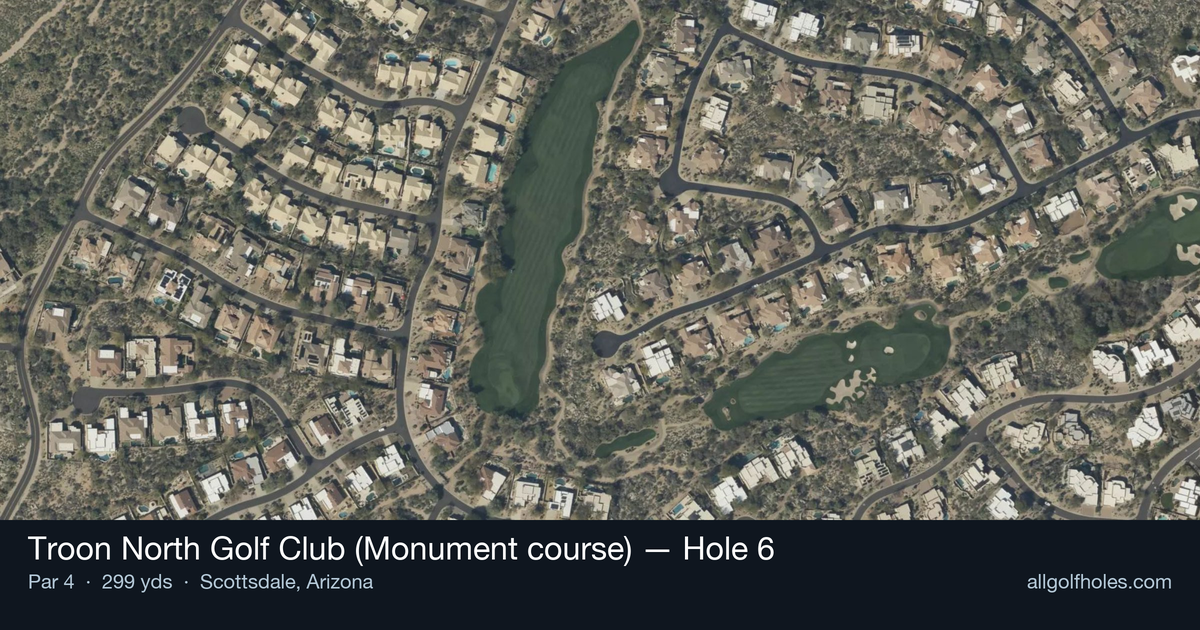
Aerial source not provided
Green size: 31 yds deep × 35 yds wide
Scorecard yardage is for Championship tees. The aerial shows its labeled reference position; distance rings measure to the green.
Championship tees · Par 4 · 299 yards
The plan for No. 6
The sixth hole at Troon North Golf Club's Monument course presents a deceptively challenging short par 4 at just 299 yards. While the length might suggest an easy birdie opportunity, this straight hole demands precision over power in the unforgiving Sonoran Desert landscape. The tee shot plays to a generous fairway, but the approach shot to the small green requires careful club selection and accurate distance control. With no significant hazards protecting the putting surface, the real challenge lies in the green's subtle contours and the premium on accuracy that defines Monument's championship design. Smart course management and a deft short game separate good scores from great ones on this strategic test that rewards thoughtful play over aggressive tactics.
Off the tee
**Target Line & Strategy:** With the hole measuring under 300 yards, driver is rarely the optimal choice here. Focus on positioning for your preferred approach distance rather than maximum distance. A 3-wood, hybrid, or long iron off the tee will leave you with a comfortable short iron into the green while maintaining accuracy. **Club Selection Considerations:** Consider laying back to your favorite wedge or short iron distance - typically leaving yourself with 80-120 yards to the pin. This approach prioritizes precision over power, setting up the ideal angle and distance for attacking the small green. **Risk Management:** Avoid the temptation to get overly aggressive off the tee. The straight layout might seem inviting for a big drive, but remember that positioning trumps distance on this hole.
Approach & recovery
**Preferred Angles:** With a small green as your target, the approach shot becomes the scoring moment of this hole. Focus on hitting the center of the green rather than attacking specific pin positions, especially when the flag is tucked near edges. **Club Selection:** Depending on your tee shot placement, expect to hit anything from a sand wedge to a 9-iron. Take extra club if between distances - missing long or short on a small green often means a difficult up-and-down. **Execution Keys:** Commit fully to your yardage and club selection. Small greens punish indecision and tentative swings. Make a confident, controlled swing focusing on solid contact.
On the green
**Putting Strategy:** Monument course greens are known for their excellent condition and consistent roll. At typical speeds around 10.6, these surfaces reward good reads and confident strokes. Pay attention to grain direction, which can significantly influence ball roll in the Arizona desert conditions. **Pin Position Considerations:** On a small green, pin position becomes crucial. When the flag is tucked, aim for the center of the green and rely on your putting rather than trying to get too cute with approach shots. ## RISK VS REWARD **Conservative Play:** The smart play is laying back off the tee to your comfort zone, then attacking the center of the green with a controlled short iron. This strategy virtually guarantees a par opportunity with birdie potential. **Aggressive Option:** Longer hitters might consider driver to get as close as possible, potentially leaving just a wedge. However, this increases the risk of an awkward distance or poor angle, making the small green even more challenging to hit. ## DIFFERENT SKILL LEVELS **High Handicappers:** Focus entirely on course management. Use a club off the tee that guarantees fairway position, then aim for the biggest part of the green regardless of pin position. Two-putt par should be the goal, with any birdies being a bonus. **Low Handicappers:** This hole rewards precision and confidence. Consider your preferred approach distance when selecting your tee shot, then be aggressive to the center of the green. The small target demands your best short iron technique, but birdie opportunities abound for well-executed shots. **Mid Handicappers:** Split the difference - lay back to a comfortable approach distance, then play conservatively to the green center. Focus on avoiding big numbers rather than forcing birdies. The key to success on this hole lies in recognizing it as a precision test rather than a power showcase. Smart club selection and committed execution will yield better results than attempting to overpower this deceptively challenging short par 4.
Watch for
- Course conditioning and mapped hazards may affect line selection; confirm from the aerial.
Hole 6 Green Complex
Mapped green boundary
Green size: 5,736 sq ft
How did Hole 6 play?
How did this hole play today?
Frequently asked questions
Yardage reference: Championship tees · 299 yards.
What's the best strategy off the tee?
↓
For this 299-yard par 4, most players will hit 3-wood or driver to set up a comfortable approach.
How difficult is hole 6?
↓
This hole is a good scoring opportunity for most golfers. Key challenges include: heavily bunkered.
How big is the green on hole 6?
↓
The green is medium-sized with moderate targets. Pay attention to pin placement when selecting your approach club.
What's a good score on hole 6?
↓
This hole is a birdie opportunity if you find the fairway. This shorter par 4 rewards accuracy off the tee with a short iron approach.