Hole 2 at Troon North Golf Club (Monument course)
- Par
- 3
- Yardage
- 173 yds
- Hazards
- 1 bunker
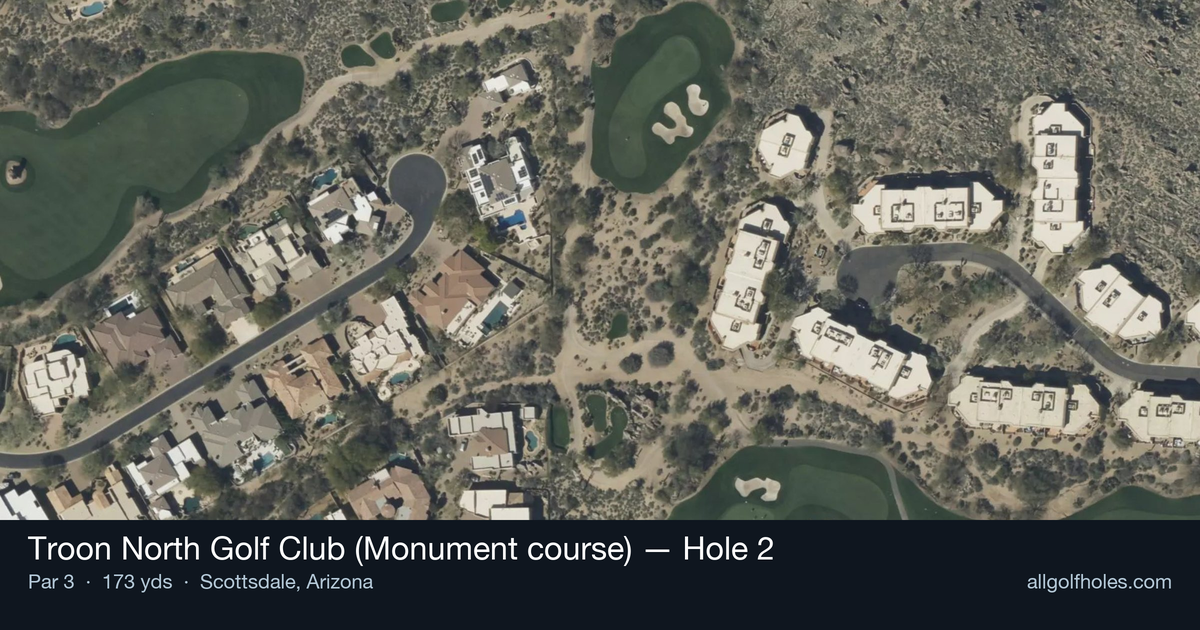
Aerial source not provided
Green size: 35 yds deep × 30 yds wide
Scorecard yardage is for Championship tees. The aerial shows its labeled reference position; distance rings measure to the green.
Championship tees · Par 3 · 173 yards
The plan for No. 2
The second hole at Troon North Golf Club Monument course presents an early test of precision in the Sonoran Desert landscape. This 173-yard par 3 demands accuracy over distance, with the small target green nestled against the dramatic backdrop of Pinnacle Peak. Despite being rated as the most challenging hole on the course with a handicap of zero, the straightforward layout allows golfers to focus purely on club selection and execution. The elevated tee shot plays through the desert air where conditions can dramatically affect ball flight, making local knowledge invaluable. With Troon North's renowned fast greens running at tournament speeds, even a well-struck tee shot requires careful consideration of pin position and landing area to avoid a challenging two-putt scenario.
Off the tee
Club selection is critical on this mid-length par-3. Depending on conditions, you'll likely need anything from a 7-iron to a 5-iron, with wind and elevation playing significant roles in the desert environment. Aim for the center of the green to maximize your margin for error given the small target. Take one extra club if you're between selections - the desert rough and surrounding areas can be unforgiving, making it better to be long than short. Pay attention to pin position, but don't get overly aggressive chasing tucked pins on such a small green.
Approach & recovery
Since this is a par-3, your tee shot IS your approach shot. Focus on a smooth, controlled swing rather than trying to muscle the ball. The key is committing to your club selection and making solid contact. Given the desert setting, factor in the typically firm conditions that can add significant roll to your ball. Aim for the front-center of the green when the pin is back, and middle-back when the pin is forward.
On the green
With greens running at 10.6, expect lightning-fast putting surfaces that reward careful pace control. The grain direction will significantly affect your putts, so take time during your pre-round preparation or early holes to read how the grain runs. Desert greens often have grain running toward nearby mountains or water sources. Focus on getting your first putt close rather than being overly aggressive - two-putting from anywhere on this small green should be your primary goal. ## RISK VS REWARD This hole offers limited risk/reward opportunities due to its straightforward design. The main decision point is club selection and target line. Playing aggressively to a tucked pin on such a small green rarely pays off for most players. The reward for hitting it close is minimal compared to the risk of missing the green entirely in the desert landscape. ## DIFFERENT SKILL LEVELS **High-handicap players** should focus on the largest part of the green regardless of pin position. Take enough club to comfortably reach the green and make a smooth swing. Don't worry about getting close to the pin - just find the putting surface and rely on your short game from there. **Low-handicap players** can be more aggressive with pin hunting, especially when the pin is in the center portion of the green. Use the wind and conditions to your advantage, and don't be afraid to take dead aim when you have a good yardage. Your superior distance control allows you to attack more pin positions safely. **Mid-handicap players** should pick a conservative target but commit fully to their club selection. This is an excellent scoring opportunity if you can consistently find the green and avoid the two-putt struggles that fast greens can create. Remember, as noted by experienced players, Troon North demands solid golf skills to score well. This early par-3 sets the tone for your round - start with a smart, conservative approach and build confidence for the challenges ahead.
Watch for
- Course conditioning and mapped hazards may affect line selection; confirm from the aerial.
Hole 2 Green Complex
Mapped green boundary
Green size: 4,269 sq ft
How did Hole 2 play?
How did this hole play today?
Frequently asked questions
Yardage reference: Championship tees · 173 yards.
What club should I use on this par 3?
↓
At 173 yards, most golfers will need a mid-iron (7-iron to 8-iron) to reach this green. Adjust for elevation, wind, and pin position.
How difficult is hole 2?
↓
This hole is a moderate challenge for most golfers. Key challenges include: small green.
What hazards should I watch out for on hole 2?
↓
Key hazards include: 1 greenside bunker. Plan your shots to avoid these trouble spots.
How big is the green on hole 2?
↓
The green is small and requires precision. Expect challenging pin positions with limited room for error.
What's a good score on hole 2?
↓
This hole is a solid par with birdie chances for precise approach shots. Making par is a good result here. Focus on hitting the green and avoiding three-putts.