Hole 15 at Troon North Golf Club (Monument course)
- Par
- 4
- Yardage
- 372 yds
- Hazards
- 2 bunkers
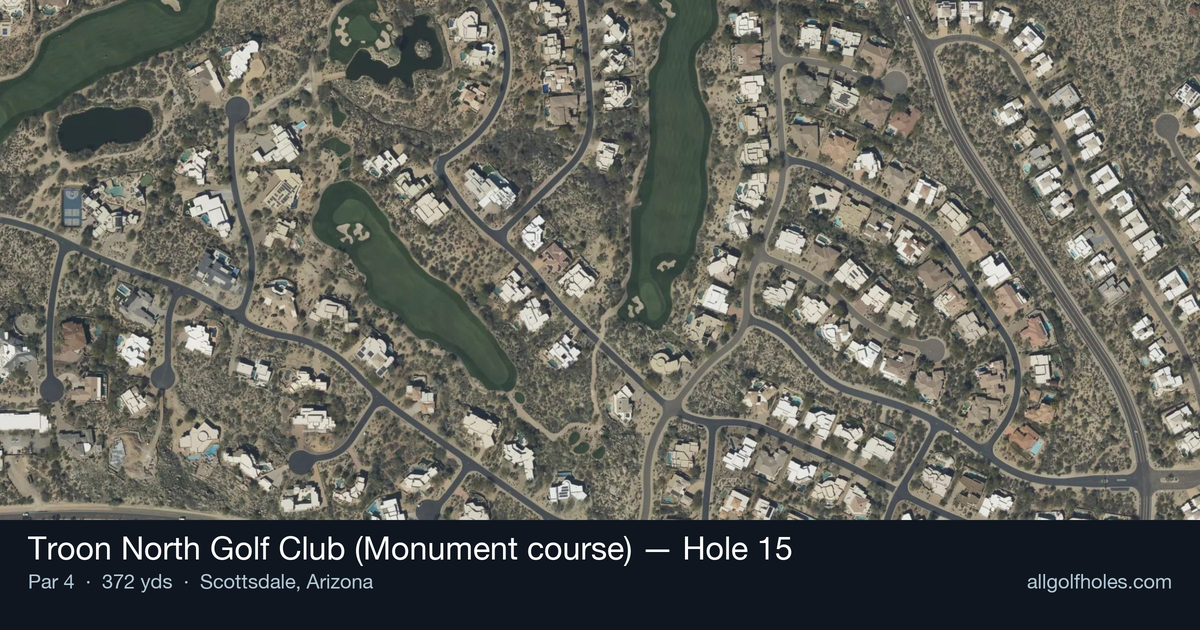
Aerial source not provided
Green size: 28 yds deep × 31 yds wide
Scorecard yardage is for Championship tees. The aerial shows its labeled reference position; distance rings measure to the green.
Championship tees · Par 4 · 372 yards
The plan for No. 15
This short par 4 at Troon North Golf Club (Monument course) stands as one of the course's most beloved strategic gems, earning its place among the Monument's celebrated trio of drivable par-4s. At 372 yards, the hole presents golfers with a classic risk-reward scenario framed by the stunning Sonoran Desert landscape. The straight layout invites aggressive players to challenge the green with their tee shot, while more conservative approaches can lay up for a comfortable wedge into the small, undulating putting surface. The compact green demands precision on approach shots, as misses leave challenging recovery shots from the surrounding desert terrain. With its strategic options and pristine desert setting, this hole perfectly captures the essence of championship golf in Scottsdale, offering both scoring opportunities and potential pitfalls that make it a memorable test of course management and execution.
Off the tee
Your tee shot strategy should prioritize position over distance on this shorter par 4. With the green reachable in regulation for most players, focus on finding the ideal approach distance rather than maximum yardage. A controlled drive with a fairway wood or long iron may prove more beneficial than driver, especially if it leaves you with a comfortable wedge or short iron into the green. The straight layout suggests minimal trouble off the tee, but maintaining center-line positioning will provide the best angle for your approach shot.
Approach & recovery
The approach shot is where this hole reveals its teeth. The small green demands pinpoint accuracy, and your club selection becomes critical for sticking shots close to challenging pin positions. Depending on your tee shot placement, you'll likely face anything from a wedge to a mid-iron approach. Take extra club if needed to ensure you clear any front-edge trouble, as coming up short on a small green typically leaves difficult recovery shots. Study the pin position carefully and aim for the center of the green when in doubt.
On the green
The compact putting surface requires careful attention to speed control and break reading. Small greens at desert courses often feature subtle undulations that can be deceiving, so take time to read your putts from multiple angles. The green's size means that even slightly aggressive putts can run well past the hole, so err on the side of leaving uphill putts when possible. Focus on getting your first putt close rather than being overly aggressive with longer attempts. ## RISK VS REWARD This hole presents a classic risk/reward scenario disguised as a simple short par 4. The temptation to be aggressive exists, but the small green punishes wayward approaches severely. The reward for precise execution is significant - birdie opportunities abound for those who execute proper course management. However, the risk of missing the small target and facing difficult recovery shots can quickly turn a scoring opportunity into a bogey or worse. ## DIFFERENT SKILL LEVELS **Low Handicap Players:** Take advantage of your precision by being aggressive with pin hunting, especially on favorable pin positions. Your ability to control distance and trajectory should allow you to attack most pin locations with confidence. Consider the conditions and pin placement when deciding between driver and positional club off the tee. **High Handicap Players:** Play this hole conservatively by aiming for the center of the green regardless of pin position. Use whatever club gives you the most confidence for your approach shot, even if it means laying back with your tee shot. A safe par here is an excellent score, and the small green makes scrambling difficult if you miss the target. The 15th hole embodies everything great about strategic golf design - it rewards thoughtful planning and precise execution while punishing careless play, making it a true test of your complete game.
Watch for
- Course conditioning and mapped hazards may affect line selection; confirm from the aerial.
Hole 15 Green Complex
Mapped green boundary
Green size: 4,019 sq ft
How did Hole 15 play?
How did this hole play today?
Frequently asked questions
Yardage reference: Championship tees · 372 yards.
What's the best strategy off the tee?
↓
For this 372-yard par 4, most players will hit 3-wood or driver to set up a comfortable approach.
How difficult is hole 15?
↓
This hole is a good scoring opportunity for most golfers. Key challenges include: small green.
What hazards should I watch out for on hole 15?
↓
Key hazards include: 2 greenside bunkers. Plan your shots to avoid these trouble spots.
How big is the green on hole 15?
↓
The green is small and requires precision. Expect challenging pin positions with limited room for error.
What's a good score on hole 15?
↓
This hole is a medium-length test where par is a solid result. A straightforward par 4 where course management pays off.