Hole 13 at Troon North Golf Club (Monument course)
- Par
- 3
- Yardage
- 176 yds
- Hazards
- 3 bunkers
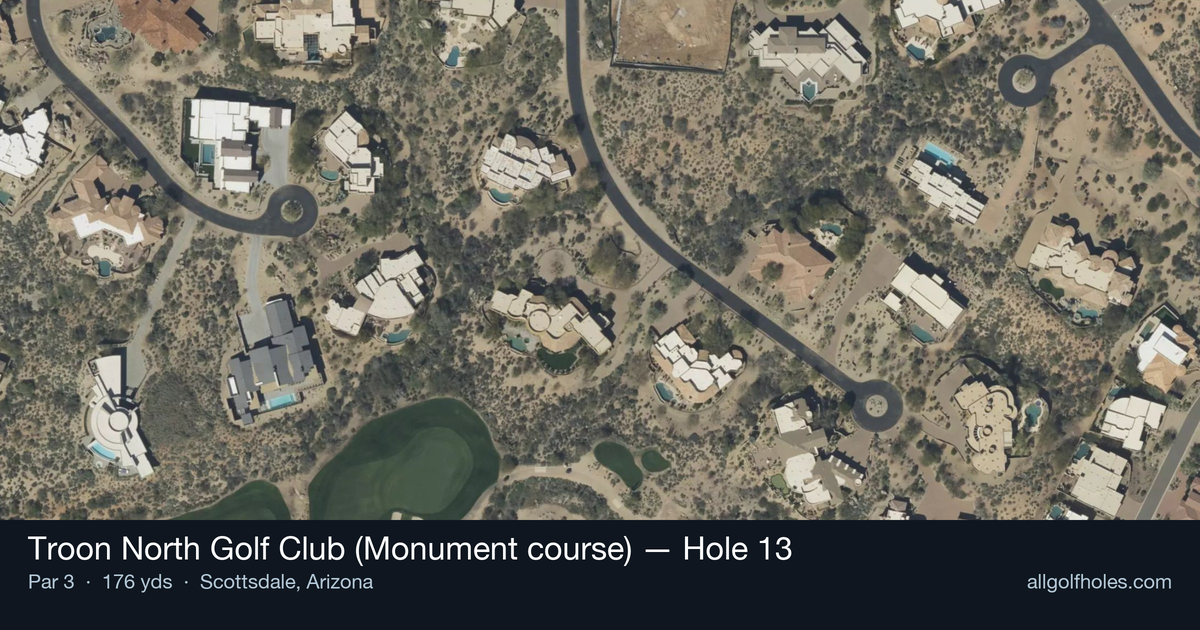
Aerial source not provided
Green size: 37 yds deep × 21 yds wide
Scorecard yardage is for Championship tees. The aerial shows its labeled reference position; distance rings measure to the green.
Championship tees · Par 3 · 176 yards
The plan for No. 13
The 13th hole at Troon North Golf Club Monument course presents a deceptively challenging par 3 that epitomizes desert golf precision. This 176-yard test demands pinpoint accuracy to a small, elevated green nestled among the dramatic Sonoran Desert landscape. With no room for error and the unforgiving desert floor lurking beyond, club selection becomes critical as desert winds can wreak havoc on even well-struck shots. The straight-forward layout may appear simple, but the compact target and natural desert hazards create an intimidating visual that separates confident ball-strikers from tentative players. Success here requires committed execution and precise distance control, making it a memorable checkpoint in Troon North's Monument course routing through Arizona's stunning high desert terrain.
Off the tee
Your tee shot is your approach shot on this par 3, making club selection absolutely critical. In the Arizona desert, conditions can vary dramatically - morning rounds may play softer while afternoon rounds often feature firm, fast conditions and swirling winds through the ravines and foothills. Choose a club that gets you comfortably to the back of the green rather than trying to attack a specific pin position. A smooth swing with a longer iron is often better than forcing a shorter club. The straight layout means you can aim directly at your target, but be aware that desert courses often feature optical illusions that can affect depth perception.
Approach & recovery
Since this is a par 3, your approach strategy is built into your tee shot selection. The small green size means precision trumps power - focus on the center of the green regardless of pin position. Desert greens are typically well-bunkered or surrounded by collection areas, so even though no major hazards are marked, expect severe consequences for missing the putting surface. Take one extra club and make a confident, committed swing rather than trying to manufacture a perfect distance with a forced shot.
On the green
Small greens in desert settings typically feature subtle but significant undulations that can be difficult to read. The firm conditions common in Arizona mean approach shots will often release more than expected, so factor this into your club selection. Once on the green, focus on lag putting to the correct level - small greens often have multiple tiers or false fronts that can create challenging two-putts if you're on the wrong section. Pay attention to the grain of the bermuda grass, which typically grows toward the setting sun in desert climates. ## RISK VS REWARD The risk/reward equation here is simple: there's significant risk for missing the green with minimal reward for aggressive play. The small target and desert surroundings mean that attacking pins close to edges rarely pays off for amateur golfers. The reward comes from playing conservatively to the center of the green and walking away with par, especially given this hole's scratch handicap rating. Smart course management here can save strokes that aggressive play might cost you. ## DIFFERENT SKILL LEVELS **High Handicappers:** Take plenty of club and aim for the center of the green every time. Don't worry about pin positions - your goal is to find the putting surface and avoid the desert. Consider taking an extra club and making a smooth three-quarter swing for better accuracy. If you miss the green, focus on getting your next shot onto the putting surface rather than trying to get close to the pin. **Low Handicappers:** You can be more aggressive with pin hunting, but still respect the small target. Use course conditions and wind to your advantage, and don't be afraid to take extra club if there's trouble short. Your superior short game skills mean you can attack back pins more confidently, but remember that even scratch golfers need to play smart in desert conditions where recovery shots are extremely difficult. The beauty of desert golf lies in its demand for precision and strategic thinking, and this hole exemplifies those qualities perfectly within Troon North's stunning Sonoran Desert setting.
Watch for
- Course conditioning and mapped hazards may affect line selection; confirm from the aerial.
Hole 13 Green Complex
Mapped green boundary
Green size: 4,485 sq ft
How did Hole 13 play?
How did this hole play today?
Frequently asked questions
Yardage reference: Championship tees · 176 yards.
What club should I use on this par 3?
↓
At 176 yards, most golfers will need a mid-iron (7-iron to 8-iron) to reach this green. Adjust for elevation, wind, and pin position.
How difficult is hole 13?
↓
This hole is a moderate challenge for most golfers. Key challenges include: small green.
What hazards should I watch out for on hole 13?
↓
Key hazards include: 3 greenside bunkers. Plan your shots to avoid these trouble spots.
How big is the green on hole 13?
↓
The green is small and requires precision. Expect challenging pin positions with limited room for error.
What's a good score on hole 13?
↓
This hole is a solid par with birdie chances for precise approach shots. Making par is a good result here. Focus on hitting the green and avoiding three-putts.